You've probably got one photo you want to post right now. Maybe it's a travel shot, a memorial image, a product photo, or a simple talking-head graphic for Instagram. You don't want a full video edit. You just want the image to stay on screen while music or a voiceover plays.
That sounds simple, but many beginners stumble at this point. The biggest mistake isn't choosing the wrong app. It's misunderstanding what the app is making for you. Once you understand that, the rest gets much easier, and your result looks better on the first try.
Table of Contents
- The Secret to Adding Music to a Photo
- First Things First Prep Your Audio for Impact
- Your Toolkit Adding Music on Any Device
- Pro Touches Timing Fades and Finding Music
- Exporting and Sharing on Social Media
- Quick Troubleshooting and Final Checklist
The Secret to Adding Music to a Photo
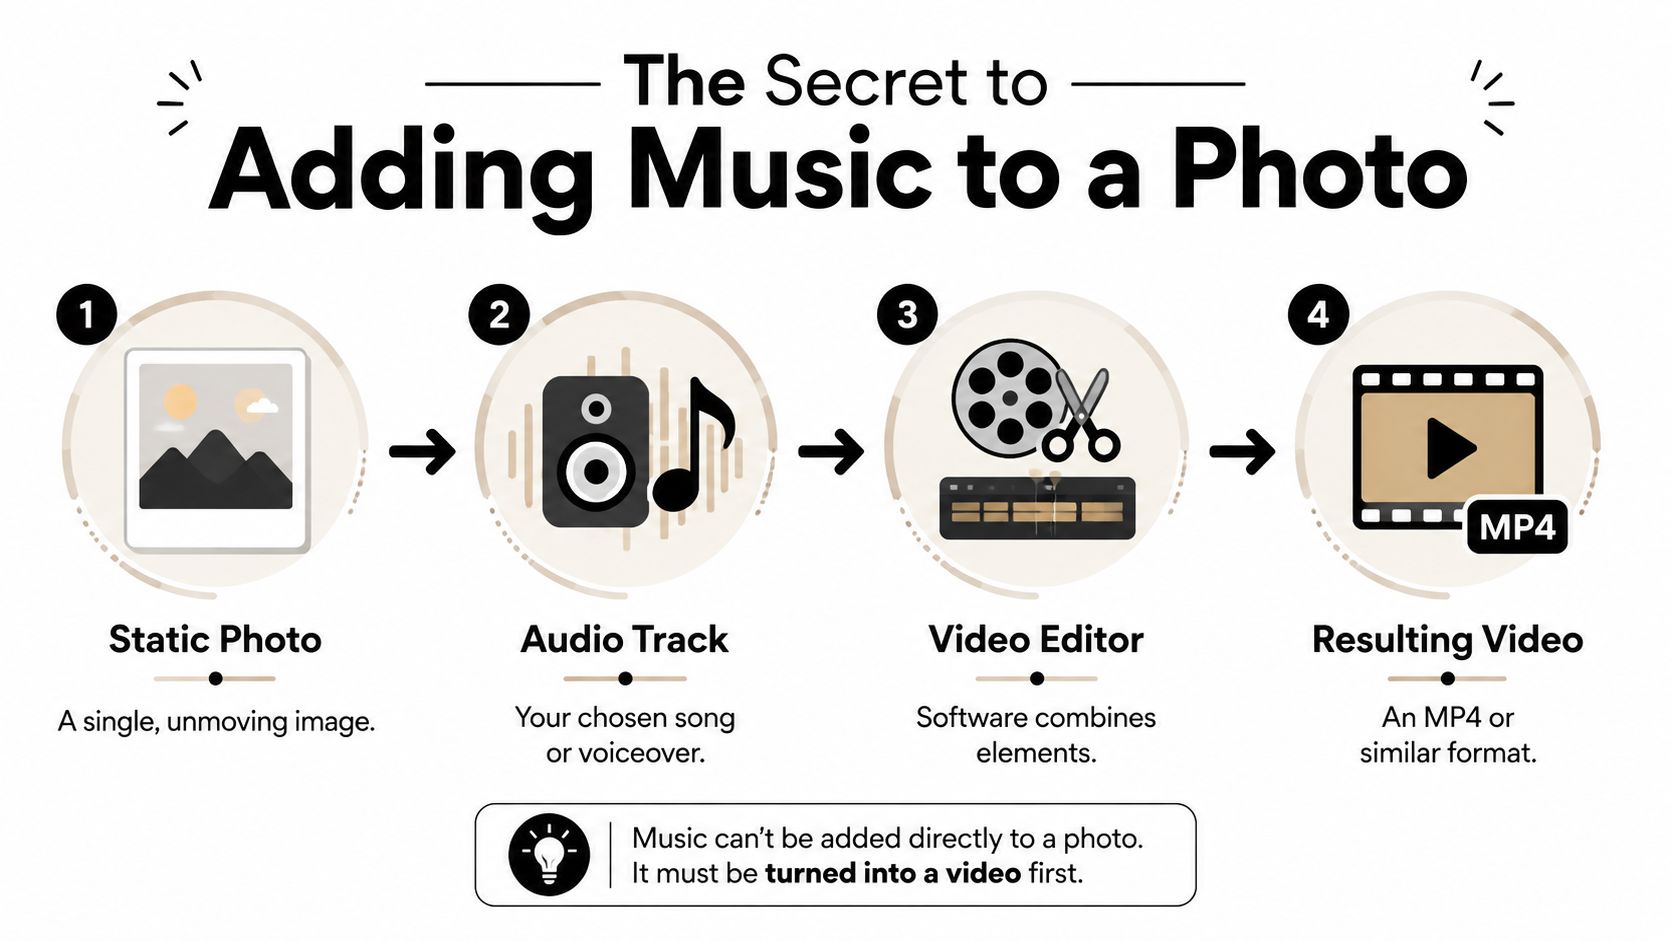
If your goal is to add music to a photo, the first thing to know is this: you are not modifying the photo file itself. You're creating a video from that photo.
A JPEG or PNG doesn't have a normal place to store an audio track the way an MP4 does. That's why so many people hit a wall when they try to do this inside a photo app. According to reported user behavior on Lemon8, 68% of users trying to add music to photos on social media first run into the error “cannot add audio to static image,” and only 12% of top-ranking results explain that the process involves converting the image from JPEG to MP4.
What's actually happening
When you use CapCut, Canva, Clideo, Kapwing, or an in-app social editor, the workflow is usually the same:
- You import a still image
- You add music or a voice track
- The editor places both on a video timeline
- It exports an MP4
That's why your “photo with music” ends up as a playable video clip even when the image never moves.
Practical rule: If a tool promises to add audio to a photo, expect the final file to be a video.
Why this matters before you start
Once you know you're making a video, a lot of confusing behavior suddenly makes sense. Aspect ratio matters. Clip duration matters. Export settings matter. Audio fade-ins matter. And if your image disappears after a few seconds while the song keeps going, that isn't a bug. It's usually the timeline.
This also explains why social platforms keep nudging creators toward video-style posting. The underlying format fits what those platforms already distribute and rank. If you treat the project like a tiny video edit instead of a magical photo feature, you'll make cleaner choices from the beginning.
First Things First Prep Your Audio for Impact
Most tutorials jump straight into the app. That's backwards.
The photo is usually the easy part. The audio is what makes the final piece feel polished or amateur. A beautiful image paired with clipped voiceover, room echo, hiss, or a song that starts too abruptly will still feel rough. Clean sound does more for perceived quality than most beginners expect.
According to EchoWave's overview of the format shift, the workflow depends on turning images into MP4s because short-form platforms are dominated by video, with over 90% of content now video-based, and TikTok reports that posts with original audio receive 3x more engagement than those without. That makes the soundtrack more than decoration. It's part of the post's performance.
Start by trimming with intent
Before you import anything into an editor, decide what the audio needs to do.
If it's a song, pick the exact section you want. The first few seconds matter most because that's where awkward intros, dead air, or a jarring beat drop can make the post feel clumsy. If it's a voiceover, cut every false start, long pause, mouth noise, and filler phrase before you build the video around it.
A simple approach works well:
- For a social post: use the strongest section of the song, not the entire track.
- For a memorial or tribute image: fade in gently and avoid harsh openings.
- For a promo image or announcement: keep speech first, then tuck music underneath.
- For a quote graphic or educational post: favor clarity over drama.
Clean the audio before you edit the video
If you're using narration, interview audio, or a homemade voice note, clean it before it ever reaches the timeline. That means removing background hum, hiss, fan noise, and room echo. Even light cleanup can make the final export sound far more intentional.
Clean first, edit second. If you wait until export to notice the hiss, you'll end up rebuilding the whole piece.
This matters for music too. Sometimes the issue isn't noise. It's that the file starts too loud, has silence at the front, or contains uneven volume that fights the image instead of supporting it.
A quick prep workflow that saves time
Use this order and you'll avoid most rework:
| Step | What to do | Why it helps |
|---|---|---|
| Pick the exact audio clip | Choose the song segment or voiceover take first | Your photo duration will follow the audio |
| Trim the front and back | Remove dead air and weak endings | The post starts cleaner |
| Clean the file | Remove hiss, hum, echo, or distracting background noise | The result sounds publishable |
| Export a ready-to-use track | Save a clean MP3 or WAV | Editors handle these more reliably |
A lot of beginners think adding music to a photo is mostly visual. In practice, it's often an audio-prep job with a still image attached.
Your Toolkit Adding Music on Any Device
The good news is that the tooling is easier than it used to be. According to AddMusictoPhoto's market overview, the shift from old slideshow builders to lightweight single-image tools has been dramatic, and free web services such as Clideo and AddMusictoPhoto now handle millions of conversions monthly. That lines up with what creators want now: fast, account-free workflows that don't feel like desktop video production.
If you want the shortest path, choose a tool that lets you import one image, one audio file, and control duration without digging through advanced menus.

On an iPhone
On iPhone, I'd separate the job into two paths. Use the native route when you want speed inside the Apple ecosystem. Use a dedicated editor when you want more control.
Simple route with a video editor app
Import your photo into CapCut or Canva, then add your music or voice track. Make sure the image sits on the timeline for the full audio length. If the app places the photo as a short clip, drag its edge until it covers the entire soundtrack.
What to check before export
- Canvas size: Pick the final shape first. Vertical for Reels or TikTok. Horizontal for YouTube. Square if you're designing for a grid-first look.
- Photo fit: Don't let the app auto-crop something important out of frame.
- Audio start: Place the audio at the very beginning unless you want silence on purpose.
If you're working in Apple's ecosystem, you can also create a lightweight video project from a still image and soundtrack in a native or near-native workflow. That's convenient, but the dedicated apps are usually faster when you need exact timing and fades.
If your iPhone workflow feels “too automatic,” switch to a timeline-based editor. Automation is nice until it crops the photo wrong or cuts the song at the wrong place.
On an Android
Android gives you a lot of flexibility, but the same rule applies: use a timeline app when you care about control.
CapCut is a common choice because the steps are straightforward. Start a new project, add the photo, then import the audio. Once both are on the timeline, extend the image to match the full duration of the sound. Preview the first and last second before export. That catches most mistakes quickly.
Google Photos can be useful for broader highlight-video workflows, but if your job is one still image plus one soundtrack, an editor with direct layer control is usually less frustrating.
A clean Android workflow looks like this:
- Create a new project
- Set the format before import if the app allows it
- Add the single image
- Add MP3 or WAV audio
- Stretch the image clip to the full track
- Trim excess audio or excess visual hold
- Export as MP4
One thing I like about Android editors is that they often expose the timeline clearly. That makes it easier to spot mismatches between the image length and the soundtrack.
A quick visual walkthrough can help if you prefer to follow along while editing:
Using a Web App
Web apps are the fastest choice when you're on a laptop and don't want to install anything. They're also great if the source photo is already in cloud storage and you just need a clean export.
Clideo, Kapwing, and similar tools usually follow the same pattern:
- Upload the image
- Upload the audio
- Adjust duration
- Choose format and size
- Export the MP4
The upside is speed. The downside is that browser tools sometimes hide timeline controls behind small menus, and they may default to a generic canvas or duration that you need to fix manually.
Which option is best
This depends less on your device and more on your tolerance for manual control.
| Best for | Recommended approach | Trade-off |
|---|---|---|
| Fast social post | Mobile app like CapCut | Less precise than desktop-style editing |
| Beginner on laptop | Web app like Clideo or Kapwing | Must watch for default settings |
| Brand or client work | Full editor with timeline controls | Slower, but fewer surprises |
| One-off personal post | Simplest app you already know | Fine if you still check duration and crop |
If you only remember one thing from this section, remember this: the best tool is the one that lets you clearly control duration, crop, and audio placement without fighting the interface.
Pro Touches Timing Fades and Finding Music
A photo with music is still a video edit, and this is the point where that becomes obvious. The export may already work, but timing and audio polish decide whether it feels intentional or rushed.
Fix the duration first
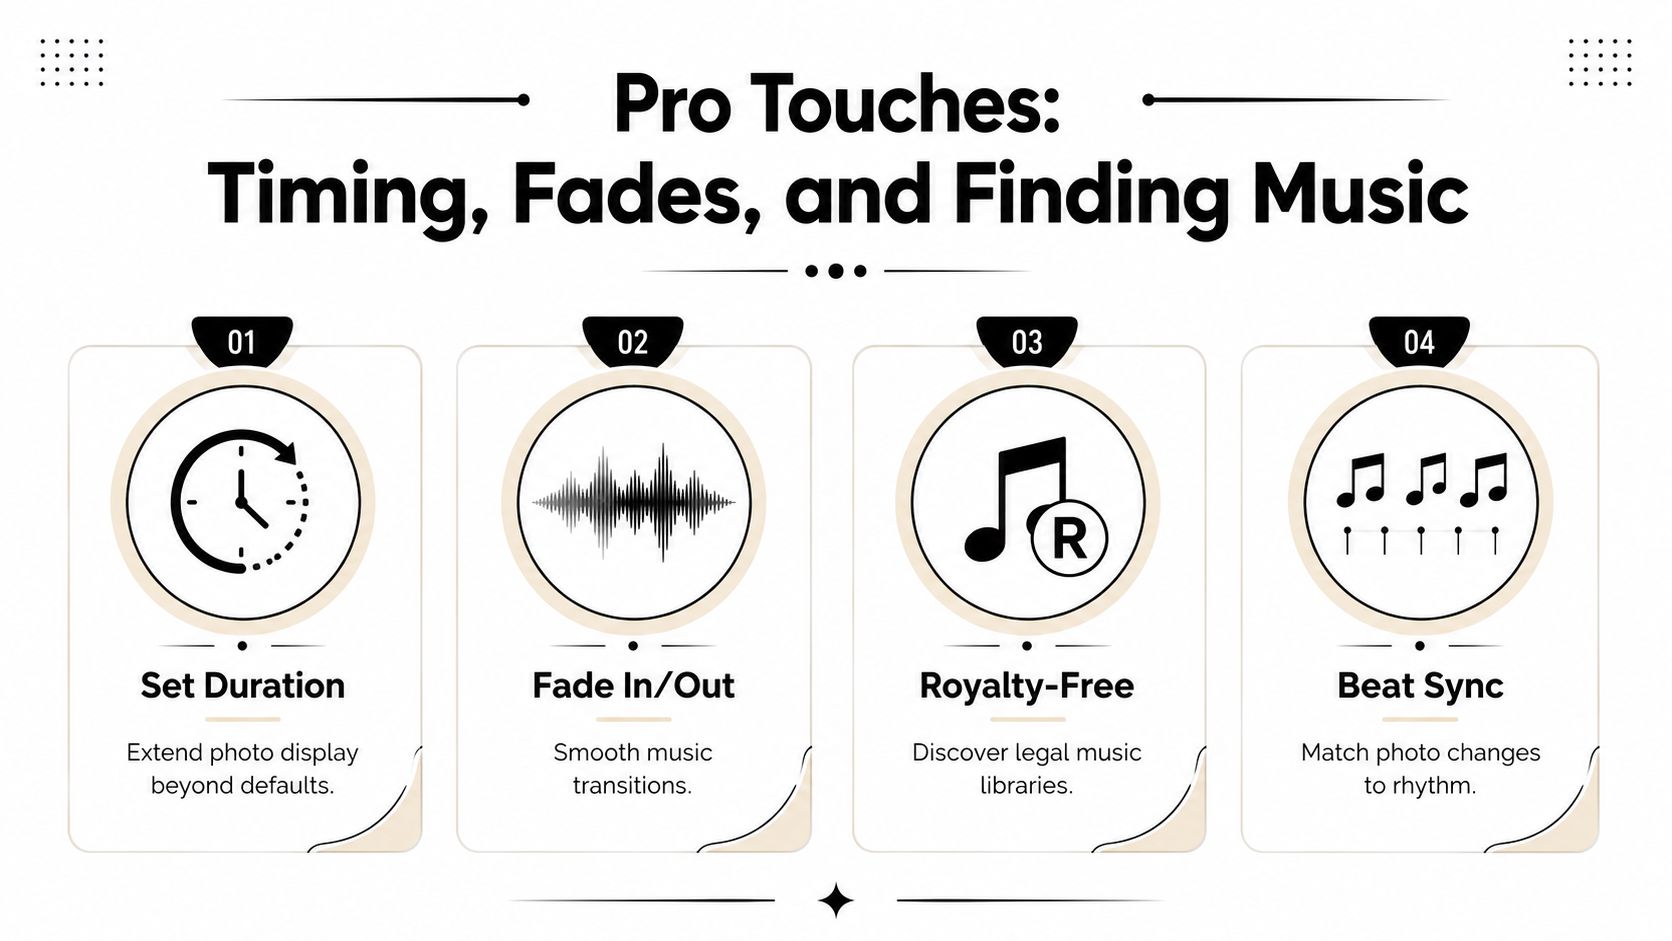
The most common mistake is simple. The photo clip is shorter than the music.
According to CLRN's tutorial analysis, 5 seconds is a common default, and approximately 60% of novice users miss the step where the image needs to be extended to match a longer audio track.
Check that before touching effects. If the image ends early, the viewer sees a black screen, a frozen end card, or a cut-off export depending on the app. None of those look finished.
Use this quick workflow:
- Zoom out on the timeline so you can see the full audio track
- Select the photo clip
- Drag the right edge until it reaches the end of the music
- Play the last two seconds to confirm the ending feels clean
That one adjustment solves a surprising number of failed posts.
Smooth the audio
Clean audio usually reads as "professional" faster than any visual effect. A hard start or stop makes the whole piece feel assembled in a hurry, even if the photo itself looks great.
A short fade-in and fade-out usually does the job. For a single-photo video, keep it subtle. Around half a second to one second is enough in many editors. Longer fades can work for memorials or slower emotional posts, but they often feel sleepy on product posts, announcements, or anything meant to grab attention fast.
One rule helps beginners immediately: lower the music more than feels necessary on first listen.
A practical starting point:
- Voiceover or spoken message: keep music tucked under the speech
- Single photo, no voice: let the track sit higher, but avoid clipping or a harsh opening
- Memorial or tribute: use softer entries and exits
- Promo or announcement: start closer to the beat, keep the intro short
If you prepared your audio earlier, this step gets easier. You are refining a clean track, not trying to hide hiss, uneven volume, or an awkward cut with fades.
Time the image to the music, not just the full length
Matching duration is the minimum. Matching the feeling of the track is what makes a still image feel alive.
Look for a natural endpoint in the music. That might be the end of a phrase, a beat drop, or the first clean fade in the song itself. If the track keeps going long after the message lands, trim it. Beginners often leave extra seconds at the end because the song is still playing, but the visual has already said everything it needs to say.
For a stronger result:
- Cut on a musical phrase instead of the middle of a lyric
- Avoid long empty intros unless the post is meant to feel reflective
- If the song has a strong beat, start the photo right before or on that beat
- If the track never settles, choose a simpler section
Choose music you can actually publish
A good track that gets muted later is still the wrong track.
Platform libraries are usually the fastest option for casual posts inside Instagram or TikTok. Licensed royalty-free music is the safer choice for client work, business accounts, YouTube uploads, ads, and cross-platform reuse. The trade-off is convenience versus control. Native libraries are easy, but the same song may not be available on every account type or every platform.
A few habits save time:
- Match the mood to the photo
- Skip tracks with busy intros or distracting vocals unless the vocals are the point
- Read the license terms before using the song in paid, branded, or client content
- Test the post on the platform where it will be published
Good edits here are usually quiet edits. Correct length, clean fades, and music that fits the image will improve the result more than extra motion effects.
Exporting and Sharing on Social Media
The final export is where a lot of careful work gets lost. The file may be technically correct, but if the canvas is wrong or the platform recompresses it badly, the post still looks weak.
One quality problem shows up constantly on Instagram. According to this Q1 2025 tutorial analysis, 45% of Instagram creators abandon music-to-photo attempts after the app auto-converts the image to a low-resolution video, yet only 8% of tutorials explain how to use Instagram's native Reels editor to preserve the original photo's aspect ratio and quality better.
Match the canvas to the platform
Choose the frame before you build the edit.
- Instagram Reels and TikTok: use a vertical canvas
- YouTube standard video: use a widescreen canvas
- Square feed-first post: use a square canvas if your editor supports it cleanly
If you start in the wrong format and crop later, you're more likely to cut off important details or get soft scaling. This matters even more for text-based graphics and portraits.
Exporting as MP4 is usually the safest move because that's what these platforms expect from a photo-plus-audio post.
Use the native editor when quality matters
If your final destination is Instagram and you're struggling with reduced quality, try building the music layer inside Instagram's native Reels editor instead of exporting a branded or compressed file from a third-party app.
That approach often works better when your priorities are:
- No watermark
- Cleaner scaling
- Closer adherence to the app's expected format
- Less chance of a weird second compression pass
There's a trade-off, though. Native editors are convenient, but they usually give you less precision than a dedicated timeline app. If exact trimming, voiceover cleanup, and layered timing matter more than convenience, create the MP4 externally and upload the finished file.
For social posts, don't just ask “What exports fastest?” Ask “Where will this file be compressed again?”
Quick Troubleshooting and Final Checklist
A photo-with-music post is still a video file, so the usual video problems apply. In practice, the failures are predictable.
If the audio stops early, the still image clip is usually shorter than the soundtrack, or the app trimmed the project to a default length. Extend the photo on the timeline and confirm the export duration before rendering.
If the image looks soft or blurry, the problem usually started earlier. The canvas was set wrong, the photo was scaled too far, or the file went through more than one export. Go back to the original image, rebuild in the right frame size, and export a fresh MP4 once.
If the music buries the voice, fix the audio before you chase visuals. Clean the voiceover first, then lower the music until speech stays clear the whole way through. Short fades at the start and end usually solve the abrupt, homemade sound beginners get on their first pass.
Final checklist
- Clean the audio first: trim dead air, reduce noise, and fix obvious level problems
- Choose the editor for the job: quick phone app for speed, timeline editor for control
- Set the canvas before editing: vertical, square, or widescreen based on where it will be posted
- Import both assets into one project: your photo and your music or voice track
- Make the image last long enough: the still should cover the full audio runtime
- Balance the mix: keep music under speech and add simple fades
- Export once: use a platform-friendly MP4 and avoid extra recompression steps
- Preview the full file: check the first second, the last second, and any point where the music changes
That last preview catches more mistakes than any setting screen. Watch it once with headphones, then once on phone speakers. If both play cleanly, it is ready to post.
If your soundtrack or voiceover needs cleanup before you edit, ClearAudio makes that step much easier. You can remove hiss, hum, room echo, and distracting background noise, or isolate speech and vocals so your final photo-video sounds clean before it ever hits the timeline. For podcasters, video editors, and independent creators, it's a fast way to get publication-ready audio without wrestling with a full DAW.