You've finished the edit, the interview looks excellent, and then you put on headphones. A café grinder cuts through the guest's first sentence. An HVAC system adds a constant low hum. Traffic rises and falls behind every answer. The footage may be strong, but the audience has to work too hard to understand it.
That's why learning how to remove background noise from video starts with more than finding a noise-removal button. The reliable process is a two-stage craft: diagnose what's competing with the dialogue, then choose a light reduction, dialogue isolation, or deeper source-separation workflow. No tool can recover speech that was completely masked, and aggressive processing can replace one problem with metallic, hollow, or watery artifacts.
The techniques behind modern cleanup come from decades of speech-enhancement research. Spectral subtraction, first proposed as a widely used denoising method in 1979, helped establish the idea of estimating a noise profile and subtracting it from a mixed recording. Later systems added statistical modeling and neural networks, with deep-learning approaches becoming a major direction from the mid-2010s onward (speech-enhancement survey). The practical lesson is simple: use the least destructive method that solves the actual problem.
Table of Contents
- When Background Noise Wrecks a Good Take
- Diagnose the Noise Before You Touch a Slider
- Clean Audio Inside Your NLE the Traditional Way
- Choosing Between Denoisers, Dialogue Isolators, and Source Separation
- Restoring Dialogue with ClearAudio Step by Step
- Batch Cleaning Podcasts, Interviews, and Call Recordings
- Verifying Quality and Exporting Without Re-Introducing Noise
When Background Noise Wrecks a Good Take
The timeline tells you what went wrong before the viewer ever sees the scene. Dialogue waveforms sit low against a broad, restless bed of sound. Between phrases, the room doesn't fall silent. A low-frequency swell continues under the guest, consonants vanish into café chatter, and every pause exposes the recording's noise floor.
I've seen this happen with interviews recorded beside roads, livestreams captured under laptop fans, and documentary scenes where the location mattered more than acoustic control. The temptation is to pull the noise-reduction control toward its maximum and hope the voice survives. Sometimes the result is quieter, but the speaker sounds phasey, brittle, or detached from the scene.
Practical rule: Make the recording less distracting, not artificially silent.
Clean dialogue helps viewers follow ideas without decoding every word. That matters in interviews, training videos, podcasts with visual footage, and short social clips. If the audience has to strain to understand a sentence, strong cinematography won't fully compensate for the listening effort.
The recovery plan begins with listening, not processing. Find out whether you're dealing with steady hiss, electrical hum, traffic rumble, reverberation, or competing voices. Those problems occupy different parts of the recording and respond to different tools.

Before changing the clip, check the wider production context. A useful overview of how sound and picture interact in production is Busylike's complete guide to A/V. Then keep the original media untouched, duplicate the audio, and work on a clearly labeled repair layer. That one habit makes A/B comparisons and revisions far safer.
Diagnose the Noise Before You Touch a Slider
Start with closed-back headphones and listen at a moderate level. Don't judge the clip through laptop speakers alone, because small speakers can hide low rumble while exaggerating the apparent loudness of speech. Play a sentence, then listen to the spaces between words. The noise that remains when nobody speaks often reveals the correct treatment.
Match the sound to its cause
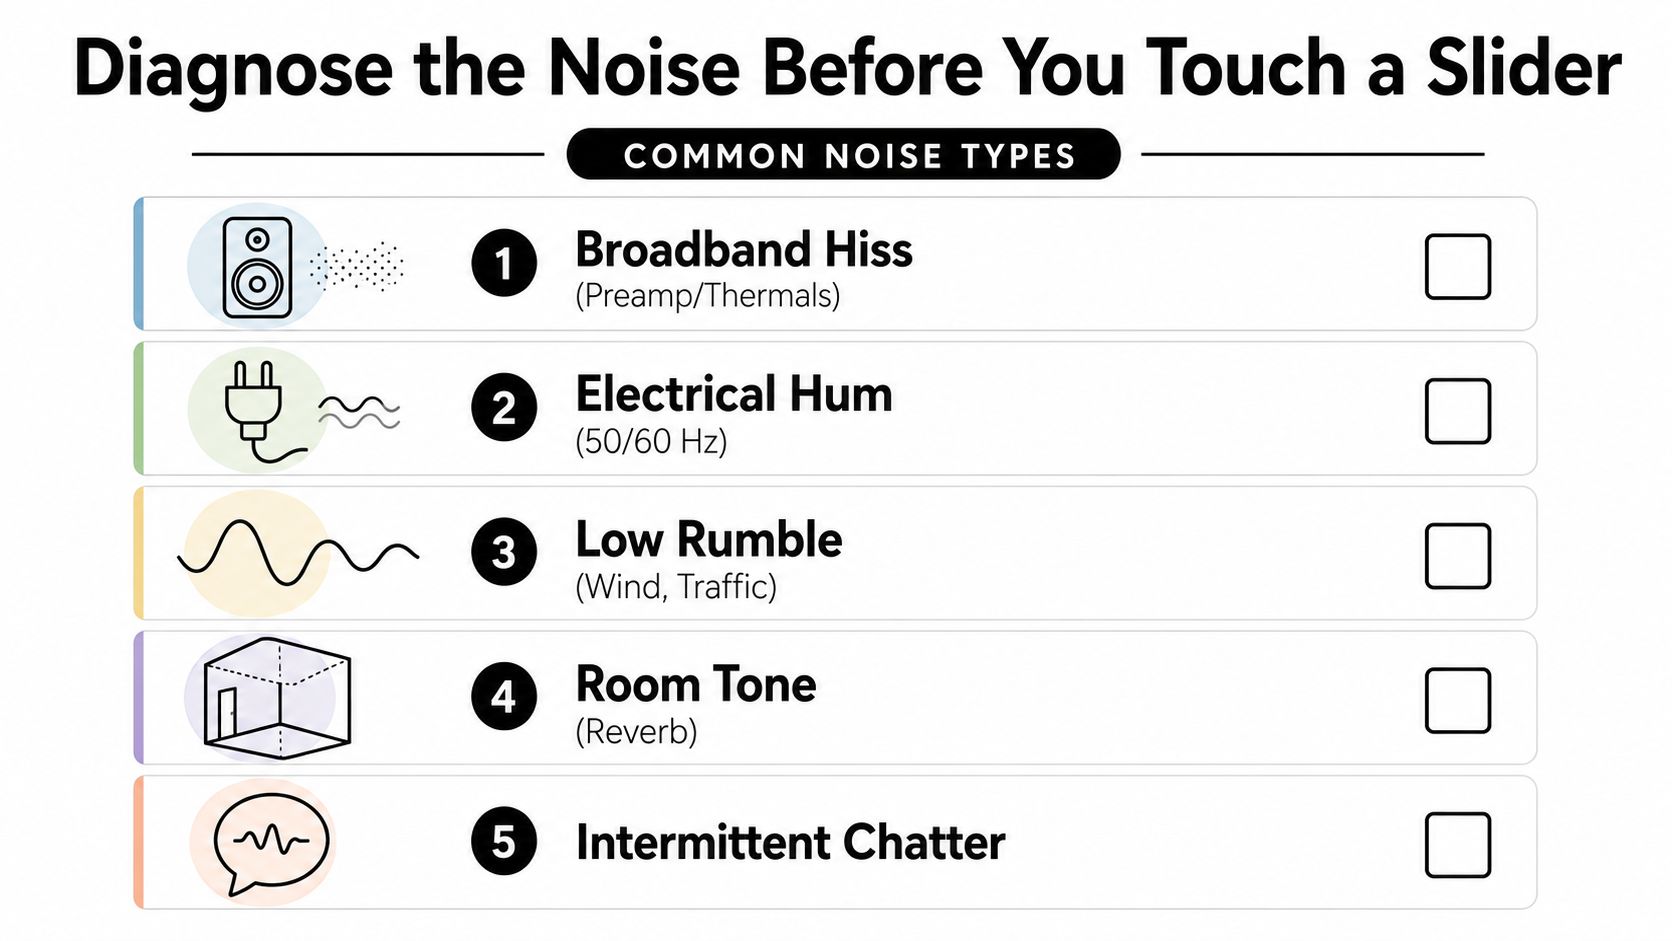
Broadband hiss usually sounds like a continuous wash across the upper spectrum. It can come from microphone preamps, inexpensive interfaces, or a noisy recording chain. Electrical hum tends to form a stable low-frequency tone, often with harmonics above it. Low rumble comes from traffic, handling, wind, footsteps, or building vibration.
Room reflections are different from a steady noise bed. They smear the voice after each syllable and make the recording feel hollow. Intermittent chatter, doors, beeps, and passing vehicles require event-level editing or separation because a profile built from one quiet moment won't describe the entire clip.
Open a spectrogram if your editor provides one. Steady problems appear as persistent horizontal energy, while short intrusions show up as isolated shapes. A waveform helps you see level and timing, but a spectrogram helps you see where the unwanted sound lives. Visual audio-repair workflows commonly use both views to identify broadband, electrical, and intermittent problems (audio cleanup fundamentals).
Prevent the repair before recording
Capture room tone at every location. A quiet section gives you material for edits and helps a denoiser understand the background, but it also lets you compare whether the environment changes between takes. Record a clean wild track or ADR option whenever the scene permits.
Use these habits before pressing record:
- Set conservative gain: Keep peaks below -12 dBFS as a starting practice, leaving room for unexpected volume changes.
- Control the environment: Move away from HVAC vents, refrigerators, windows, and hard reflective surfaces where possible.
- Protect lavaliers: Hide the capsule carefully and isolate it from fabric movement, necklaces, and cable rub.
- Monitor live: Test the microphone while wearing headphones, not after the interview is over.
For a broader pre-recording check, use AONMeetings' crisp audio test steps. Prevention won't eliminate every location problem, but it gives post-production a cleaner signal to work with.
Clean Audio Inside Your NLE the Traditional Way
Built-in tools remain useful when the noise is predictable and the dialogue is already reasonably clear. The classic workflow is restrained: remove the obvious bed, correct the frequency problem, shape dynamics, then compare the result with the untouched recording.
In Premiere Pro, duplicate the dialogue clip and open the Essential Sound panel. Tag it as dialogue, apply Noise Reduction, and start with a subtle Amount around 6 to 12 dB. Use a quiet section for the noise profile when the effect supports profile capture, then back off if consonants lose edge or the voice develops a digital shimmer.
DaVinci Resolve gives you more control on the Fairlight page. Try Dialogue Isolator for a voice competing with general ambience, then use a parametric EQ to notch electrical hum at 50 or 60 Hz when that tone is present. A gentle high-pass around 80 Hz can reduce rumble, but listen carefully because a low male voice may need some of that energy.
Final Cut Pro's Audio Inspector includes Noise Reduction and Hum Reduction. A starting range around 30 to 50 percent can be useful for a moderate problem, but the correct setting depends on the recording. Treat every value as a starting point, not a promise.
| Editor | Tool | Starting Setting |
|---|---|---|
| Premiere Pro | Essential Sound Noise Reduction | 6 to 12 dB for a subtle pass |
| DaVinci Resolve | Dialogue Isolator, EQ | Isolate first, then notch 50 or 60 Hz hum and consider an 80 Hz high-pass |
| Final Cut Pro | Noise Reduction, Hum Reduction | Around 30 to 50 percent, adjusted by ear |
Keep the order deliberate
Process the noise before compression. Compression raises quiet sections, which can bring the noise floor forward and make later cleanup harder. After reduction, use EQ to restore balance, then apply gentle compression to stabilize speech. Normalize or limit only after those corrective stages.
Bypass the entire chain and match the perceived loudness before deciding whether it sounds better. A louder processed clip often seems cleaner for a moment, even when it has lost natural detail. If the voice sounds thin, gated, or underwater, reduce the effect rather than adding more EQ to disguise the damage.
Choosing Between Denoisers, Dialogue Isolators, and Source Separation
The right tool depends on what shares the recording with the voice. Traditional denoisers work by reducing spectral content that resembles a learned or selected noise profile. Dialogue isolators use neural masking to emphasize vocal characteristics. Source-separation systems go further by attempting to split a mixed recording into controllable layers.
| Tool Category | How It Works | Best For | Watch Out For |
|---|---|---|---|
| Traditional spectral denoiser | Estimates noise and subtracts or attenuates it in frequency bands | Mild hiss, stable fan noise, simple hum | Musical noise, high-frequency dullness, profile mismatch |
| AI dialogue isolator | Learns patterns associated with speech and suppresses competing material | Persistent ambience, room noise, uneven backgrounds | Vocal hollows, pumping, latency, consonant damage |
| Source separation | Splits dialogue or other sound into separate stems | Music under speech, traffic with overlapping voices, mixed production audio | Separation bleed, watery artifacts, heavier processing, manual review |
Use a traditional denoiser when the unwanted sound stays consistent. A short profile can describe a fan or hiss well, and a light pass may preserve the original room character. It won't reliably remove a passing truck, a second speaker, or music that occupies the same frequency range as the dialogue.
Choose an isolator when the voice is clear but surrounded by changing ambience. This approach can preserve intelligibility in situations where a fixed noise profile fails, though it may make the speaker sound unnaturally dry. De-reverberation is a separate decision. If reflections are the main problem, reducing general noise alone won't restore clarity.
Use source separation when the recording contains distinct competing layers. Recent audio-visual research points toward systems that combine visual attention with speech and background separation, moving beyond basic denoising toward dialogue-focused extraction (audio-visual source separation research). ClearAudio fits this third category as a browser-based option for separating dialogue and cleaning audio or video files, with selectable processing modes for different quality and speed needs.
A practical decision tree looks like this:
- Steady hiss or hum: Start with spectral denoising or a targeted EQ notch.
- Changing room tone or HVAC: Try a dialogue isolator, then check the voice for hollowness.
- Music, traffic, or another speaker under the words: Test source separation.
- Reflections dominate: Add de-reverb carefully, independently from noise reduction.
- The speech is masked rather than merely noisy: Compare alternate takes, wild sound, or ADR before pushing restoration further.
Restoring Dialogue with ClearAudio Step by Step
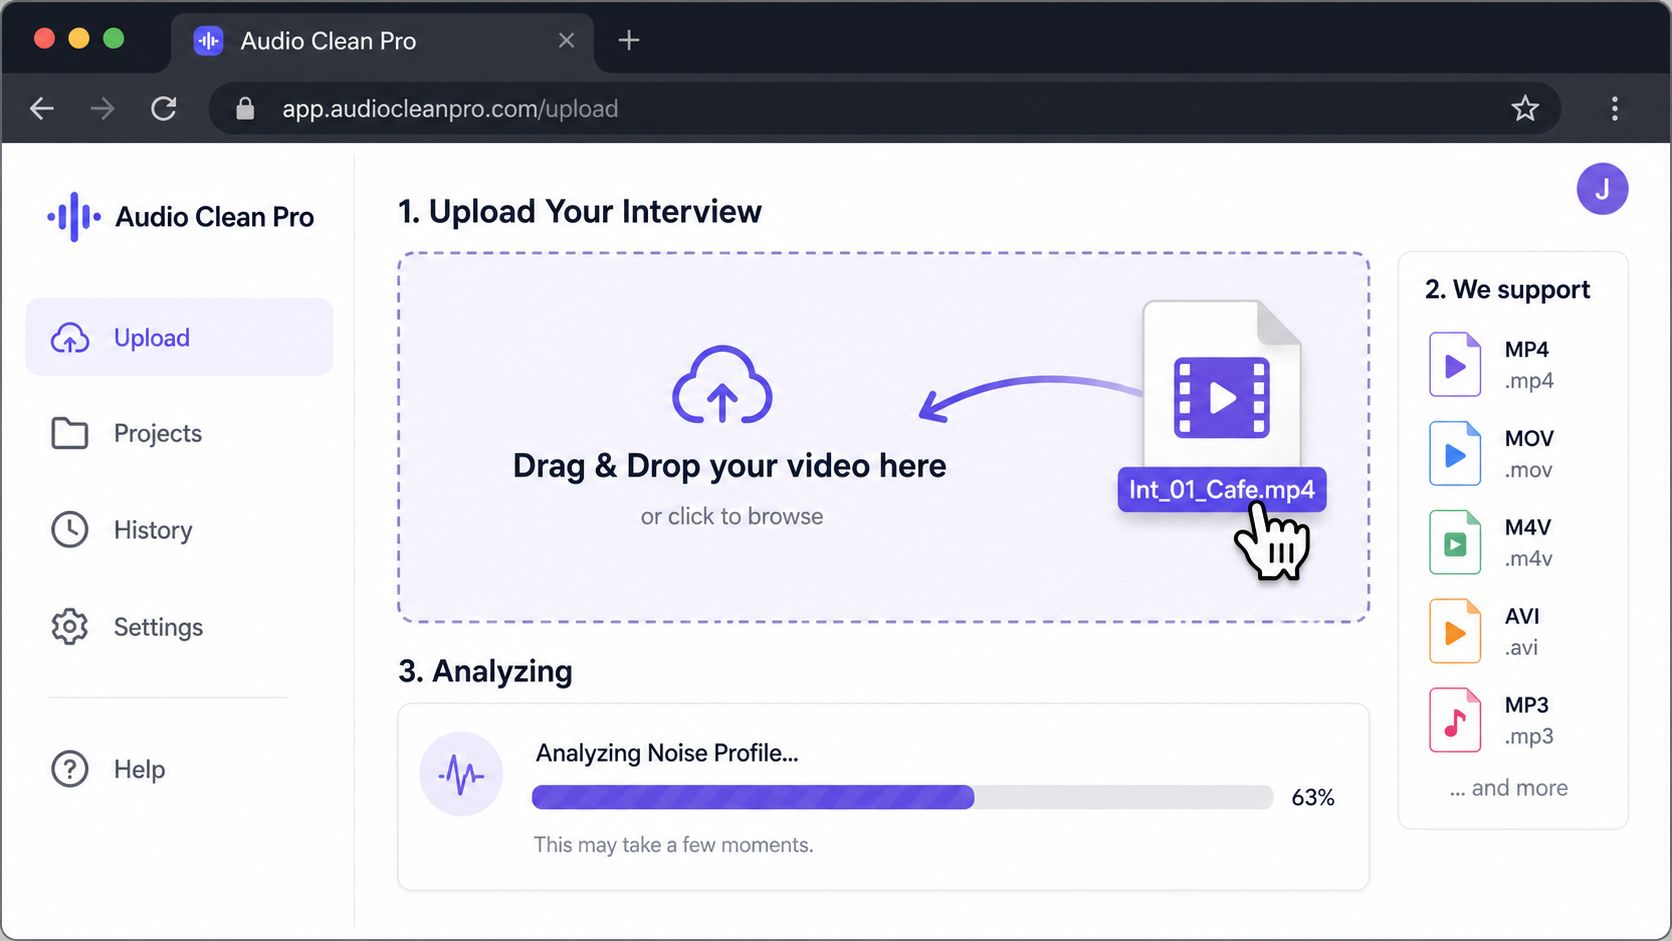
For a noisy interview, the safest approach is to preserve the camera file and create a separate replacement track. ClearAudio's browser workflow accepts audio or video files, so you can begin with the source rather than manually extracting a track first.
Build the replacement
- Upload the source: Drag the file into the browser uploader or use the file picker. Confirm that your media is in a supported format such as MP4, MOV, MKV, or WAV.
- Describe what matters: Specify that the priority is spoken dialogue, and identify whether you want the speaker preserved while reducing background noise.
- Choose a quality mode: Use Standard for speech-only material with a simple background, High for interview dialogue where some ambience should remain, or Maximum when field sound has buried the voice under traffic or other clutter.
- Preview before exporting: Compare the processed version with the original. Listen specifically to “s,” “t,” and “k” sounds, breath transitions, and the ends of words. Those details often reveal overprocessing before you notice it in a full sentence.
If the recording was made in a reflective room, enable the optional de-reverb treatment and preview it separately. Don't assume the strongest setting is the most natural. A little remaining room sound can be less distracting than a voice that feels isolated from its location.
Return it to the edit
Export a clean WAV or MP3 replacement track at 48 kHz when that matches the original video timeline. Import it onto a dedicated audio layer, line it up against the source, and mute the original rather than deleting it. Keeping the untreated clip makes it easy to recover a breath, laugh, or room transition that the restoration handled poorly.
Use names that communicate both origin and treatment, such as interview_cafe_camA_CA-High_clean.wav. Include the scene or speaker identifier, the original take, the processing mode, and a clean or dirty tag. That convention prevents an approved restoration from being confused with the camera reference during revisions.
Batch Cleaning Podcasts, Interviews, and Call Recordings
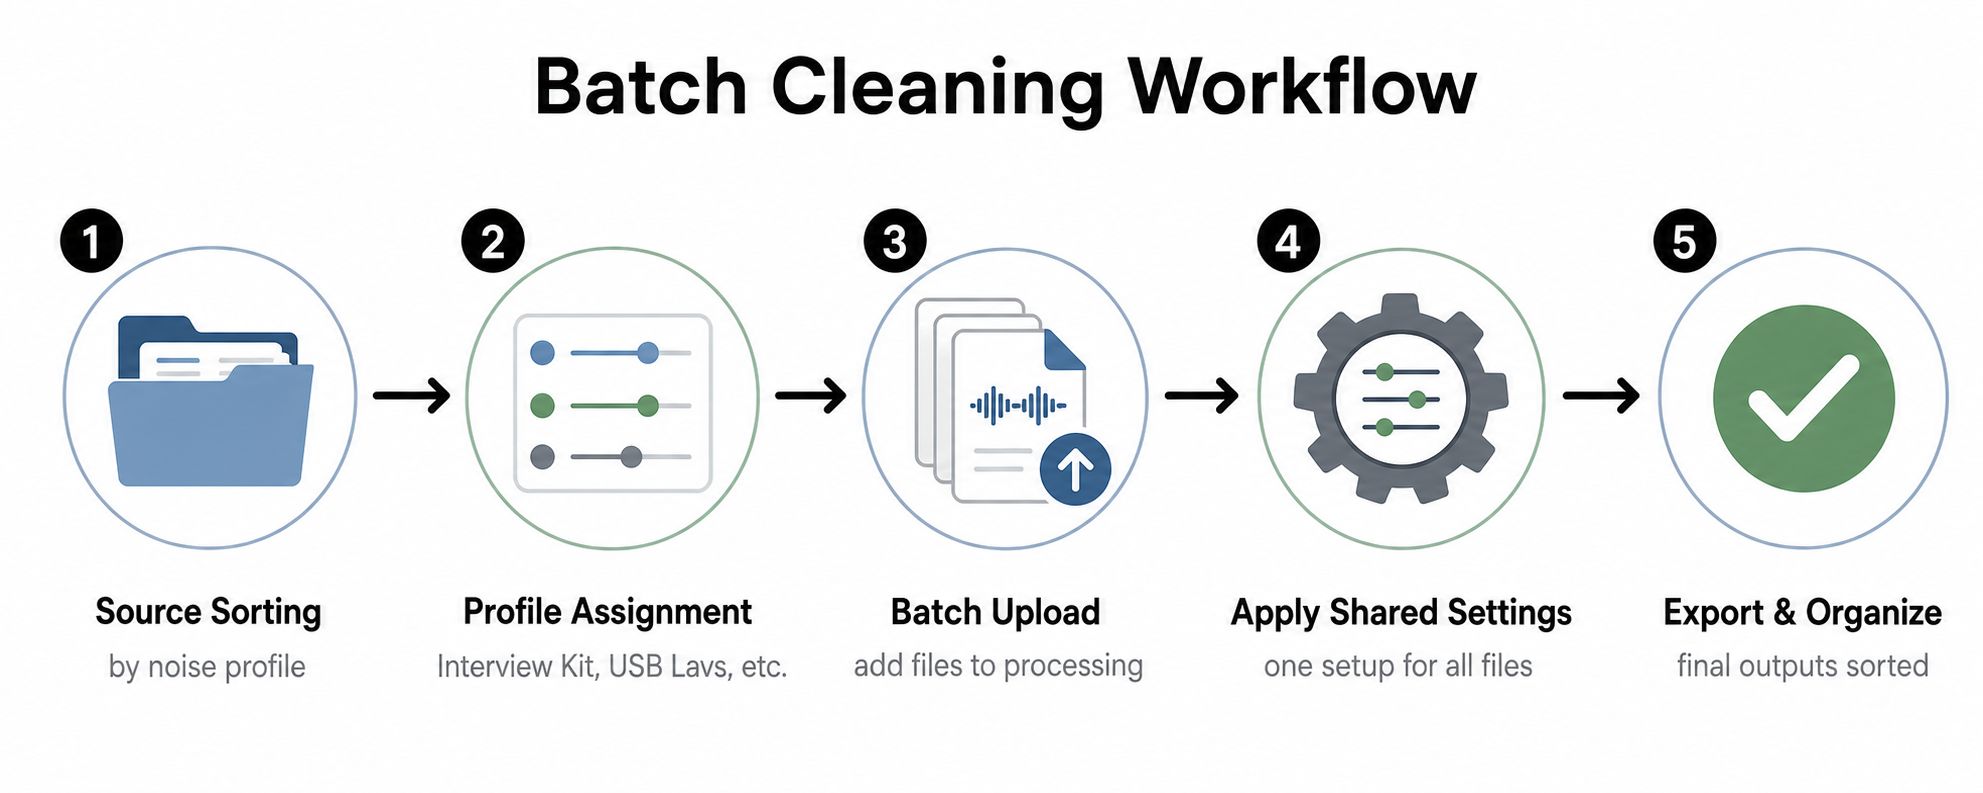
Batch work fails when files with different noise profiles receive the same treatment. Sort the material before uploading it. Put café interviews together, lavalier recordings together, USB microphone sessions together, and calls with similar room or platform characteristics into separate folders.
Create a small processing map for each group:
- Interview kit: Use a dialogue-focused mode and preserve enough ambience to avoid a sterile result.
- USB lavalier recordings: Check clothing rustle and inconsistent proximity before applying a shared setting.
- HVAC-heavy sessions: Apply a profile suited to steady low-level noise, then listen for pumping.
- Call recordings: Inspect compression artifacts first, because additional isolation can make the voice brittle.
Queue each folder as its own batch, assign the matching quality mode, and let long runs process while you work elsewhere. Don't mix untested settings into a large queue. Test one representative file from each folder, approve the result, and use that version as the reference for the rest.
A consistent naming system keeps the batch auditable. Include the shoot date, location code, speaker or scene, and processing state. For example, 2026-08-27_CAFE01_GUEST03_CA-High_clean.wav tells another editor what the file is without opening it.
Track the work in a simple spreadsheet with the original filename, processed filename, selected mode, review status, and any manual follow-up. Spot-check the first, middle, and last file in every completed batch. If those three don't match in tone and intelligibility, stop the import and investigate the queue rather than correcting dozens of clips later.
For interview-specific finishing ideas, How to enhance interviews can complement the audio cleanup stage. The visual edit still needs its own review, especially where cuts, speaker changes, or reaction shots affect the perceived continuity of the restored sound.
Verifying Quality and Exporting Without Re-Introducing Noise
Louder isn't cleaner. After processing, lower the restored clip to the same perceived level as the original and switch between them without looking at the timeline. This blind A/B test exposes artifacts that are easy to mistake for improvement when the processed version is louder.
Listen for four failures:
- Metallic texture: Often caused by excessive spectral reduction.
- Pumping: The noise floor rises and falls as an adaptive processor follows the speech.
- Clipped consonants: Strong masking can remove the edges that make words intelligible.
- Phase or comb effects: Stacked processors, duplicated tracks, or misaligned replacements can create hollow coloration.
Objective checks can support your ears. STOI is an intelligibility measure ranging from 0 to 1, and an open benchmark reported 0.925 for RNNoise, 0.915 for unprocessed audio, and 0.959 for a stronger model under the same test setup (noise-suppression benchmark guide). Those figures are useful for comparing engines in controlled workflows, but they don't guarantee a natural final mix. Artifacts can remain audible even when an objective score improves.
PESQ and SI-SDR can add further context when you have suitable references, especially for experiments involving separation. Audio-visual enhancement work also reports objective and human intelligibility evaluation, reinforcing the point that metrics and listening tests answer different questions (audio-visual enhancement study). For routine editing, a clean reference or carefully chosen proxy is more valuable than chasing a target score without a listening check.
Apply normalization and limiting after denoising, EQ, and compression. Keep spoken-word peaks controlled with practical headroom rather than forcing every quiet passage upward. If the result is muddy, try a restrained high-shelf adjustment after removing the cause, and use a declip process only when clipping is present.
| Platform | Codec | Bitrate | Sample Rate | Loudness Target |
|---|---|---|---|---|
| YouTube and Vimeo | AAC | 320 kbps | 48 kHz | Use the platform delivery specification and verify the final mix |
| Podcast delivery | MP3 | 192 kbps | 48 kHz | Check intelligibility and consistency across speakers |
| Podcast archive | FLAC | Lossless | 48 kHz | Preserve a clean master before distribution encoding |
| Social video | AAC | Platform-dependent | 48 kHz | Check true-peak behavior after the final encode |
Export a master before making delivery versions. Keep the cleaned WAV aligned with the picture, retain the original camera audio, and document the processor chain. That gives you a revision path when a director prefers more room tone or a platform encode exposes a hidden artifact.
ClearAudio lets you upload an audio or video file, describe whether you want speech or dialogue preserved, and process noise, hum, hiss, room echo, or competing layers in the browser. Try the ClearAudio workflow on one representative clip, compare it against your NLE's lightest repair pass, and keep the version that preserves the most natural speech.