
You exported a clean MOV, sent it off, and watched it bounce back with a file-size error. That's the usual moment people start hunting through random sliders, hoping one of them will magically make the problem disappear. The fix is more disciplined than that. Reduce MOV file size by choosing the right lever first, then trimming only what the delivery really needs.
The hard part is that MOV is just the container. The size is driven by what's inside it, especially the codec, resolution, frame rate, bitrate, and sometimes the audio tracks sitting in the file beside the picture. If you've been shooting 4K at 60 fps and trying to squeeze it into a client portal, the portal isn't the problem, the delivery settings are.
Table of Contents
- Why Your MOV File Is Too Large in the First Place
- The Compression Math Behind Smaller MOV Files
- Remux vs Re-Encode and When to Use Each
- Step-by-Step Settings in FFmpeg, HandBrake, QuickTime, and Premiere
- Audio Tracks, Speech Clarity, and AI Cleanup Before Compressing
- Ready-Made Presets for YouTube, Clients, Email, and Archive
- Final Checklist and Quick Decision Tree
Why Your MOV File Is Too Large in the First Place
You know the drill. The export looks great on your timeline, then email rejects it, the LMS caps it, or the client portal refuses anything over the limit. That usually means the file is carrying more data than the destination wants, not that the video is flawed.
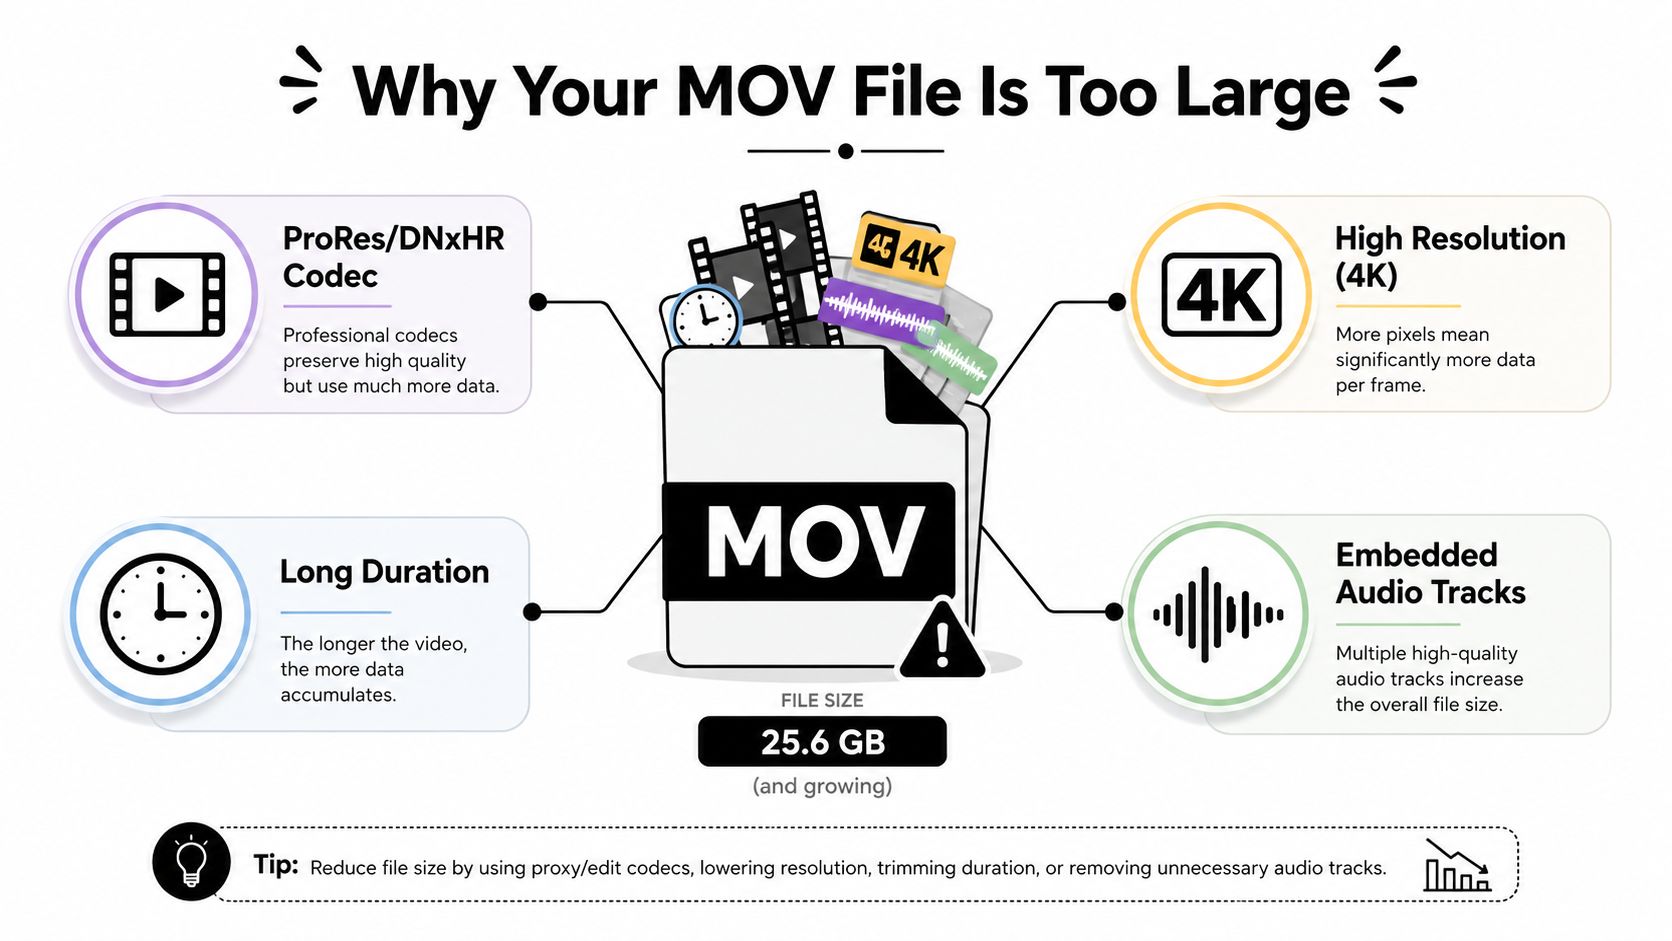
Start with the four levers that matter most
The core rule is simple, file size is the clip's total data rate multiplied by its duration. That means shrink output by using a more efficient codec or reducing dimensions, such as 840×480 to 640×365. Once you accept that, the rest of the export decisions get easier.
The four levers are codec, resolution, frame rate, and bitrate. Duration matters too, but you can't always shorten the content, so you usually work on the other four first. In practice, that means deciding whether the file needs a lighter codec, fewer pixels, fewer frames, or a cleaner delivery target.
Match the export to the destination
A 4K source is often the wrong starting point for a file that's headed to the web, a review portal, or an email attachment. Exporting 4K as 1080p can make the file about 75% smaller, and dropping a 60 fps source to 30 fps or 24 fps can cut size nearly in half for most content. Those are not tricks, they are the result of moving less data.
Practical rule: if the destination is a phone, laptop, or normal web player, do not preserve 4K 60 fps out of habit. Keep what the viewer can actually see.
That's why shooting high and delivering high can be a losing battle when the target does not need it. A 4K 60 fps master is useful when you need crop room, motion smoothness, or archival flexibility. It is a poor fit when the job is a quick upload, a review cut, or a speech-first recording that nobody will watch in full resolution.
The Compression Math Behind Smaller MOV Files
A bloated MOV usually carries too much data for the job it needs to do. Size drops when you cut that data at the source, then keep only the pieces the viewer will notice. In practice, that means treating video, audio, and track structure as one export decision instead of three separate ones.
Why resolution changes move the needle fastest
Resolution is the first place to cut because it removes pixels outright. Fewer pixels mean less detail for the encoder to describe in every frame, which is why resizing a file usually produces the biggest size drop for a given project. A 4K master aimed at review, email, or web playback often keeps far more detail than the destination can show.
That is also why a smaller frame size can do more than a bitrate tweak on its own. If the viewer is watching on a phone, laptop, or standard web player, full-resolution delivery is often wasted data. The cleanest export is the one that matches the screen, not the camera.
Frame rate matters right after that. A 60 fps interview, lecture, or screen recording rarely needs every frame preserved if the motion is mostly faces, slides, or cursor movement. Dropping to 30 fps or 24 fps lowers the amount of motion data the encoder has to carry, and the file usually gets easier to move around without the timeline feeling broken.
Bitrate, constant quality, and why guessing is sloppy
Bitrate is the amount of data allowed per second. Guessing a number and hoping the export looks fine still happens a lot, and it is a bad habit for MOV work because the same setting can behave very differently across footage types. A talking-head clip, a screen capture, and a handheld shot do not need the same compression treatment.
Constant quality is usually the cleaner approach for delivery files because the encoder spends bits where the image needs them and saves them where it does not. That is especially useful with H.265, where flat backgrounds, slides, and static sections can compress efficiently without crushing the whole file. Guides on MOV compression also point to this workflow as a practical way to cut file size without an obvious visual hit ShortGenius.
The trade-off is straightforward. CBR holds a steady data rate, VBR lets the encoder vary the rate, and RF or CQ asks for a visual target instead of a fixed number. For most MOV exports, constant quality is the better starting point, while fixed bitrate makes sense only when a platform or delivery spec forces it.
Audio deserves the same scrutiny before compression. A clean stereo track usually survives far better than a pile of redundant tracks, guide audio, or unused language channels, and that cleanup can shrink the file before any video settings change. If speech is noisy, AI cleanup can also help you avoid padding the export with extra audio bitrate just to mask hiss, hum, or room tone. That is part of the compression math too, because every track you keep has to be carried through the final file.
Remux vs Re-Encode and When to Use Each
Not every oversized MOV deserves a full re-encode. Sometimes the file is bloated because of the way it's wrapped, or because it contains tracks you don't need. In those cases, re-encoding is unnecessary damage.
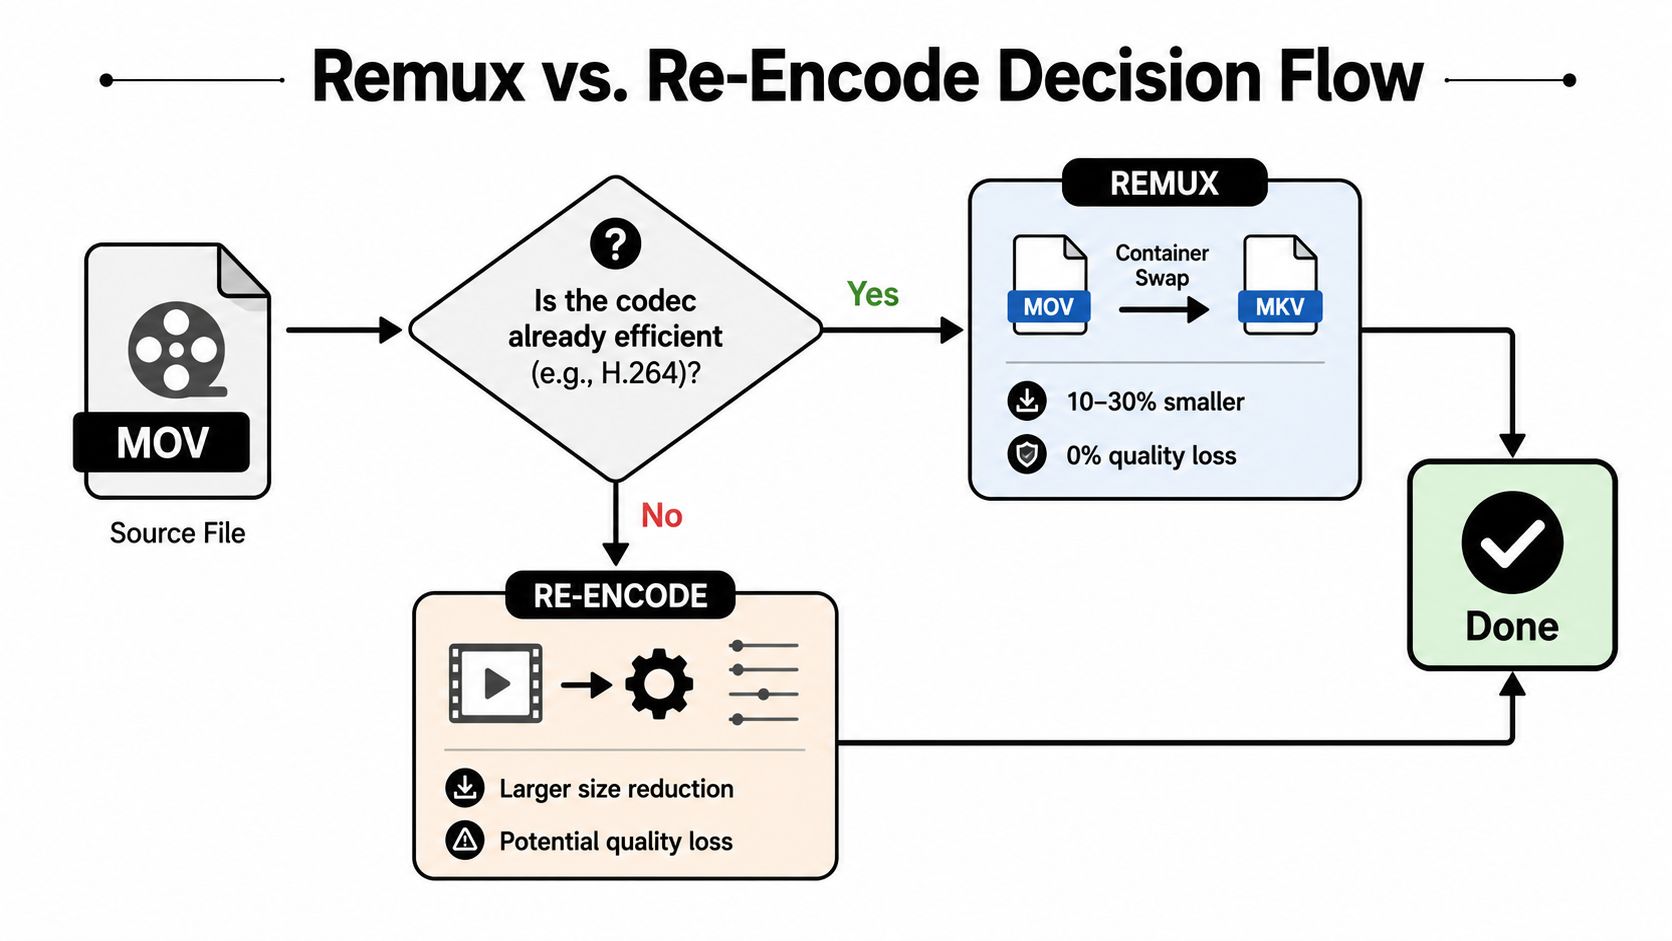
Use remuxing when the video already looks right
A remux changes the container without changing the encoded video stream. That means no quality loss, because the picture data itself stays untouched. If the codec is already efficient enough and the issue is mostly packaging, remux first.
This matters when you're handling archival work, delivery masters, or source material that should stay pristine. If a file already uses a modern efficient codec, forcing a new encode can add compression damage for no real gain. You're better off stripping what you don't need, then keeping the rest intact.
Re-encode when the source is too heavy to ship
A re-encode becomes necessary when the source codec, resolution, frame rate, or bitrate are too expensive for the destination. That's the case for many 4K masters, screen recordings, and camera originals that were created for flexibility, not for fast transfer. If the file has to be smaller in a meaningful way, a real encode is usually unavoidable.
The mistake I see most often is converting a good source into a worse format for no reason. A 10-bit H.265 file pushed into 8-bit H.264 can lose quality in both directions and may not even shrink as much as expected. If you're starting with something already efficient, protect it unless you have a clear reason not to.
Don't re-encode just because the button is there. Re-encode because the delivery target actually needs it.
Track cleanup also belongs in this decision tree. Duplicate audio streams, accidental commentary tracks, or extra channels can make the file heavier than it should be. Removing those is a lossless step, and it belongs before you decide whether the video itself needs a new encode.
Step-by-Step Settings in FFmpeg, HandBrake, QuickTime, and Premiere
The right tool depends on how much control you want and how much time you have. FFmpeg gives the tightest command-line control. HandBrake gives you fast, repeatable presets. QuickTime is convenient on macOS. Premiere works when the export has to happen where the edit already lives.
FFmpeg for precise control
If the goal is a smaller MOV without wasting time on trial and error, FFmpeg is the tool that gives you the most control over codec, bitrate, frame rate, audio, and track cleanup in one pass. A practical starting point is H.265/HEVC with a constant-quality target in the RF 22 to 28 range, while keeping the frame rate unchanged unless you intentionally want to lower it. That usually gives a solid balance between size and visual consistency for web delivery. If the source is too detailed, add a resolution scale step instead of pushing quality harder and hoping the file shrinks enough.
FFmpeg also makes it easier to deal with the full MOV package, not just the picture. If you have extra audio tracks, commentary, or duplicate streams, remove them before you finalize the encode. That keeps the output lighter without making the video take an unnecessary quality hit.
Use FFmpeg when you want one command to do the job without a lot of clicking. It is especially useful for batch work, because the same settings can be repeated across a folder of files without drift.
HandBrake for fast, human-friendly exports
HandBrake works well when you want a preset-driven workflow and do not want to babysit a timeline export. The practical route is to start with a web-oriented preset, choose H.265 (x265), then set the RF slider around 22 as a starting point, adjusting upward only if the file is still too large. Keep audio passthrough if the track is already clean and you do not need to touch it.
It is also a good place to clean up obvious excess before export. If the MOV carries duplicate tracks, unnecessary commentary, or channels you are not using, strip them out instead of preserving them by habit. You are not helping the delivery by shipping dead weight, and you avoid the trade-off of compressing a bigger file than the job needs.
This is the tool I would hand to someone who needs repeatability more than microscope-level control. It is also the easiest place to compare the impact of resolution changes, because you can see the output estimate without doing mental arithmetic.
QuickTime and Premiere for everyday editorial work
On macOS, QuickTime's File > Export As path is the simplest option when speed matters more than fine control. A lower-resolution export such as 1080p or 720p is the quickest way to reduce size, and Apple Community specifically recommends reducing dimensions when you need the file smaller Apple Community. It is not the most granular tool, but it is often good enough for one-off shares.
Premiere fits the same general logic. Use a delivery-minded export, keep the source in mind, and do not overshoot the bitrate just because the slider can go higher. If your footage is already well compressed, the better move is often to match the file to the screen it will be viewed on, then leave the extra headroom out of the export.
A practical editorial workflow is to clean the timeline before you compress it. Remove unused audio tracks, check for accidental stereo duplicates, and decide whether the narration needs cleanup before export. That keeps the MOV smaller and avoids the common mistake of preserving clutter just because it lives in the project already.
Audio Tracks, Speech Clarity, and AI Cleanup Before Compressing
Most MOV guides act like audio is just another slider. That's too shallow for the files people ship now. Interviews, lectures, calls, screen recordings, and demos all live or die on speech clarity, and bad audio can make a “small” file useless.
Clean the sound before you shrink the file
If the recording has noise, hum, hiss, room echo, or muddled dialogue, fix that first. A cleaner audio track is easier to understand, and it also tends to behave more predictably during compression. In practical terms, that means you don't want to preserve a messy track just because it's attached to the video.
Recent learning-focused guidance also points to removing duplicate audio tracks, keeping one clear narration track, and testing playback on real devices before shipping Video Learning AI. That advice is easy to ignore and expensive to skip. Duplicate tracks don't help the audience, and they can add baggage to files that are already large enough.
Why AI-assisted cleanup belongs before compression
AI cleanup is useful because it can isolate the speaker, vocals, music, or background elements the file needs, while stripping away the stuff that makes compression ugly. Clear dialogue compresses more gracefully than noisy, overmixed audio. That's true whether you're preparing a course, a podcast clip, a call recording, or a screen capture.
Practical rule: compress after you clean. A dirty file makes every later decision harder, because you're trying to preserve junk and speech at the same time.
That workflow is simple. Upload the audio or video, tell the tool what to keep, export the cleaned result, and only then shrink the MOV. If the file is speech-heavy, this step often matters more than chasing a slightly lower bitrate. People forgive a larger file more easily than they forgive unintelligible dialogue.
Keep the audio that serves the story
Don't strip audio just to brag about a smaller export. If the video is a lecture, a sales demo, or an interview, the voice is part of the asset. Preserve the channel that matters, drop the duplicates, and don't create a technically smaller file that's harder to understand than the original.
Ready-Made Presets for YouTube, Clients, Email, and Archive
Most editors don't need theory, they need a preset they can trust. The right export changes with the job, because a YouTube upload, a review cut, an email attachment, and an archive master are not asking for the same thing.
Pick the preset that matches the job
| Use Case | Resolution | Frame Rate | Codec | Quality Control | Target Size Hint |
|---|---|---|---|---|---|
| YouTube upload | 1080p | 30 fps | H.264 | VBR | Around 12 Mbps for SDR uploads |
| Client review | 1080p | Source or 30 fps | H.265 | RF 26 | Small enough for easy review sharing |
| Email share | 720p | 24 fps | H.264 | Lower delivery preset | Keep it light enough for mail attachment limits |
| Archive master | Source or full-resolution master | Source | ProRes or H.265 master | RF 18 | Preserve full audio and picture detail |
A YouTube upload doesn't need every pixel from a 4K timeline if the audience is mostly watching on phones and laptops. A client review file should be compact and easy to open, not precious. Email is the strictest environment, so the file has to be intentionally smaller, and that usually means dropping resolution before you start fighting with bitrate. An archive master is different, because preservation matters more than speed.
Use playback checks that expose bad exports early
Watch the file on a phone over cellular, a laptop on weaker Wi-Fi, and a TV or stick player if that's where the final audience will see it. Those are the places where bloated files or over-compressed exports become obvious fast. If the audio is the point, listen with headphones too, because speech cleanup mistakes show up there first.
The best preset is the one you can reuse without hesitation. That's why I prefer setting a few trusted export profiles instead of improvising every time a deadline lands.
Final Checklist and Quick Decision Tree
The fastest way to avoid a bad MOV export is to stop treating every file the same. A file that's going to a client portal needs a different treatment than an archival master, and an interview needs a different cleanup pass than a silent motion graphic.
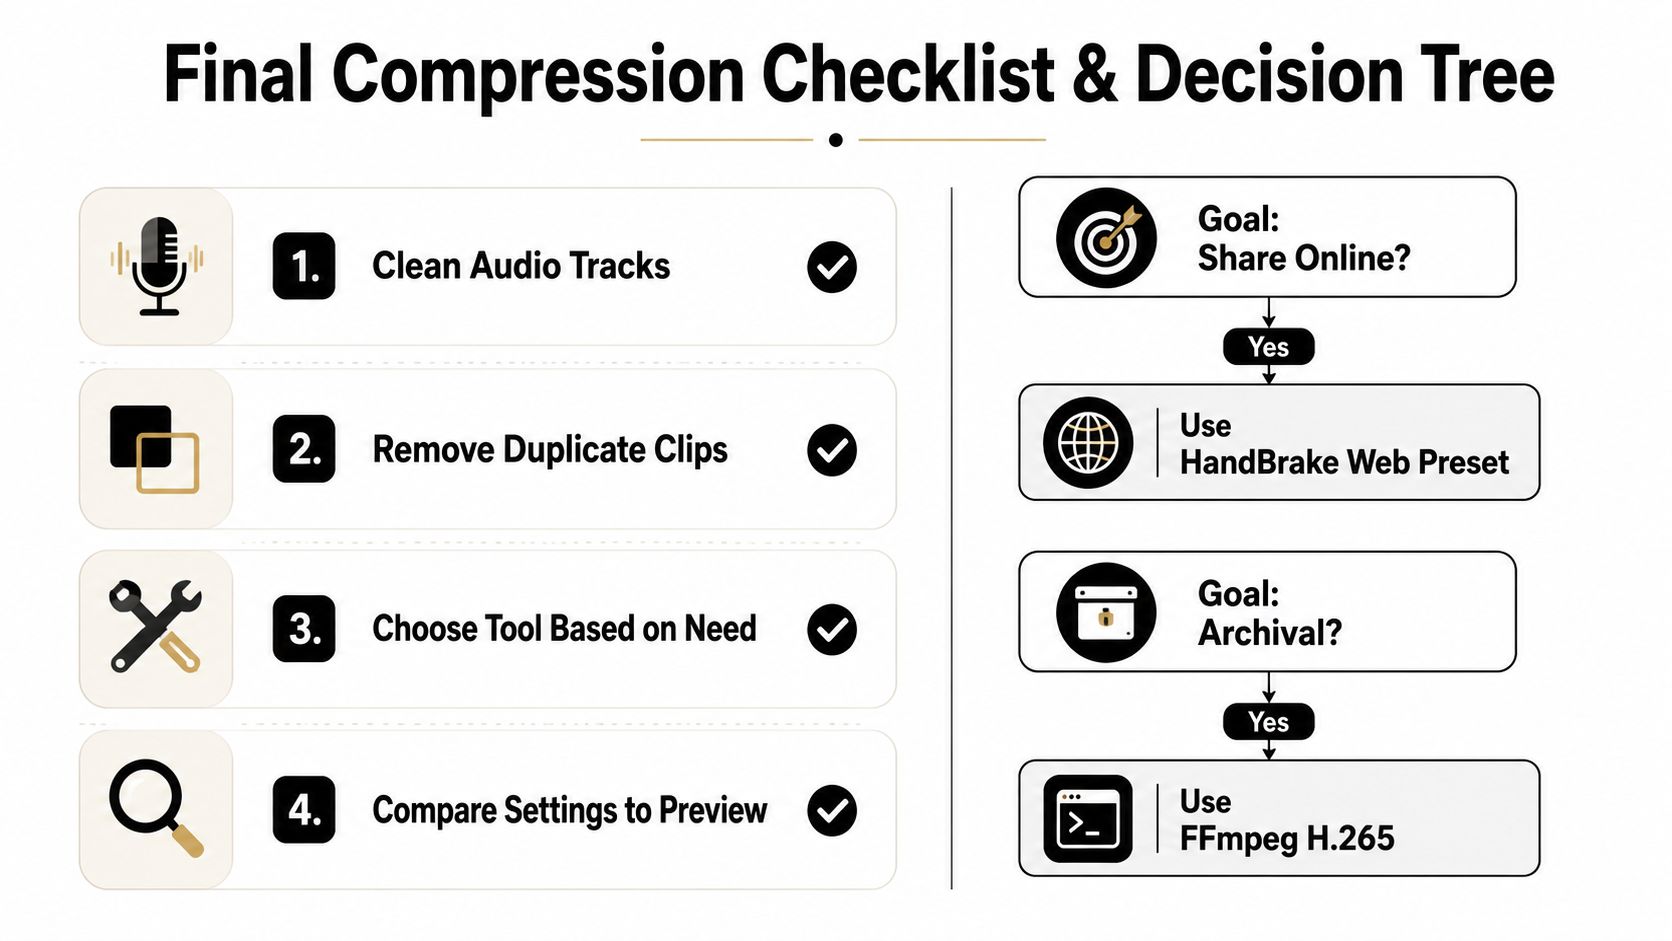
The four-step pre-compression checklist
- Clean audio tracks first. Fix noise, hum, hiss, and echo before you touch the video encode.
- Remove duplicate tracks. Keep the one narration or dialogue track that matters, drop anything redundant.
- Choose the delivery target. Email, web, client review, and archive all call for different compromises.
- Decide between remux and re-encode. If the codec is already efficient, keep the picture intact. If the file is too heavy, re-encode with a smarter target.
The short decision tree
If the goal is a quick online share, use a web-friendly preset and prioritize lower resolution before you start sacrificing speech quality. If the goal is archival, avoid needless re-encoding and protect the source as much as possible. If the file is interview-heavy, treat audio cleanup as part of compression, not an afterthought.
The three mistakes I see most often are easy to name. People re-encode already compressed footage, they ignore audio baggage, and they export for the wrong destination. Each one wastes time and usually produces a worse file than necessary.
Keep the original until the compressed version plays correctly on the device it was made for. Then save the preset, because the next MOV problem will look almost exactly like this one.
If you want cleaner speech before your next export, try ClearAudio on the noisy track first, then compress the finished file.