You hit record on your Mac, say a clean first line, then hear it on playback. Fan whine. Room echo. Keyboard clicks. Maybe traffic outside, maybe an air conditioner, maybe that low hiss you didn't notice until the waveform was already on screen.
That's the core problem with trying to remove background noise on Mac. There isn't one fix. There's a ladder of fixes. Some are instant and good enough for a Zoom call. Some are manual and fussy but effective. Some belong in a DAW. And some problems shouldn't be fixed in post at all because the better move is stopping the noise before you record.
The practical way to remove background noise Mac users deal with every day is to choose the lightest tool that solves the job. If you're recording a client call, use the built-in option. If you're cleaning an interview, use a proper editor. If you're shaping a podcast, work non-destructively. If your MacBook fan is screaming, fix the source first.
Table of Contents
- The Instant Fix Using Your Mac's Built-in Tools
- Free Manual Cleanup with Audacity
- Advanced Control with GarageBand and Logic Pro
- The Effortless AI Workflow with ClearAudio
- How to Prevent Noise Before You Hit Record
- FAQ Your Noise Removal Questions Answered
The Instant Fix Using Your Mac's Built-in Tools
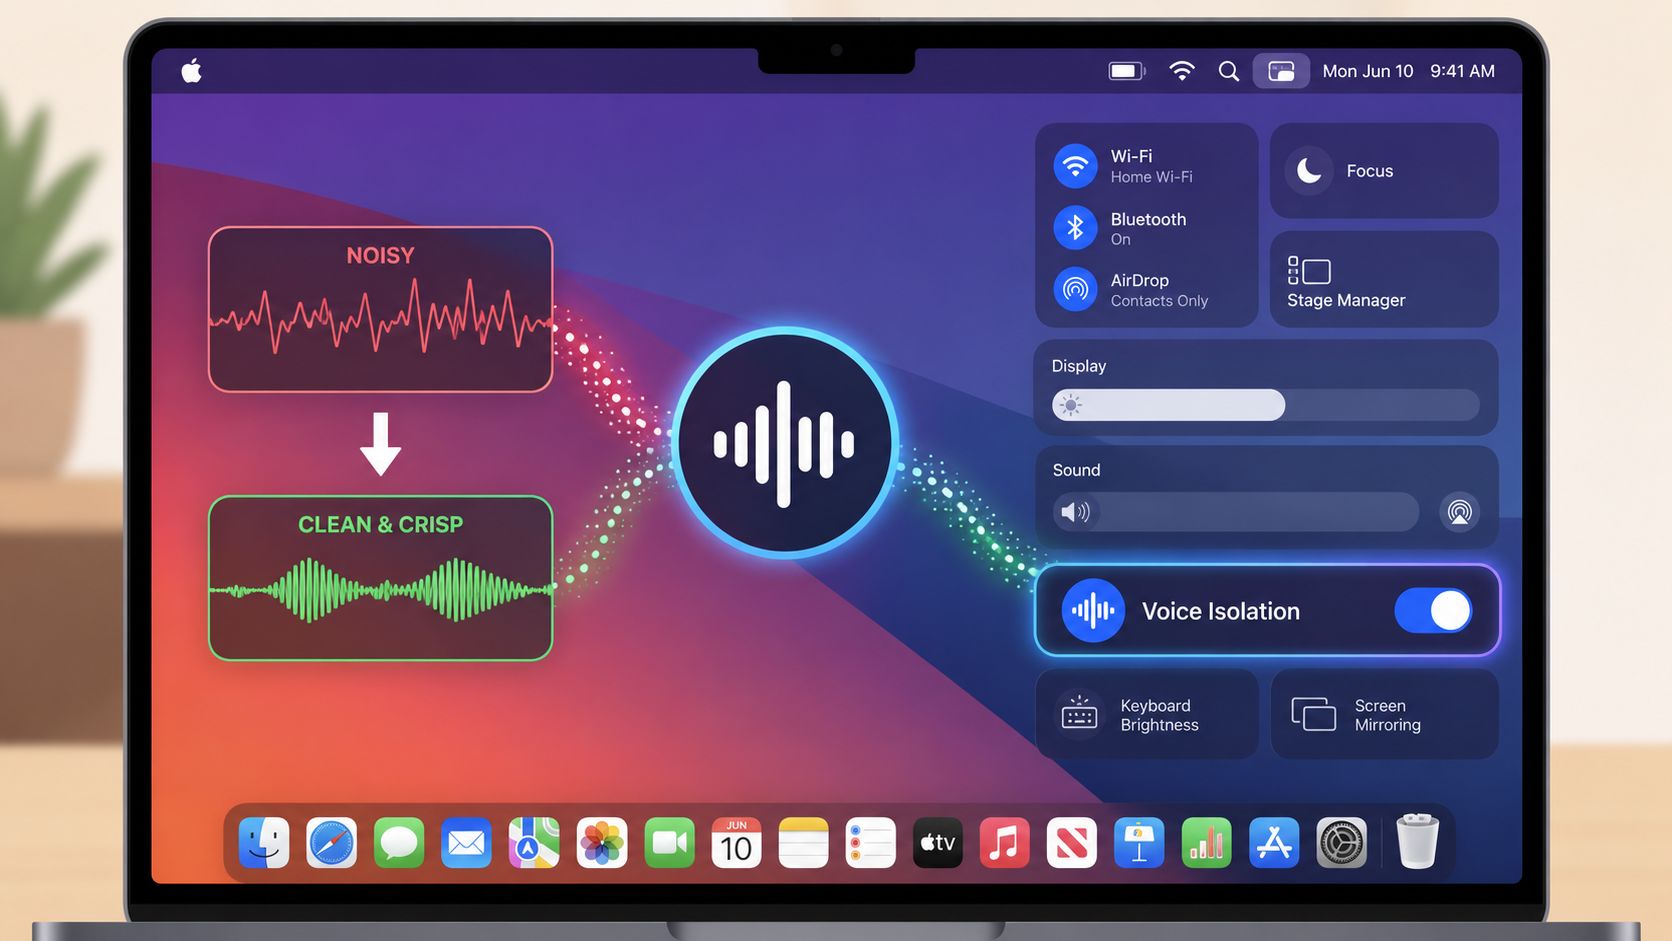
If you need a result in under a minute, start with Voice Isolation. This is the fastest way to remove background noise Mac users already have access to without installing anything extra. Apple introduced native Voice Isolation in macOS Monterey 12.0, officially released on October 24, 2021, and Apple says it can deliver 90%+ reduction in background noise in typical indoor environments, according to the MacOS discussion citing Apple's feature details.
Turn it on fast
On supported Macs, open Control Center from the menu bar while you're in an app that's using the microphone. Look for Mic Mode and switch to Voice Isolation. Depending on the app and macOS version, you may also see related audio controls through app-level microphone settings.
This works best for:
- Live calls like FaceTime and Zoom
- Quick voice recordings where speed matters more than perfect detail
- Everyday speech in a room with steady hum, light traffic, or HVAC noise
What it does well is simple. It pushes speech forward and suppresses the stuff behind it.
What it's good at and what it isn't
Voice Isolation is strongest when the noise is fairly steady. Air conditioning, computer hum, and general room wash are the kinds of problems it handles well. If you just need the meeting to sound cleaner, this is often enough.
Practical rule: Use Voice Isolation for live speech. Don't expect it to rescue a badly recorded interview after the fact.
There are limits. Apple's developer-facing documentation, summarized in the source above, notes the feature struggles more with irregular sounds. Sudden clatter, dish noise, knocks, and other non-stationary noises don't behave like a constant hum, so suppression is less consistent. It also isn't a replacement for post-production if you care about a natural, polished final track.
Best use cases
A quick way to decide:
| Situation | Best move |
|---|---|
| Zoom call in a noisy room | Turn on Voice Isolation |
| Quick webcam video | Use Voice Isolation and record |
| Podcast interview you'll publish | Record cleanly, then do post cleanup |
| Audio with fan whine plus room echo | Use built-in suppression only as a first pass |
For casual use, built-in tools are the best first rung on the ladder. They're fast, free, and already on the machine. For anything you plan to edit and publish, they're the starting point, not the finish line.
Free Manual Cleanup with Audacity
Audacity is still the classic free answer when you need more control than a toggle switch. It's slower, and it asks you to make decisions, but it can do a solid job on hiss, hum, room tone, and steady background wash if you're careful.
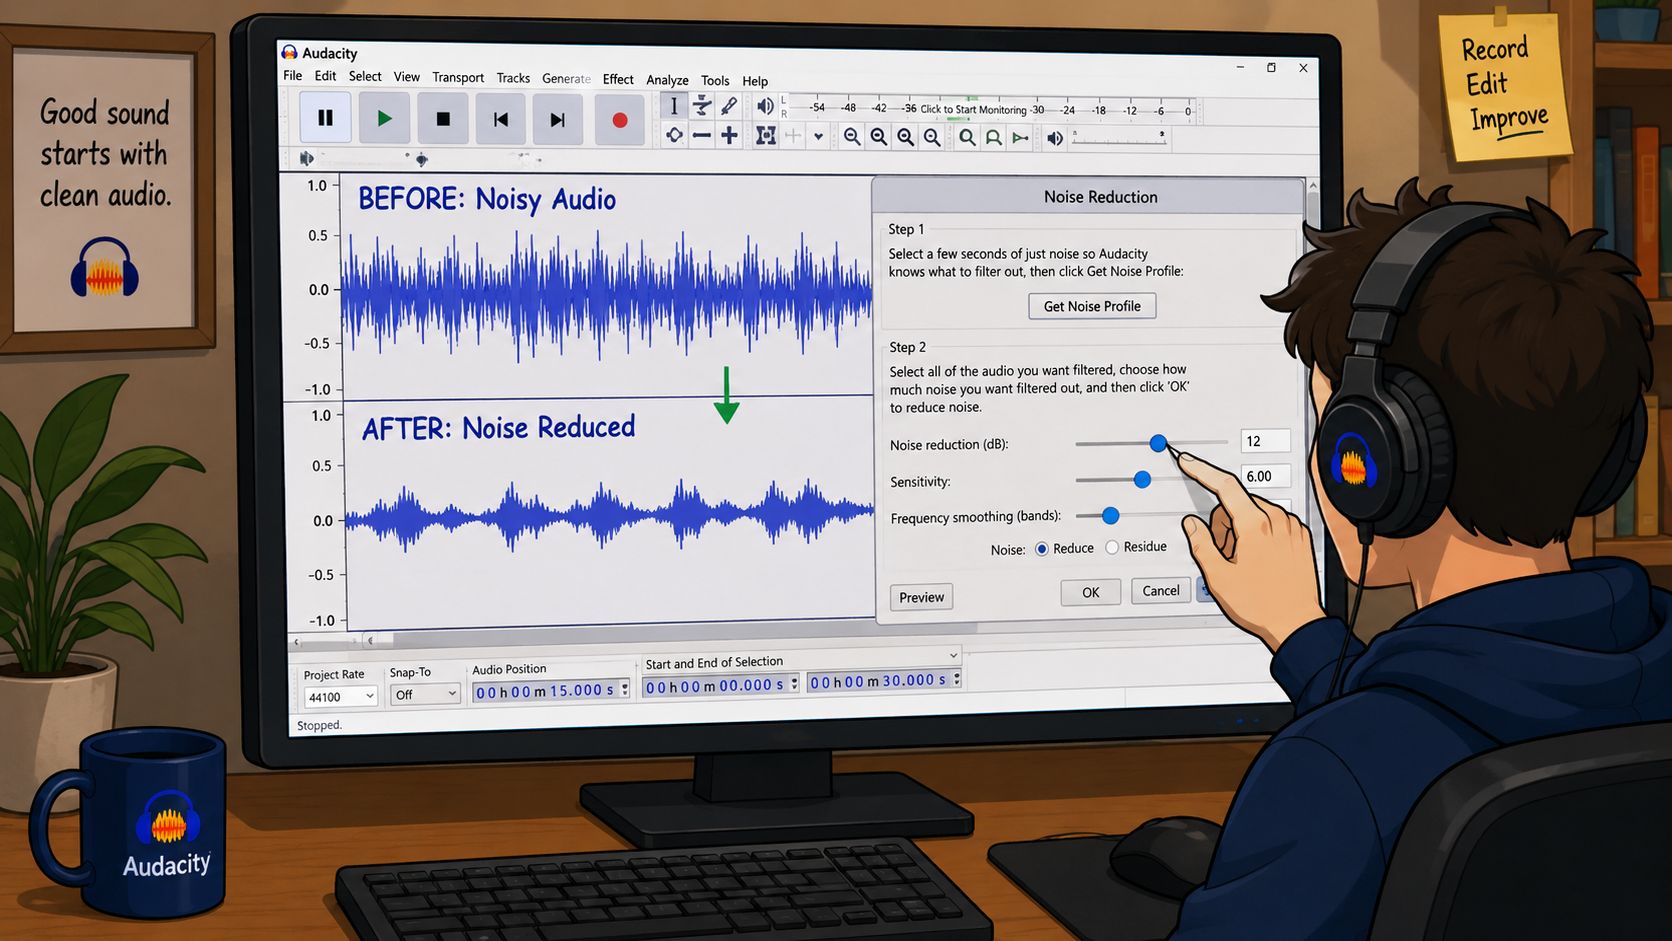
Audacity's Noise Reduction effect uses spectral subtraction. In practical terms, you feed it a sample of the unwanted noise, and it tries to subtract similar content from the rest of the recording. Benchmarks summarized by Make Tech Easier's Audacity noise removal guide show users can often reduce ambient noise by 15 to 20 dB with a 12 dB reduction threshold, but pushing it too hard often creates warbling artifacts. That risk is one reason manual cleanup rewards restraint.
Where Audacity still wins
Audacity is worth using when:
- You have a clear noise sample at the start or end of the clip
- The noise is steady rather than constantly changing
- You want free control over how aggressive the cleanup gets
It's less satisfying when the file has several problems at once. If there's fan noise, room echo, keyboard taps, and inconsistent mic distance, a single noise reduction pass won't magically fix all of it.
Good denoising usually means making the noise less distracting, not pretending it never existed.
A clean Audacity workflow
The workflow matters more than the menu click.
- Find room tone first. You need a short section that contains only the background noise. No breaths, no consonants, no chair movement.
- Get the noise profile. In Audacity, select that clean section, then open Noise Reduction and choose Get Noise Profile.
- Select the full clip. Reopen the effect and apply reduction to the entire recording.
- Start conservatively. A moderate setting usually sounds more natural than an aggressive one.
- Preview before applying. Audacity editing is destructive in this context, so don't treat the first pass like a draft you can ignore.
A simple working mindset helps:
- Reduce first, don't obliterate: If the voice starts sounding metallic, you've gone too far.
- Protect speech texture: S and T sounds often tell you first when the settings are getting too aggressive.
- Save a duplicate: Keep an untouched version before committing.
Here's a walkthrough if you want to see the process in action:
Settings that usually age well
Audacity exposes several controls, but the practical battle is always the same. More reduction means more artifacts. Less reduction means more leftover noise.
A useful pattern is:
- Moderate noise reduction
- Sensitivity that doesn't grab speech tails
- Light frequency smoothing so the result doesn't turn brittle
If your clip starts sounding underwater, stop. Back off the reduction, preview again, and accept a little residual noise. That trade is usually better than a swirly, overprocessed voice.
Advanced Control with GarageBand and Logic Pro
If Audacity is the free utility knife, GarageBand and Logic Pro are the better mixing desks. The big advantage isn't just sound quality. It's workflow. You can make changes non-destructively, listen in context, and adjust without permanently chewing up the file.
That matters when you're editing spoken-word audio. Podcast dialogue often doesn't need one big noise-removal move. It needs several smaller moves that each solve a narrower problem.
Use a noise gate for pauses
A noise gate closes when the input falls below a threshold. On a spoken track, that means it can mute or reduce room noise during pauses between sentences.
This works well for:
- Solo podcast tracks
- Voiceovers
- Dialogue recorded in a mostly stable environment
It does not remove noise under the words themselves. It cleans the gaps. That's still valuable because many amateur recordings sound worse in the pauses than in the talking.
A practical way to set a gate is to lower the threshold until the room drops away when the speaker stops, then back off slightly so the ends of words don't get chopped. If consonants vanish or breaths get guillotined, the threshold is too aggressive.
A gate should make silence feel cleaner. It shouldn't make the speaker sound edited.
Use EQ for targeted problems
EQ is the smarter tool when the noise lives in a predictable part of the spectrum. A low hum, a rumble, or a thin hiss often responds better to targeted EQ than to broad denoising.
Try this approach:
- For low rumble, use a high-pass filter so the voice keeps its body but the unnecessary sub-low content drops out.
- For narrow annoying tones, use a careful notch or dip rather than hacking huge chunks out of the vocal.
- For harsh hiss, use small top-end reductions instead of darkening the whole track.
GarageBand keeps this approachable. Logic Pro gives you more precision and better feedback. The principle is the same in both.
Why a DAW is often the sweet spot
For many creators, this is the best middle tier in the remove background noise Mac workflow. It takes more effort than Voice Isolation, but less guesswork than trying to force one destructive effect to solve every issue.
A DAW is the right choice when:
- You're editing a full episode rather than one quick clip
- You want reversible changes
- You need more finesse than global noise reduction can offer
The drawback is time. If you don't already know your way around gates, EQ, automation, and plugin chains, the learning curve is real. But once you understand those tools, you'll stop trying to solve every noise problem with one button.
The Effortless AI Workflow with ClearAudio
The modern alternative is simple. Instead of manually teaching the software what noise sounds like, you let AI separate what matters from what doesn't.
That's appealing for one reason above all. Manual denoising is fragile. In Audacity, success depends on a perfect 2 to 5 second noise profile, and Guru Software's Audacity guide notes that if that profile contains even 5% desired audio, fidelity can drop by 30 to 40%. That's exactly the sort of failure mode that makes people think they're bad at audio when the workflow itself is easy to break.
Why manual cleanup breaks down
Manual tools are fine when the problem is obvious and stable. They get tiring when the audio is mixed, messy, or inconsistent.
That includes files like:
- Interview audio with room tone changing between speakers
- Field recordings with speech plus environmental sound
- Video dialogue where handling noise and echo are both present
- Batch work where you don't want to repeat the same cleanup routine over and over
The old workflow asks you to analyze the problem first, then choose settings, then preview, then correct your correction. That's acceptable for hobby editing. It's a drag when turnaround matters.
When AI is the sensible choice
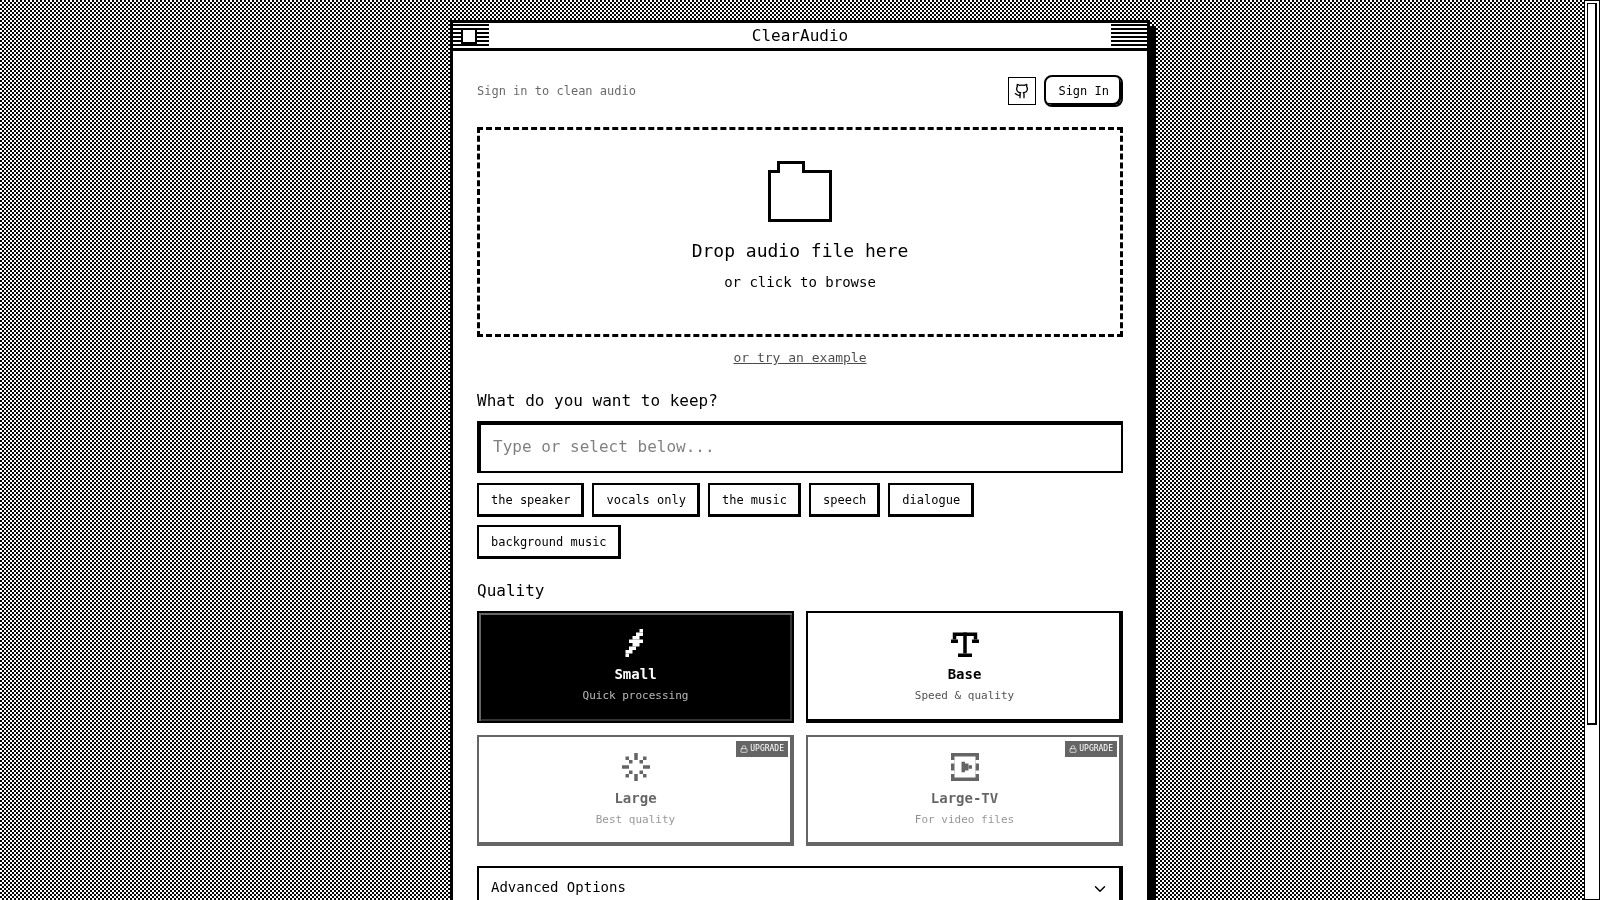
AI-based cleanup makes the most sense when your priority is speed with fewer manual decisions. You upload the file, choose what you want to keep, and let the system handle the separation and enhancement.
That's a better fit when:
- You're not an audio engineer
- You need publication-ready dialogue fast
- You're working with both audio and video files
- You care more about outcome than about tweaking knobs
There's still judgment involved. AI can't turn a terrible recording into a studio session. But it removes a lot of the technical friction that blocks good-enough editors from getting to good-enough results.
The best workflow is the one you'll actually use consistently. Fast cleanup beats abandoned perfection.
The practical hierarchy looks like this. Use built-in Mac tools for live speech. Use Audacity if you need free, manual control. Use GarageBand or Logic Pro if you want non-destructive finesse. Use AI when you want strong results without spending your afternoon tuning a noise print.
How to Prevent Noise Before You Hit Record
The best cleanup pass is the one you don't need. Most audio gets worse because the noise problem starts before the software ever sees a file.
A better room, better mic placement, and a quieter Mac will beat heroic post-production every time.
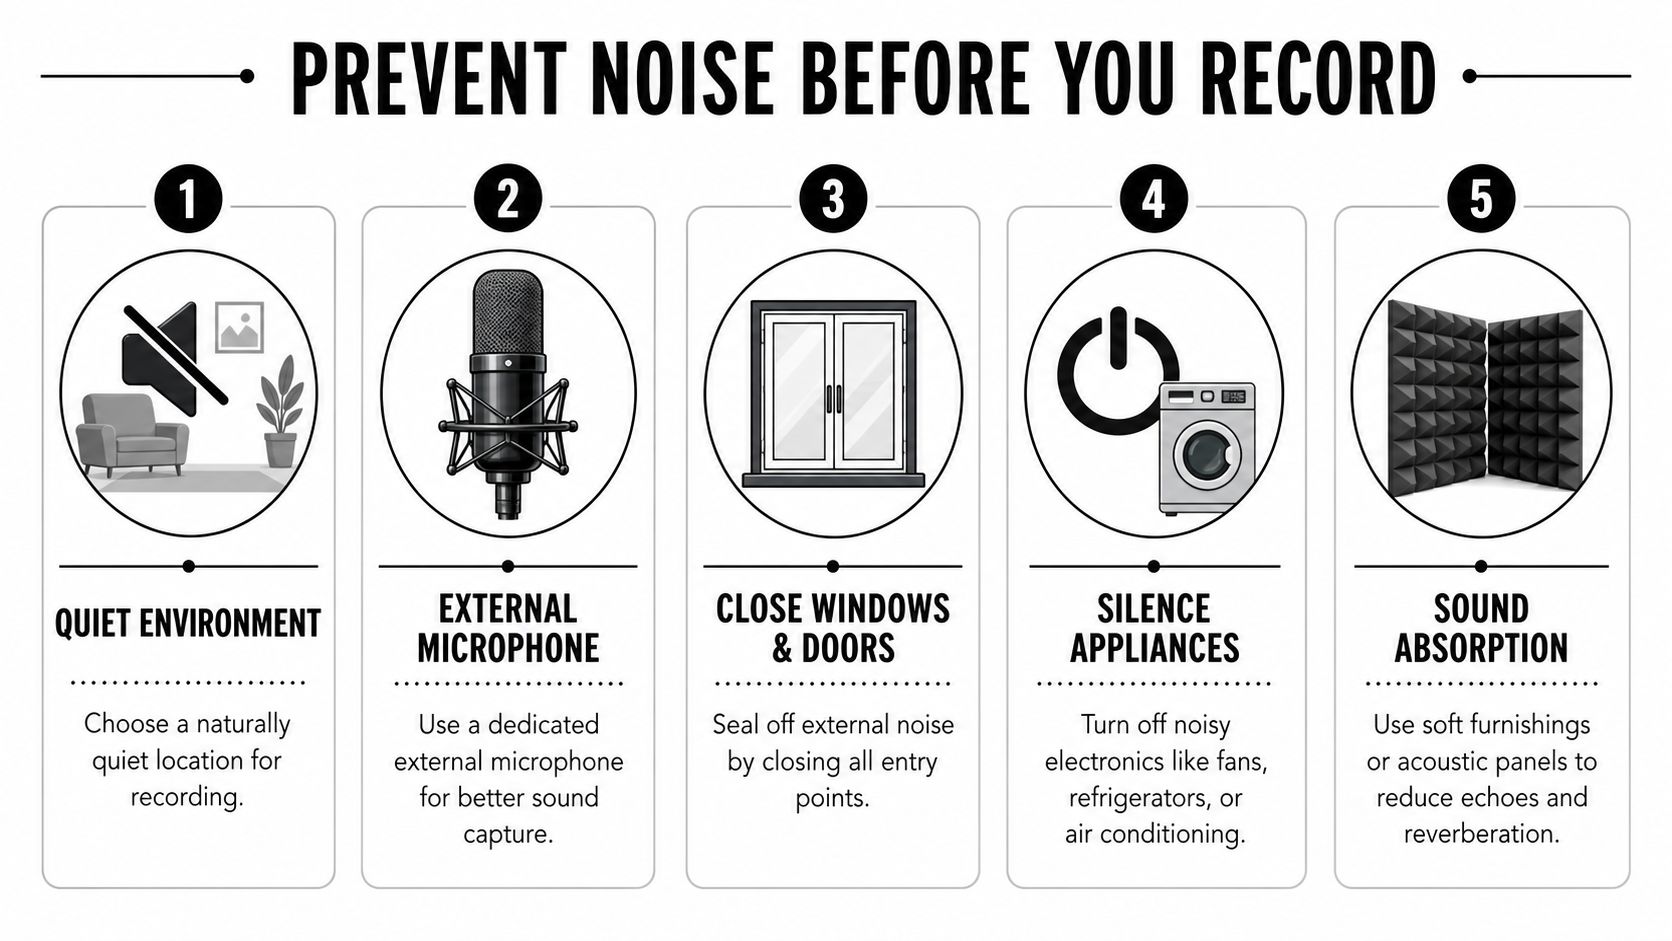
Fix the room before the waveform
You don't need a studio. You need fewer reflective surfaces and fewer interruptions.
A short prevention checklist:
- Pick the quietest room: Bedrooms, closets, and rooms with curtains, rugs, and bookshelves usually beat kitchens and empty offices.
- Get the mic closer: A closer mic raises the level of your voice relative to the room, which means you need less repair later.
- Turn off the obvious offenders: Air purifiers, desk fans, loud lights, and nearby appliances all print into the recording faster than people expect.
- Close windows and doors: Outside noise is easier to block than to remove later.
- Monitor with headphones: You'll catch hum, hiss, or room noise before recording a full take.
Room echo deserves special attention. Noise reduction tools don't really remove reverberation the same way they remove hiss. Once your voice is smeared across hard walls, cleanup gets harder and more artificial.
Stop Mac fan noise at the source
MacBook fan noise is one of the most common recording complaints because people assume the issue is heat alone. Often it isn't.
A discussion in the podcasting community notes that many recordings are spoiled by fan noise triggered by background activity rather than obvious overheating, and the source tied to that discussion says 70% of recorded fan noise on Macs stems from background processes causing fans to spin unnecessarily. It also points to practical fixes like fan control software and disconnecting power before recording in some setups, as covered in this podcasting thread about MacBook fan noise during recording.
Here's the practical version:
- Quit unused apps before you open your recorder or browser session.
- Pause sync-heavy tasks like cloud uploads or background exports.
- Restart the Mac if Activity Monitor shows stuck processes or you've been editing video all day.
- Record on battery if your setup allows it, since some users find plugged-in systems run hotter or ramp up differently.
- Move the mic away from the exhaust path if you must use the laptop mic area.
Clean audio starts with boring discipline. Close apps. Quiet the room. Check the mic position. Then record.
This part gets ignored because it isn't glamorous. But if the source is bad, every tool later in the chain is doing damage control.
FAQ Your Noise Removal Questions Answered
Some problems don't fit neatly into one tool. These are the questions that usually come up after the first cleanup attempt.
Can I remove background noise from video on a Mac
Yes. If the video editor you're using has audio tools, start there. In simple projects, app-level noise reduction or dialogue enhancement may be enough. For more control, extract the audio, clean it in Audacity, GarageBand, or Logic Pro, then bring it back into the edit.
If the video matters as much as the sound, don't judge the audio in solo. Listen with picture. Some light residual room tone is often less distracting than aggressive cleanup that makes speech sound processed.
Can I remove another person's voice
Sometimes, but it's much harder than removing hum, hiss, or fan noise. Broadband noise is one thing. Competing speech is another. If two voices overlap heavily, any tool has to decide which parts belong to whom, and mistakes are common.
If one voice is clearly dominant and the other is faint or distant, modern separation tools can help. If both people are speaking at once into the same mic, expectations need to stay realistic.
Why does my audio sound overprocessed on Mac
The usual cause is too much reduction. That might happen in post, or it might happen before the file even reaches your editor.
Apple's noise handling has confused users for years. An Apple Stack Exchange discussion about disabling ambient noise reduction in macOS Catalina describes how ambient noise reduction became a default behavior in some versions of macOS with no simple GUI toggle, which creates problems for people who want authentic room tone or more natural audio. If your recording feels thin, swishy, or unnaturally clamped down, system-level processing may be part of the problem.
What's the best method for most people
Use the smallest hammer that works.
A quick chooser:
- Need a cleaner live call right now: Use Voice Isolation.
- Need a free fix for one recording: Use Audacity carefully.
- Editing a podcast or voiceover regularly: Use GarageBand or Logic Pro.
- Need fast, polished results without deep manual work: Use an AI cleanup workflow.
If you want one principle to keep, it's this. Better source audio beats stronger repair. The more noise you prevent before recording, the less you'll need to remove background noise on Mac afterward.
If you want the fastest path from noisy recording to publishable dialogue, try ClearAudio. You can drag in audio or video, choose what to keep, and clean up noise, hum, hiss, and echo without building an editing chain by hand. It's a practical option when you want strong results in minutes instead of spending your time tuning denoise settings.