You've finished the edit, the interview sounds clear enough in headphones, and then the air conditioner, street traffic, laptop fan, or room wash becomes obvious on export. The fastest way to remove background noise in Premiere Pro isn't always the most aggressive one. The right choice depends on the noise itself, how much dialogue you're processing, and whether the final delivery can tolerate a little remaining ambience better than it can tolerate robotic speech.
Premiere Pro has supported integrated dialogue cleanup across multiple product generations. Adobe documented the Essential Sound panel's Reduce Noise and Reduce Reverb controls on October 15, 2018, then expanded its guidance with the DeNoise effect in an article dated January 12, 2026, where the Reduction control can be adjusted down to -10 dB (Adobe's background-noise removal guide). That history reflects a practical shift from more manual repair toward cleanup that editors can apply directly inside a mainstream timeline.
Table of Contents
- Quick Audio Cleanup with Essential Sound Panel
- Choosing Between Built-in Noise Reduction Tools
- Mastering the DeNoise Effect for Precise Control
- Handling Complex Multi-Track Scenarios
- Troubleshooting Common Noise Reduction Problems
- Building Your Noise Reduction Decision Framework
Quick Audio Cleanup with Essential Sound Panel
If you've got a talking-head clip with air-conditioning hum, mild room tone, or distant background chatter, start with Essential Sound. It's the quickest way to get a usable result without building an effects chain for every clip.
Select the dialogue clip in the timeline, open Window > Essential Sound, and choose Dialogue. Premiere then exposes dialogue-focused controls, including Reduce Noise and Reduce Reverb. Tagging the clip correctly matters because the panel changes its available processing based on the audio category.
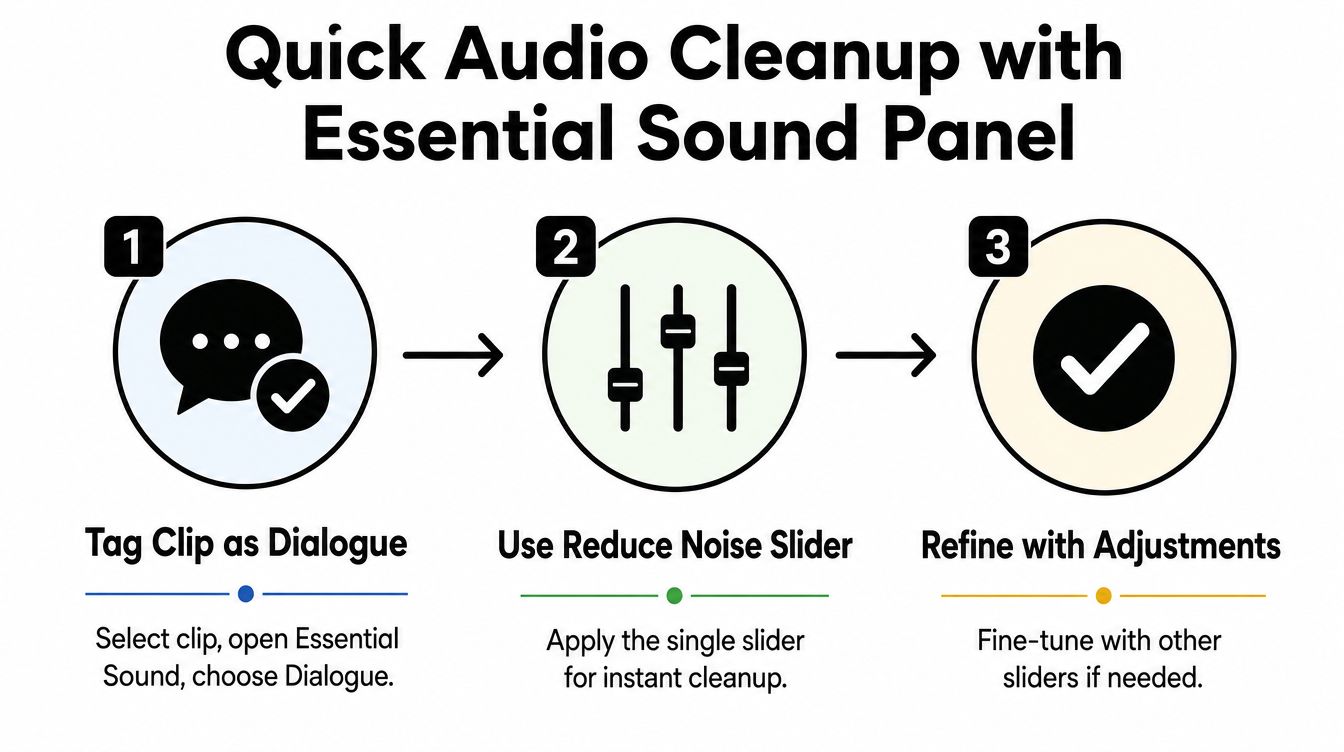
Match the control to the problem
Use Reduce Noise for steady, non-musical sounds that sit behind the speaker. Air-conditioning, computer fans, and consistent room hiss are good candidates. Light background chatter can improve too, although overlapping voices are harder because the unwanted speech occupies the same frequency and timing range as the main speaker.
Use Reduce Reverb when the recording sounds like it was captured in a bare room, hallway, or reflective office. Reverb isn't the same as noise. Noise reduction targets unwanted sound that remains present underneath the recording, while reverb reduction tries to shorten or suppress reflections around the dialogue. Applying both can help, but using both heavily often makes the voice thin or phasey.
Adobe's documented workflow provides a useful reference point, with dialogue repair controls designed for noisy or reverberant clips (Adobe's Essential Sound instructions). Start with the default or a modest slider position, then bypass the effect while the speaker is talking. The useful comparison isn't the silent gap. It's whether consonants, breaths, and word endings remain natural.
Practical rule: If the background disappears but the speaker starts sounding metallic, back off the slider immediately.
For a short social edit, the default repair can be enough. For a podcast-style interview, listen through several sentences and check that the noise floor doesn't jump whenever the speaker pauses. If you need broader guidance on preparing recordings before editing, this resource on crystal-clear audio for podcasts is a useful companion.
Essential Sound works well when speed matters more than granular control. It's also easy to copy a consistent treatment across similar clips, but don't assume one setting fits every microphone. A lavalier recorded under a shirt, a boom mic in a room, and a phone microphone in a kitchen will usually need different decisions.
Choosing Between Built-in Noise Reduction Tools
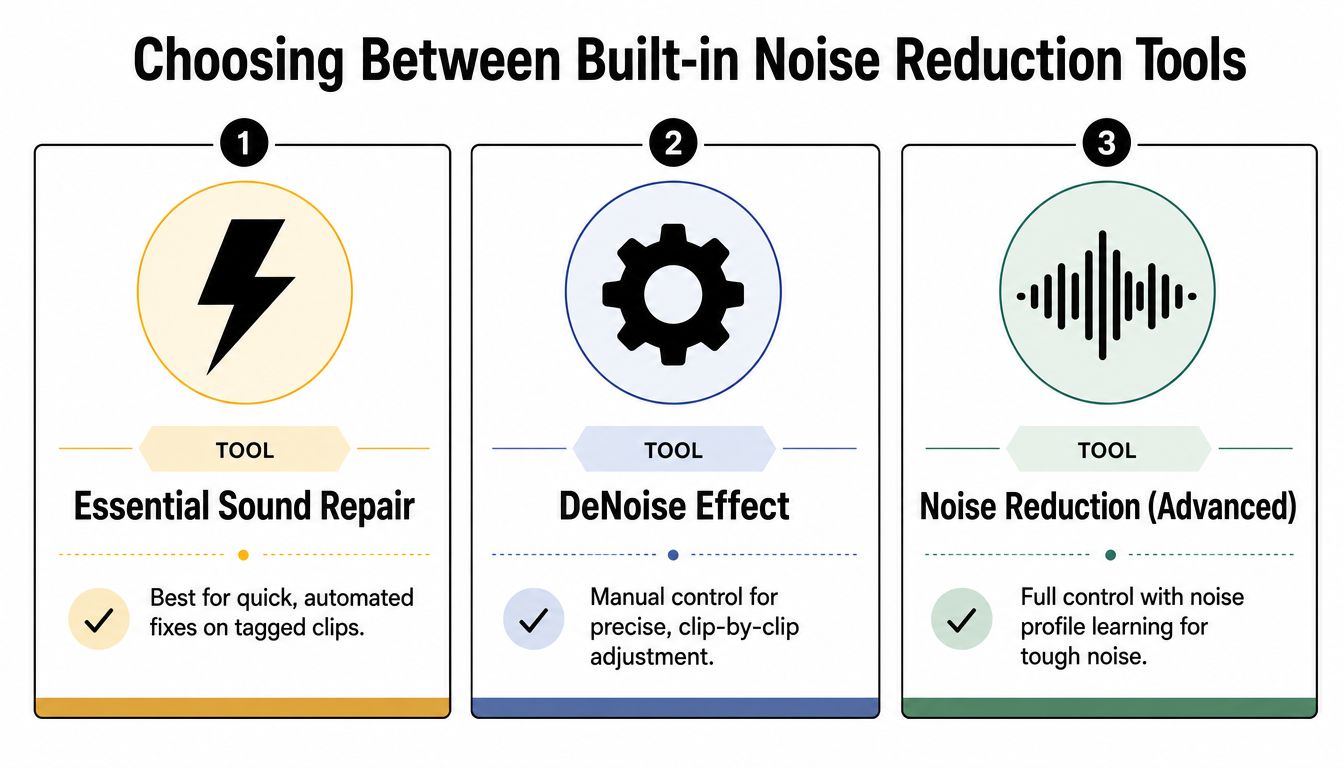
Premiere's cleanup options overlap, but they don't offer the same balance of speed, control, and repeatability. Treat them as different levels of intervention rather than interchangeable buttons.
Essential Sound for speed
Essential Sound's dialogue repair is the right first pass when you're cleaning a small number of clips for a quick social cut, interview highlight, or internal video. Tag the clip as Dialogue, adjust Reduce Noise, and evaluate the voice in context. The panel keeps the workflow approachable, but it hides some of the decisions an experienced mixer may want to make manually.
It's especially useful when the problem is broad and predictable, such as steady room hiss or mild fan noise. It's less convincing when the noise changes throughout the clip, overlaps heavily with speech, or requires different treatment during pauses and active dialogue.
DeNoise for deliberate adjustment
The standalone DeNoise effect belongs in the workflow when you need a visible, clip-level control. Adobe's guide places it under Audio Effects > Noise Reduction/Restoration > DeNoise, with the Reduction control managed from Effect Controls (Adobe's DeNoise workflow).
This approach takes more listening because you're responsible for finding the point where noise reduction helps without damaging the voice. That extra control pays off for client interviews, documentary dialogue, and any delivery where intelligibility and natural consonants matter more than processing speed.
Advanced repair for difficult material
The advanced noise-reduction path is more appropriate when you need to work from a noise profile or deal with a problem that doesn't respond cleanly to a simple slider. Adobe's advanced guidance covers controls beyond the basic panel repair, while also reflecting a limitation of Premiere's documentation. It focuses mainly on single-clip repair, not the difficult production questions around overlapping speakers, music bleed, and large batches (Adobe's advanced noise and reverberation reduction guidance).
Older Premiere versions may also expose Adaptive Noise Reduction, but it shouldn't be treated as the default choice for every current project. Tool names and available paths have changed over time, so confirm which effect your installed version provides before building a tutorial or template around it.
A 2025 survey of more than 650 audio professionals found that more than half use noise-reduction tools daily, another quarter use them weekly, and 90.1% reported using iZotope RX (CreativeLive's coverage of noise reduction in Premiere). The broader lesson is simple. Denoising is routine, but routine doesn't mean automatic. The more important the delivery, the more carefully you should choose between convenience and control.
Mastering the DeNoise Effect for Precise Control
Apply DeNoise when the Essential Sound panel leaves too much noise behind or changes the character of the speaker. In the Effects panel, open Audio Effects > Noise Reduction/Restoration, locate DeNoise, and drag it onto the selected clip. Open Effect Controls, find the effect, and use its Reduction control while previewing the actual dialogue.
Adobe's documented range starts at 0 dB and allows reduction down to about -10 dB (Adobe's Premiere noise-removal guide). Treat that as a working range, not a target. A setting that removes a steady fan from one recording may carve too much presence from another.
Find the point before artifacts appear
Begin at 0 dB, then move gradually toward stronger reduction. Stop as soon as the background becomes less distracting while the words still sound like they came from the original microphone. The most revealing sounds are usually short consonants, especially s, t, k, and p. If these begin to smear, click, or sound synthetic, the effect is doing too much.
A speech-enhancement review found the practical trade-off clearly. Stronger suppression can improve intelligibility while also increasing speech distortion (Adobe's background-noise removal resource). In a real edit, a little consistent room tone is often less damaging than a voice with watery edges.
Adjust by noise type
For steady air conditioning or computer-fan noise, moderate DeNoise is a reasonable first move. For low rumble from handling or wind, pair careful denoising with a high-pass or low-cut approach, but monitor the speaker's lower register so you don't remove body from the voice. For intermittent clicks, bumps, or changing traffic, DeNoise alone may not be the correct tool because the noise doesn't remain stable enough for uniform suppression.
Preview in three ways:
- Solo the dialogue track to hear artifacts without music masking them.
- Play the full mix because a small artifact may become unnoticeable once music and ambience return.
- Check different playback systems, including headphones and ordinary speakers, since excessive high-frequency removal can be missed on one system and obvious on another.
Use keyframes when the recording changes. A clip may need less processing while the speaker talks and a different treatment during pauses, especially if the background changes between locations. Don't push the control just because the noise is still audible in a silent gap. Dialogue cleanup is judged during speech, where distortion is most costly.
Handling Complex Multi-Track Scenarios
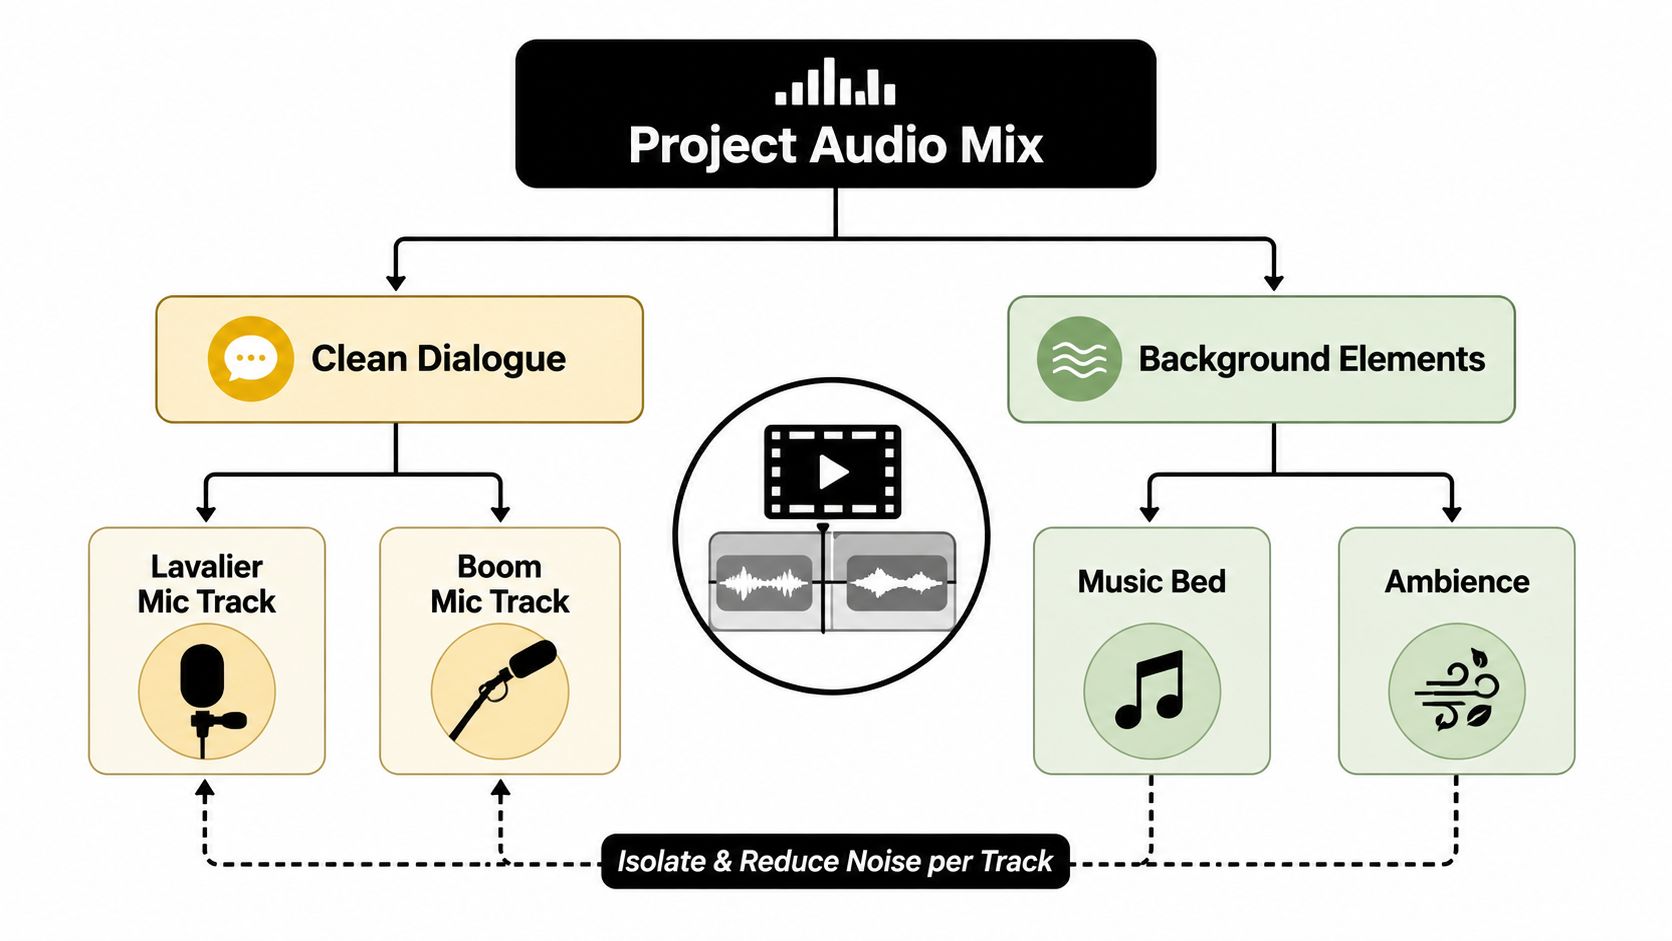
A lavalier track with music bleed, a boom microphone with room reflections, and two people speaking over each other aren't one noise problem. They're separate sources competing for the same mix, and Premiere's single-clip repair tools can't always distinguish them cleanly.
Separate before you suppress
Keep lav, boom, music, and ambience on clearly labeled tracks. Repair the dialogue sources independently before balancing the music bed. If you apply one aggressive effect to a mixed clip, the processor may treat music harmonics or another speaker's syllables as noise.
For interviews, choose the strongest microphone source for each section rather than forcing one track to carry the entire conversation. When speakers overlap, isolation becomes a source-separation problem, not a simple hiss-removal task. Cut or duck the supporting track where possible, then use denoising only on the remaining dialogue.
Long-form projects benefit from consistency. Build a small set of repeatable treatments for similar lavalier recordings, boom recordings, and room-tone sections. Apply effects to clips or tracks in a controlled way, then audition transitions between speakers. A clean clip next to an untreated clip can sound worse than two moderately processed clips with a consistent noise floor.
Production reality: Premiere can rescue a usable recording, but it can't recreate speech that the microphone never captured clearly.
Know when to leave Premiere
Stay inside Premiere for quick social edits, straightforward interviews, and stable noise that responds to moderate DeNoise or Essential Sound repair. Round-trip to a specialized tool when you're dealing with severe wind, changing interference, overlapping speakers, clipped dialogue, or a large set of clips that needs detailed spectral decisions.
The choice also depends on project stage. Early in an edit, fast panel repair helps you judge story and pacing. Before a broadcast-style or client-facing export, more controlled restoration may justify the additional pass. If you're planning a recording space rather than repairing one, this How to Contact studio guide offers useful context on setup decisions that reduce cleanup work later.
For browser-based source separation, ClearAudio can process uploaded audio or video while letting you specify what to keep, such as speech, dialogue, vocals, or music. That makes it a possible intermediate step when Premiere's built-in effects don't isolate the desired element cleanly, though you should still bring the processed result back into the timeline and compare it with the original.
Troubleshooting Common Noise Reduction Problems
Noise reduction fails in recognizable ways. The voice becomes robotic, the background level changes between cuts, high frequencies disappear, or the noise remains because it shares too much information with the dialogue.
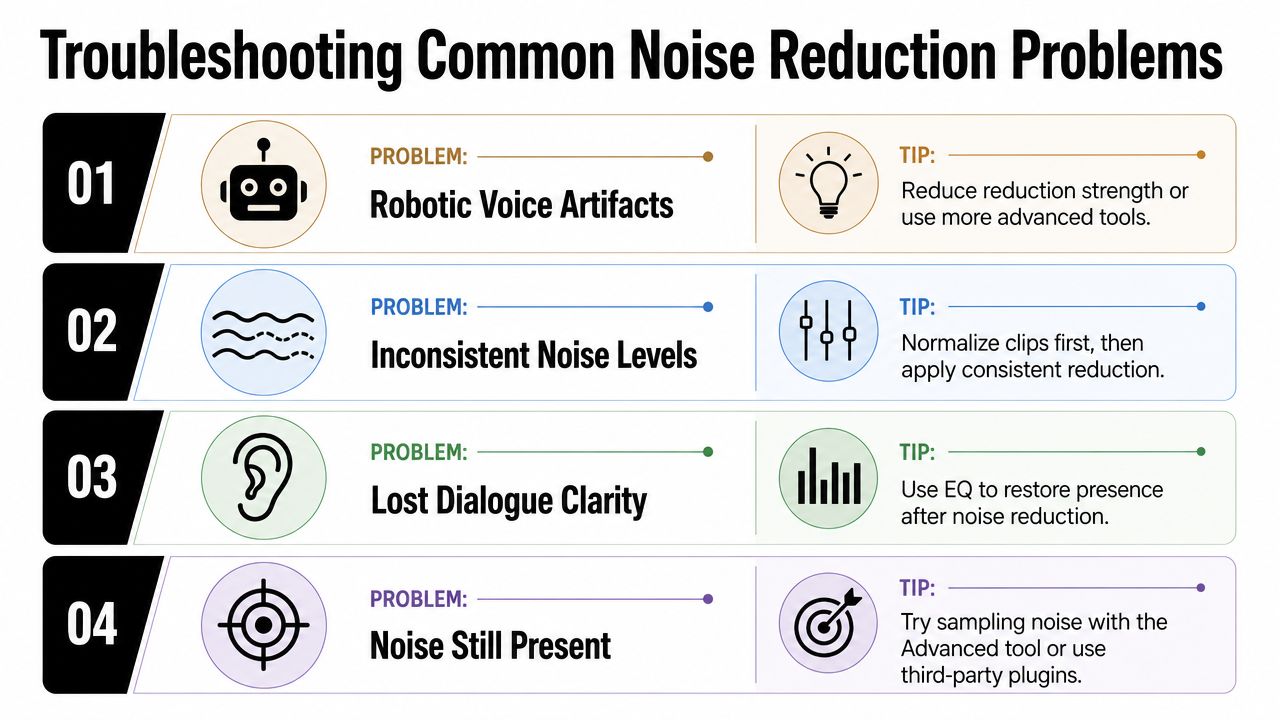
Robotic or underwater speech
This usually means the reduction is too strong, the effect is acting on a difficult noise profile, or the source contains too little clean speech for the processor to separate confidently. Reduce the amount first, then compare the untreated and treated clip at the same listening level. If the voice still warbles, remove the effect and try a different source microphone or a specialized restoration tool.
Avoid judging only from the noise between words. Processors can make silence impressively clean while damaging the speech that matters.
Uneven noise between clips
Match clips by ear before chasing exact meter readings. A normalized clip can still have a different room character from another recording, so apply a consistent treatment and then automate clip gain or track levels to smooth the transitions. Room tone can also help bridge edits when cutting between locations.
Lost clarity after cleanup
Noise reduction can soften the upper presence that helps listeners understand speech. Use a restrained EQ adjustment after denoising, focusing on restoring intelligibility rather than adding brightness indiscriminately. If sibilance becomes harsh, don't compensate by boosting more high end. Return to a lighter reduction setting.
Noise that won't disappear
Changing noise often needs a different strategy from steady hum. Try the advanced effect path when you can capture or define a representative noise profile. For wind, mechanical bursts, overlapping voices, or severe interference, Premiere may not have enough separation information to produce a natural result.
Listen for the voice first. The cleanest waveform isn't automatically the most intelligible recording.
Building Your Noise Reduction Decision Framework
Choose the workflow by answering four questions: What kind of noise is present? How many clips need treatment? How important is natural speech? Can the deadline support a round-trip?
For steady hum, fan noise, or light room hiss on a short edit, begin with Essential Sound. Tag the clip as Dialogue, use Reduce Noise, and stop when the background is less distracting without changing the speaker's identity. This is the sensible route for quick social content and rough editorial passes.
For a single interview or a small group of clips, use DeNoise when the panel doesn't give you enough control. Adjust from the documented 0 dB starting point toward a moderate setting, preview consonants, and check both soloed dialogue and the final mix. If one section changes character, use clip-level adjustments or keyframes rather than forcing one setting across the entire recording.
For a documentary, course, or client project with many microphones, organize the tracks first. Group clips by source, create consistent treatments, and listen to every speaker transition. The aim is not identical processing. It's a coherent noise floor and natural dialogue from scene to scene.
Use this final check before export
- Dialogue intelligibility: Can you understand every important phrase at normal listening volume?
- Artifact control: Do the sibilants, plosives, breaths, and word endings still sound natural?
- Mix context: Does the repair remain convincing once music, ambience, and effects return?
- Transition consistency: Do cuts between speakers or locations reveal sudden changes in noise?
- Source preservation: Have you kept the original audio muted or duplicated so you can revise the treatment?
Exporting to a specialized tool makes sense when the problem is changing, severe, or intertwined with other speakers and music. Staying in Premiere makes sense when the recording is usable and the cleanup can remain moderate. If the source is badly compromised, no slider can replace a better take, but a disciplined decision framework can keep you from making the damaged recording sound worse.
If you need another cleanup path beyond Premiere, visit ClearAudio to upload audio or video, specify whether you want to keep speech, dialogue, vocals, or music, and generate a processed file for comparison. Bring the result back into Premiere, audition it against the original, and choose the version that preserves the most natural voice for your delivery.