You finish a shoot, copy the files over, and the edit looks fine until you put on headphones. Then the room hits you back, HVAC in the low end, traffic bleeding through the window, maybe a little wind on the lav, and now the dialogue that felt solid on set sounds like a compromise.
That's the moment most creators learn that remove noise from video audio is not just a cleanup task, it's a judgment call. Push too little, and the noise still distracts. Push too hard, and the voice starts to sound robotic, watery, or hollow, which is often worse than leaving some room tone in place.
Table of Contents
- Why Video Audio Cleanup Is Harder Than It Looks
- Preparing Your Files and Diagnosing the Noise
- Choosing the Right Noise Removal Method
- Running an AI Cleanup Workflow With ClearAudio
- Balancing Intelligibility and Natural Voice Quality
- Export Settings and Quality Assurance Checks
Why Video Audio Cleanup Is Harder Than It Looks
A clean-looking video can hide ugly sound. A talking-head shot in a bright living room may feel simple to rescue until the fan in the corner, the reflections off the walls, and the fridge compressor all stack together under speech. Outdoor interviews are even less forgiving, because wind and traffic don't sit still long enough for a blunt tool to remove them cleanly.
The technical problem is that speech and noise overlap. A noise reducer can't always separate a voice from the room without shaving off the little cues that make consonants feel crisp and natural. That tension is why the field matured into audio-visual speech enhancement and separation, because video can contribute mouth-movement cues that help identify the target speaker in noise, as described in an IEEE overview and later work from the IEEE Signal Processing Society on audio-visual speech enhancement.
What usually goes wrong
Practical rule: if the cleanup sounds impressive in solo playback but distracts in context, it's overdone.
Aggressive denoising often removes a little too much texture from the voice. The result can be phasing, musical noise, or that watery artifact creators hear and immediately distrust, even if they can't name it. Research on speech enhancement has made the same point from the listener side, processing can improve intelligibility while still reducing perceived naturalness if it's pushed past the recording's limit, which is why the University at Buffalo multimodal denoising report matters for editors working with real dialogue.
Different recordings also tolerate different amounts of cleanup. A close-mic'd podcast take usually gives you more room to work than a boom mic pulled back in a reverberant hall. That's why one-size-fits-all presets fail; the noise profile, the mic distance, and the room all decide how far you can go before the voice starts to break apart.
Preparing Your Files and Diagnosing the Noise
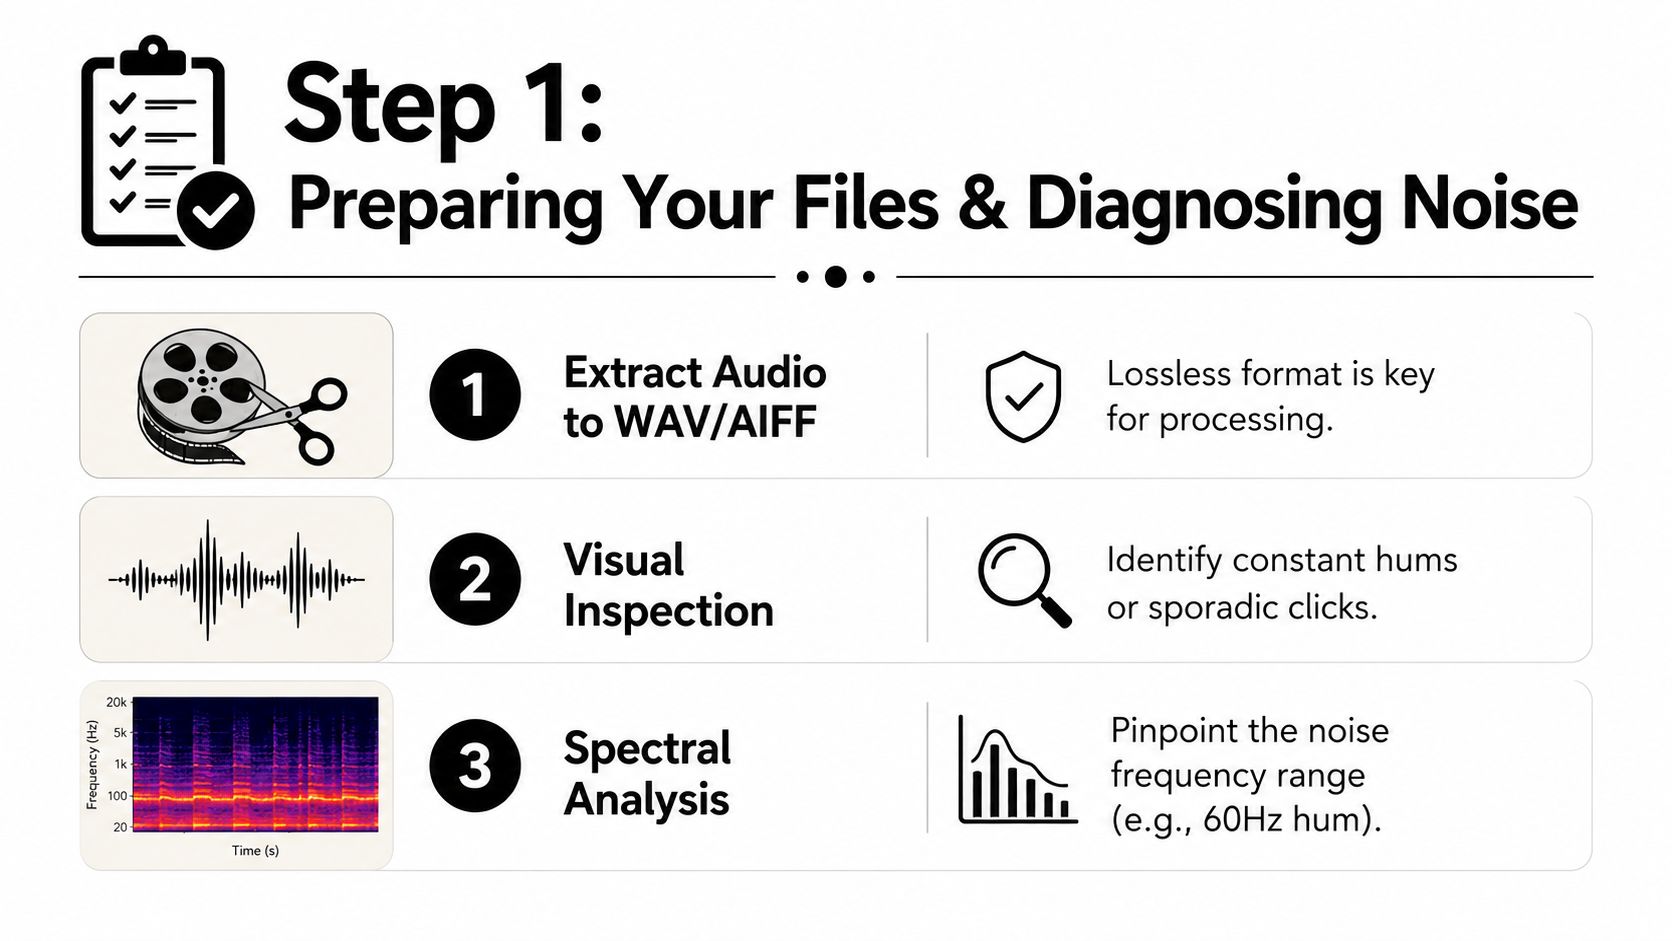
A voice can sound clean in the editor and fall apart after export. Start by pulling the audio from the video in a lossless format, preferably WAV or AIFF at the original sample rate. Avoid serious cleanup on compressed audio when possible. Each lossy encode makes artifacts more obvious and gives denoising less clean material to work with. This first export becomes the stable reference for processing, spectral repairs, and later A/B checks.
Before touching a plugin, listen to the room tone before the first spoken line. Keep the monitoring level realistic, then identify the actual problem. Broadband hiss, tonal hum, and sharp transients such as clicks or bumps require different decisions. Misdiagnosis is often what makes a voice sound worse, not the tool itself.
The Picovoice noise-suppression benchmark framework shows why controlled comparisons matter. It evaluates 16 kHz monaural speech across multiple SNR conditions, uses the Microsoft Deep Noise Suppression Challenge test set, and includes measures such as STOI, fwSegSNR, CSII, and fAI. Raw SNR can show that noise dropped, but it cannot fully describe whether speech remains intelligible or whether the voice has become watery and processed.
Listen before you process
Listen for the overlap point. If the noise occupies the same frequencies as the voice, use lighter, more selective cleanup.
I diagnose a clip in three passes. First, determine whether the noise is constant or intermittent. Next, classify it as broadband, tonal, or transient. Then check whether it stays beneath the speech or cuts through it.
That last distinction sets the processing limit. Steady room tone during pauses is usually easier to reduce than a buzz sitting beneath vowels. Removing the room bed may leave consonants intact, while suppressing noise tangled with speech can strip vocal texture and introduce robotic or watery artifacts.
A close-mic'd podcast recording generally tolerates more processing than a distant boom recording in a reverberant hall. Record the mic type, speaker distance, and frequency area where the noise is strongest. For layered problems, such as low hum, wind, and room echo together, fix the layer that most harms intelligibility first. Leaving a faint remainder can sound more natural than removing everything and damaging the voice.
Choosing the Right Noise Removal Method
Not every noisy clip wants the same fix. A constant HVAC rumble calls for something different from a ringing phone in the middle of a sentence, and a noisy café bed is a different problem again. The fastest way to ruin a take is to use a heavy-handed process on a problem that only needed a narrow correction.
If you want a practical baseline for workflow, the best practices for video sound from Wideo are worth a look because they frame audio as part of the whole edit, not an afterthought. That's the right mindset here, since the method you choose should match both the noise type and the delivery target.
Match the method to the problem
AI cleanup works well when the background is messy and layered, especially when you don't have a clean noise print or the noise changes over time. Spectral editing is more surgical, so it shines when the issue is specific, like a hum, whistle, or short burst of interference. Gates and filters are blunt but fast, which makes them useful for simple gaps between phrases, but they often fall apart when noise sits under the dialogue.
| Method | Best For | Skill Level | Speed | Artifact Risk | Limitations |
|---|---|---|---|---|---|
| AI cleanup | Layered noise, wind, mixed room problems | Low to medium | Fast | Medium | Can over-shape voices if pushed too hard |
| Spectral editing | Hums, whistles, isolated clicks | Medium to high | Slower | Low to medium | Requires precise listening and more time |
| Noise gate or basic filter | Constant low-level noise between phrases | Low | Very fast | Medium to high | Breaks down when noise overlaps speech |
A gate can make pauses cleaner, but it won't completely solve a noisy sentence. A high-pass filter can remove some low-end junk, yet it can also thin out a voice if the cut is too aggressive. The safest default is to start narrow, then widen only if the processing stays transparent.
A good cleanup tool should leave you wondering what changed, not whether the voice survived.
That's also why a single slider rarely tells the whole story. One clip might tolerate gentle spectral repair and nothing else, while another needs dialogue isolation plus a touch of room reduction. The edit, not the software label, should decide the approach.
Running an AI Cleanup Workflow With ClearAudio
Open the extracted audio or video file in ClearAudio, then pick the lightest mode that gets you usable speech. The practical split is straightforward, Light Enhancement for mild room tone or low hiss, and Deep Cleanup for heavier HVAC rumble, traffic bleed, or messy location audio that needs more separation. If you're dealing with dialogue that's already intelligible, start gentle.
The key control is the dialogue focus. Keep the voice present enough that it still sounds like a person in a real space, not a dry studio stem pasted into a vacuum. If the file includes wind or echo, use the extra controls only when those problems are audible, because every extra pass raises the odds of hollow consonants or a strange top end.
Prompt the file like an editor, not a magician
Descriptions help the model understand what matters. A prompt like “outdoor interview with wind and distant traffic” gives a more useful target than a vague request for cleaner audio, because it tells the system what to hold onto and what to suppress. The same idea works for “indoor podcast with AC hum”, “screen recording with laptop fan noise”, or “conference room dialogue with echo”.
Batch work is useful when you've got multiple interview clips or a series of talking-head takes. Run a first pass on one representative file, compare it against the original, and only then apply the same settings across the rest of the session. That saves you from over-processing an entire project just because one clip sounded bad in isolation.
The interface supports a simple browser workflow, and that's the point. You drag in the file, choose the processing mode, preview the result, then decide whether the cleaner version still feels human enough to publish. ClearAudio fits naturally as one option in that workflow when you need prompt-based cleanup without building a manual chain from scratch.
What I'd start with on common jobs
- Talking-head YouTube: Light Enhancement first, then increase cleanup only until the room stops pulling attention away from the words.
- On-location documentary interview: Deep Cleanup if traffic or wind is obvious, but check the voice for edge artifacts before you commit.
- Screen recording with fan noise: Start with dialogue-preserving cleanup, then listen for any flattened sibilants or strange breathing between phrases.
The University at Buffalo multimodal denoising report is a good reminder that visual cues can help speech cleanup when audio is badly compromised, especially when input SNR is low. That doesn't mean every clip needs maximal processing, only that speech-preserving enhancement can matter a lot when the recording is rough.
Balancing Intelligibility and Natural Voice Quality
A cleaned voice can become less convincing than the original. The turning point usually arrives when noise drops, but the speaker loses body and texture. Listeners then notice the processing before they follow the words. A denoiser should reduce distraction without stripping away the small variations that make speech sound human.
Where artifacts appear first
Listen for softened consonants, pulsing room tone, and a watery movement during pauses. With heavier processing, sustained vowels may develop a robotic edge, while sibilants can produce a phasey shimmer. These problems often appear before the track sounds obviously damaged, so compare the processed clip with the original at matched loudness.
Research also shows why aggressive cleanup can be useful in difficult recordings. The arXiv paper on intelligibility and denoising reported substantial intelligibility gains for normal-hearing and hearing-impaired listeners, with processed speech reaching 97% median intelligibility for normal-hearing participants and 83% for hearing-impaired participants. In the same data set, intelligibility improved by up to 15% at −8 dB SNR, the kind of poor signal-to-noise situation common in rough field recordings.
The practical lesson is to match the cleanup to the recording. Very noisy speech may benefit from stronger suppression, while a clean close-mic take can sound worse after the same treatment. A close microphone generally tolerates more reduction than a distant boom, and steady background noise is easier to remove than competing voices, traffic, or changing wind.
Keep the useful voice range intact
Speech presence depends heavily on the middle and upper mids. Remove low rumble that sits below the voice's useful range, but avoid thinning the frequencies that carry consonants and presence. Excessive reduction there can leave a voice polished, quiet, and lifeless.
| Recording Type | Safe Reduction | Artifact Risk Zone | Priority |
|---|---|---|---|
| Close-mic podcast | Moderate cleanup, then stop when the voice starts thinning | When the voice loses warmth or consonants blur | Naturalness |
| Talking-head video | Moderate to stronger cleanup if the room is steady | When pauses start to pump or the top end gets glassy | Intelligibility and tone balance |
| Distant interview or boom recording | Light to moderate cleanup only | When the voice turns phasey or hollow | Preserve realism first |
| Noisy field recording | Targeted cleanup with frequent A/B checks | When artifacts become more obvious than the original noise | Recover speech without exposing processing |
If you hear the plugin before you hear the person, back off.
Use intelligibility as the priority for enterprise recordings, where every word must survive a poor listening environment. Podcasts often benefit from retaining warmth rather than chasing complete silence. Broadcast-style dialogue needs a middle ground, with enough cleanup for clear speech while keeping the processing unobtrusive on speakers, earbuds, and television playback.
Set the strongest cleanup your worst section can tolerate, then check the rest of the recording. If only one passage needs aggressive treatment, automate or process that passage separately instead of forcing the entire track into the same artifact-prone setting.
Export Settings and Quality Assurance Checks
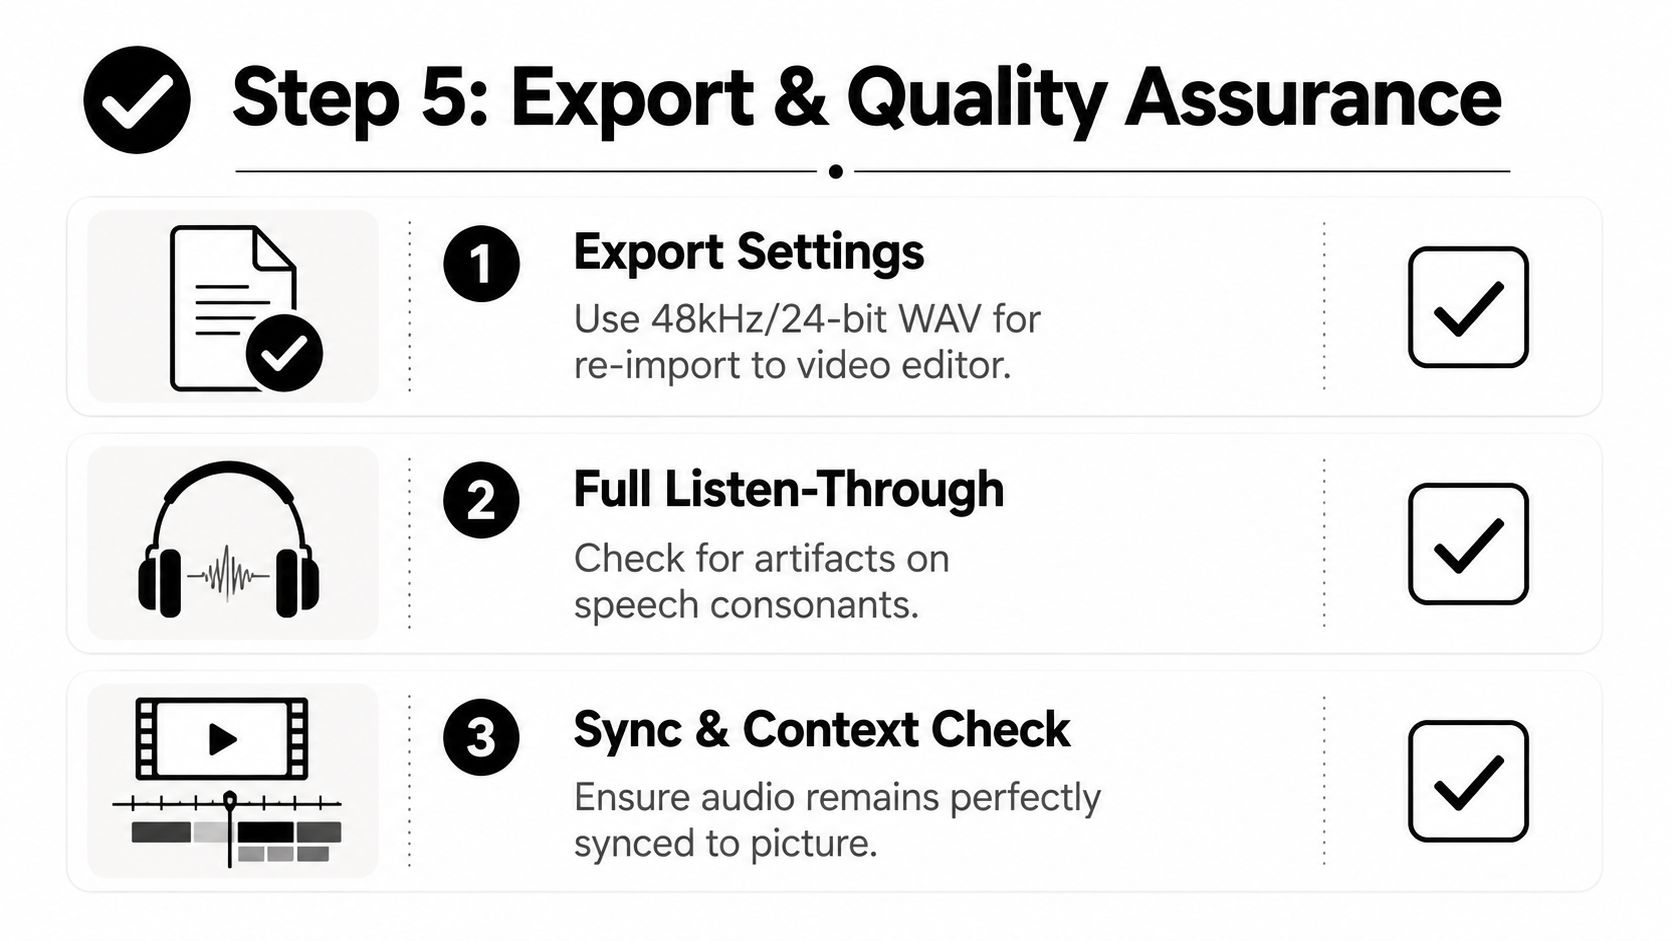
Export a cleaned file in a format that preserves your processing. For re-import into video editing, 48 kHz/24-bit WAV is the safest default. For podcast distribution, 44.1 kHz/16-bit is practical, while AAC 192 kbps suits web-only output when file size matters. These settings protect detail, but they cannot repair cleanup that was pushed too hard. If the voice already sounds watery or robotic before export, reduce the processing first.
Quality assurance should test both intelligibility and artifacts. Listen to quiet sections for musical noise, confirm that consonants still cut through, and watch for pumping or unnatural breathing that appears after processing. A single technical measure cannot decide whether the cleaned file sounds better. Compare the processed voice with the original at matched listening levels, especially in the passages where noise removal was strongest.
QA in the same places your audience will hear it
- Laptop speakers: Catch thinning, harshness, and obvious pumping.
- Earbuds: Reveal sibilance, watery artifacts, and excessive de-essing.
- Full timeline playback: Verify sync, context, and whether the voice still sits naturally under the picture.
Loudness normalization should match the destination. Podcasts commonly target -16 LUFS, YouTube often lands around -14 LUFS, and broadcast workflows use -24 LUFS. These are delivery choices, not cleanup targets. Normalize late enough that gain staging does not conceal artifacts, then listen again after the final level is applied.
Re-import the export into the video timeline and play the complete sequence. A faster pass can expose sync problems, clipped breaths, phase issues, and odd AI hallucinations more quickly than inspecting a waveform. Stop and fix any passage where the artifact becomes easier to notice than the original noise.
For dialogue-heavy video, try ClearAudio with a representative clip before processing the full project. Compare it with the original, then check the result on speakers and earbuds. Its browser workflow supports noise reduction, dialogue isolation, and video files, helping you test how far cleanup can go before speech loses its natural character.