
You've found the perfect song for a video, rehearsal, DJ transition, or remix, but the vocal sits right in the middle of the mix. You remove it with an old stereo trick, press play, and the result sounds hollow. The kick is weaker, cymbals shimmer strangely, and a faint copy of the singer still hangs behind the chorus.
The practical challenge isn't to remove vocals from a song. It's to create a music-only version that remains usable after the vocal disappears. That means choosing the right separation method, checking difficult sections, and repairing artifacts without damaging the groove.
Table of Contents
- Why Old Vocal Removal Tricks No Longer Work
- The Easiest Method AI Vocal Removers
- The Professional Method Using a DAW
- Comparing Vocal Removal Techniques
- Pro Tips for a Cleaner Backing Track
- Final Thoughts Beyond Vocal Removal
Why Old Vocal Removal Tricks No Longer Work

A stereo mix can look simple on the screen, yet the old vocal-removal shortcut often leaves a backing track that fails in the first serious listening test. The kick loses weight, cymbals develop a watery shimmer, and a faint vocal remains in the chorus.
The classic method is center-channel cancellation. Split the stereo file, invert the polarity of one channel, then recombine both channels. Identical information in the center can cancel, including part of a lead vocal. That same center also carries bass, snare energy, kick, and other elements sharing the vocal's position. The result may sound hollow or weak even when the singer is quieter.
Phase cancellation also depends on conditions that modern mixes rarely provide. The vocal must be perfectly centered, dry, and identical in both channels. Stereo reverb, delay, doubled takes, chorus, automated panning, and layered harmonies place vocal energy outside the center. Those reflections survive, while the cancellation can thin drums and low end.
Practical rule: Use phase inversion for a quick test or emergency edit. Do not treat it as a reliable way to produce a release-ready backing track.
Modern vocal removal is a source-separation problem. Machine-learning systems examine patterns across time and frequency, then estimate separate vocal and accompaniment stems. That approach handles dense mixes more effectively because it can distinguish overlapping voice, guitars, synths, percussion, and ambience instead of deleting everything in the middle.
Research in this field spans nearly 30 years, with a foundational milestone linked to a 1995 Stanford dissertation on auditory source separation, as described in this survey of audio source separation research. Deep Clustering in 2016 and Permutation Invariant Training in 2017 moved the work toward practical music separation. Deezer's Spleeter release around 2019 then put four-stem separation within reach through public software, as documented in this AES source-separation survey.
Published results still show room for improvement, including a reported vocal-separation SDR of 8.36 dB according to the published research. For a usable music-only version, choose a separator that estimates stems, then inspect the drums, bass, reverb tails, and vocal-heavy sections for artifacts.
The Easiest Method AI Vocal Removers
You need a vocal-free track for a rehearsal, a spoken-word video, or a quick remix, but the original session is unavailable. A browser-based AI separator gives you a practical first pass. Upload the mix, select the music stem, and audition the result without setting up routing, phase alignment, or spectral edits.
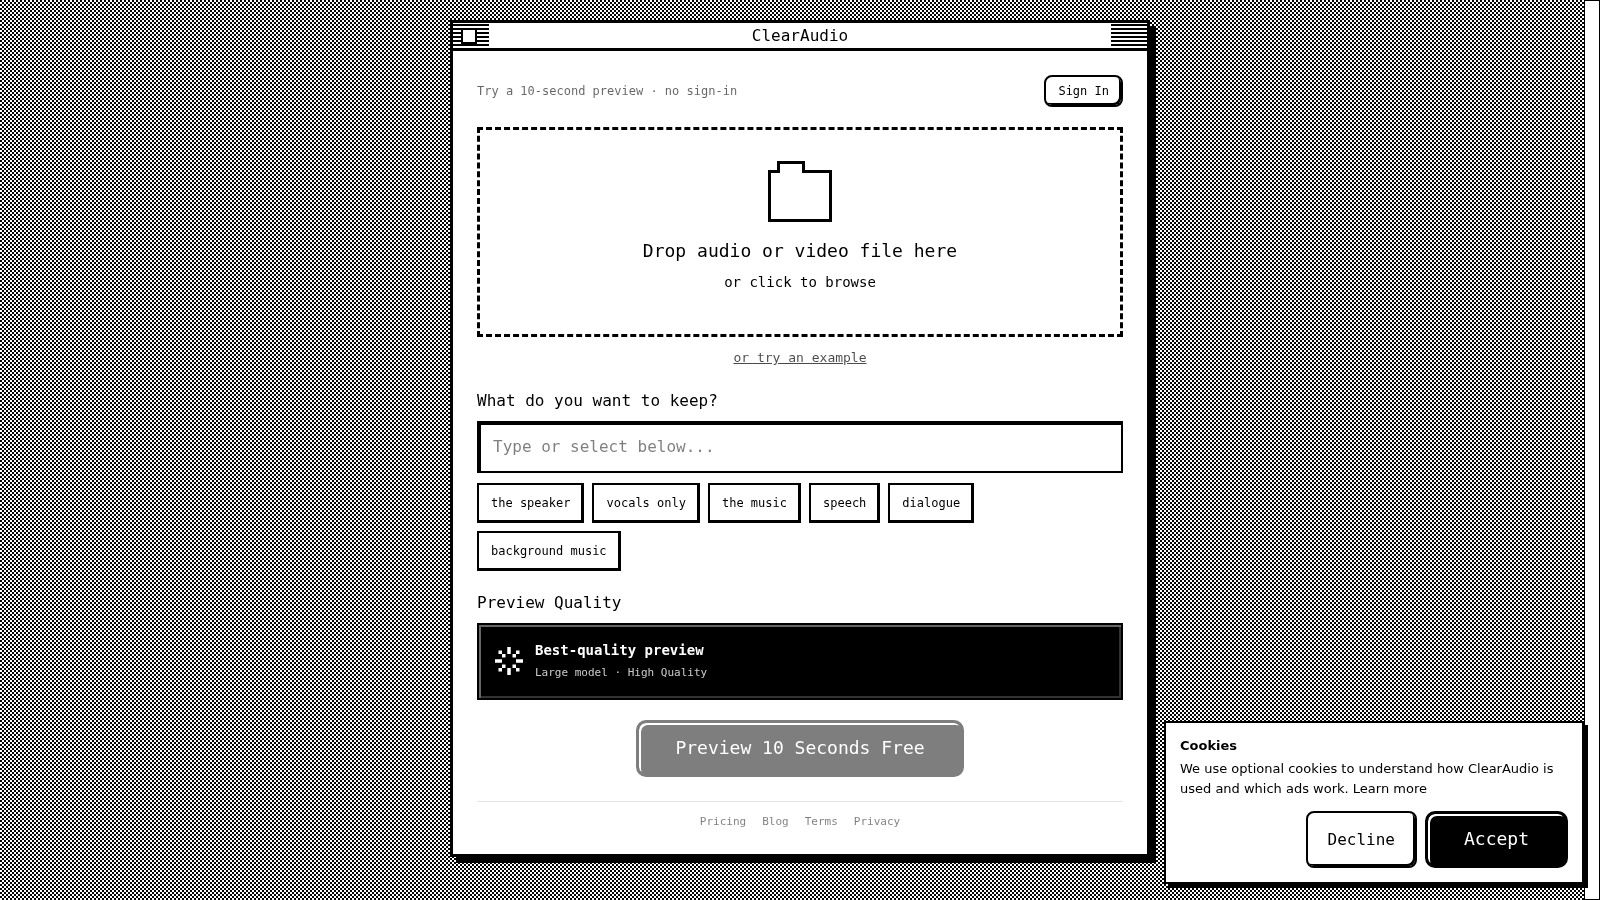
A simple browser workflow
Prepare the source file. Start with the cleanest version available. Lossless audio gives the separator more information, though a good-quality compressed file can still produce a usable result. Avoid a file that has already been normalized, clipped, or heavily filtered when an earlier master is available.
Upload the song. In ClearAudio, drag the file into the browser or use the upload control. Choose the option that keeps the music rather than the vocals. The service then creates the accompaniment output directly, so you do not need to download every stem and mute the vocal yourself.
Choose the quality mode. Use a smaller mode for a quick preview. Base is a practical starting point when processing time and detail both matter. PRO Large or PRO Large-TV suits a serious edit or video work. Higher-quality modes can retain more detail, but they cannot restore information missing from a damaged source.
Process and audition the result. Check more than the first verse. Listen to the loudest chorus, the most reverberant phrase, and sections containing cymbals or distorted guitars. Vocal bleed, watery textures, softened transients, and phasey high frequencies often appear there first.
Export and keep the original. Save the music stem as a new file and preserve the source. Keeping both files lets you compare another mode later or create a different stem without losing the reference.
The accessible AI tools that became common in the late 2010s brought multi-stem separation to creators without specialist studio software. Public tools such as Spleeter helped establish that workflow, as described in the AES overview of current source-separation trends.
For a video project that needs music removed or balanced under dialogue, Taja AI's guide on video editing provides relevant background on handling background audio in an editing workflow.
When the first result needs another pass
AI separation estimates the vocal and accompaniment from the mixed file. It can leave a quiet vocal reflection, soften a snare transient, or create a granular texture around sibilants. Try another quality mode before applying aggressive EQ. Different models can suit different arrangements, particularly mixes with wide vocal effects or dense choruses.
Judge the export by its intended use. It may work well under speech, for rehearsal, a rough remix, or a social video. A release-ready vocal-free mix needs a full inspection of drums, bass, reverb tails, stereo width, and vocal-heavy sections. If one passage remains damaged, rebuild or replace that moment from another source instead of treating the entire export as finished.
The Professional Method Using a DAW
A DAW-based workflow makes sense when the song already sits inside a production session. You can place the separated stems alongside the original, automate sections, process only the damaged moments, and route the music component into effects or additional buses.
Start by importing the original stereo file onto a reference track. Duplicate it onto a separation track, then open a stem-separation plug-in or integrated tool that can generate a vocal stem and an accompaniment stem. Keep the original muted during normal playback, but leave it available for comparison. This prevents you from making tonal decisions without hearing what the separator removed.
Build the separation inside the session
Render the result at the project's native sample rate where possible, then align it precisely with the original. Even a small timing offset makes comparison misleading and can create comb filtering when the two versions play together. Name the files clearly, for example, “original,” “music stem,” and “vocal stem,” so you don't accidentally process the wrong bounce.
Next, mute the vocal stem and listen to the music stem in context. Don't immediately add heavy compression or widening. Separation artifacts can become more noticeable when a processor raises quiet details, spreads the stereo field, or emphasizes the high end.
Use automation rather than global processing when the problem is local. If the vocal leaks only during a reverb-heavy chorus, reduce that moment with a short clip gain move, a carefully tuned dynamic EQ, or a spectral repair pass. If the drums lose impact throughout the track, replacing or layering individual percussion hits may sound more natural than trying to restore them with excessive EQ.
Control, routing, and trade-offs
The advantage of a plug-in workflow is precision. You can send the music stem to a drum bus, bass bus, or mastering chain, and you can blend a small amount of the original beneath a damaged transition if the vocal is masked by other material. You can also isolate a vocal stem for timing edits, harmony experiments, or remix preparation.
The cost is complexity. You'll need to manage plug-in formats, offline rendering, latency, file organization, and CPU load. Some tools process in real time, while others require a render before you can hear the final result. A web app is faster for a one-off file. A DAW is more useful when the separated audio becomes part of a larger arrangement.
Mixing discipline: Keep a bypassed original in the session and compare at matched loudness. A louder version often sounds “better” even when it contains more damage.
For detailed editing, inspect the intro, chorus, bridge, and outro separately. Dense vocal stacks and sustained reverb often create more residue than exposed verses. If you're preparing a track for release, check the mono fold-down as well. Stereo separation can hide phase problems that become obvious when the track collapses toward the center.
Comparing Vocal Removal Techniques
The right choice depends on whether you need speed, control, or a clean result from a difficult mix. There isn't one method that wins every project.
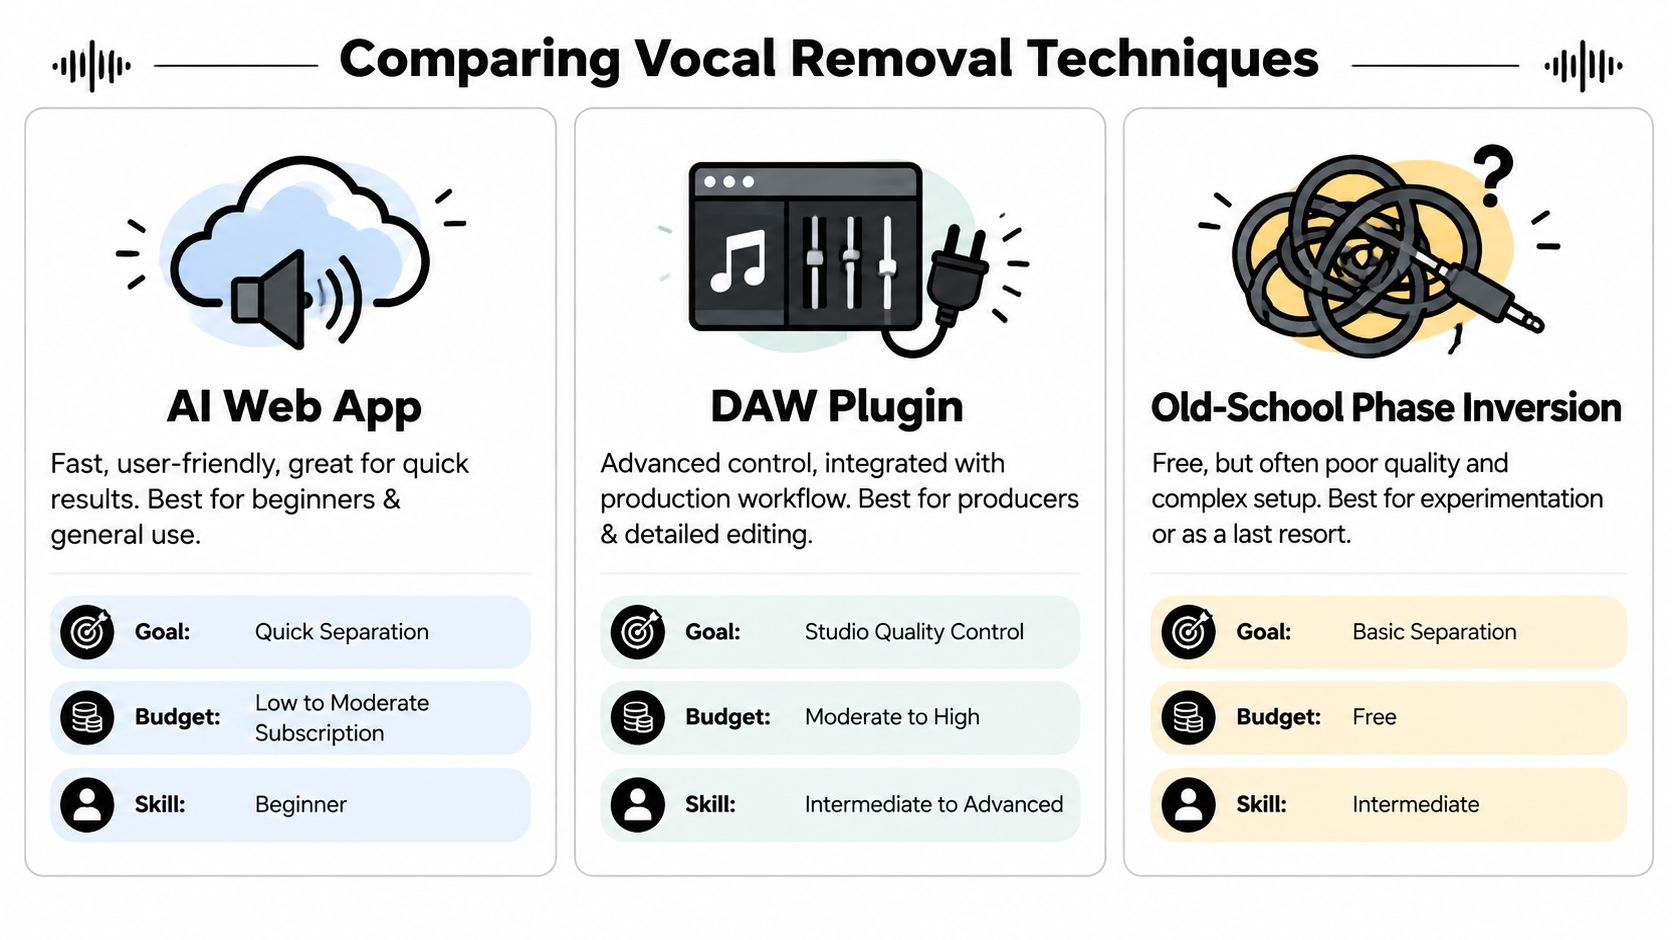
| Method | Quality profile | Processing speed | Cost and skill | Best use |
|---|---|---|---|---|
| AI web app | Usually the most practical balance for mixed material | Fast and simple | Low technical barrier, with tool-dependent access models | Videos, practice tracks, quick instrumentals |
| DAW plug-in | More control over repair, routing, and automation | Depends on rendering and session setup | More technical, with possible software costs | Remixes, production sessions, detailed post-production |
| Phase inversion | Often leaves missing bass, weakened drums, phasing, and vocal residue | Quick to attempt | Free but technically awkward | Testing, experimentation, last-resort cancellation |
The old method can still work when the vocal is tightly centered and the arrangement is simple. It becomes unreliable as soon as the singer has stereo reverb, doubling, modulation, or movement. It also removes other centered information, so “vocal removed” can mean “several important mix elements damaged.”
AI tools analyze the musical content rather than relying on identical left and right channels. DAW plug-ins provide the same general separation concept with more control after processing. For a project involving video, you may also need a separate utility to mute sound from any video before replacing it with the cleaned music track.
The history explains why the modern options feel different. Source separation grew from research into speech, audio, and music, then expanded through neural models and public tools, rather than appearing as a simple consumer filter. That long development is why a dedicated separator can preserve more of the arrangement than a center-cancellation trick.
Choose the web workflow when the deliverable is needed quickly and you don't need detailed stem editing. Choose the DAW workflow when you'll repair transitions, automate processing, or combine the result with a live production. Use phase inversion only when its limitations are acceptable.
Pro Tips for a Cleaner Backing Track
Vocal removal ends the separation stage, not the production work. A track may have no obvious lead vocal and still fail in use because the process damaged cymbals, bass attacks, stereo width, or reverb tails. The goal is a backing track that survives headphones, speakers, rehearsal, and video playback.
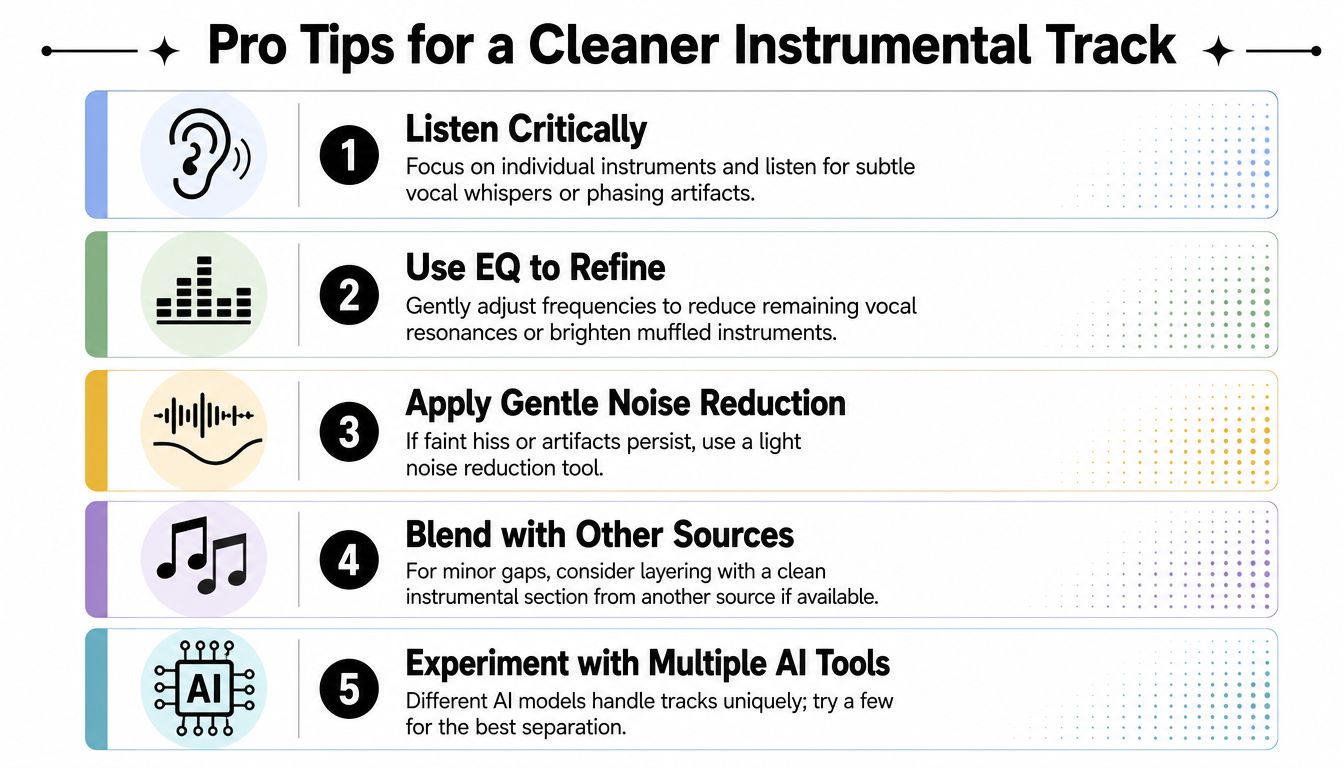
Listen for damage before processing it
Start with a quiet, focused audition. Check the gaps between phrases for breaths, consonants, harmony layers, and long reverb decays. Then listen to the music itself. Cymbals can turn watery, the kick can lose its attack, and guitars may acquire a chorused edge.
Loop difficult sections rather than relying on a full-song listen. Familiar rhythm and arrangement can hide a repeating artifact. A chorus, vocal entry, or outro loop exposes residual speech and unstable phase movement much faster.
Use EQ as correction, not camouflage
A restrained EQ move can reduce a narrow vocal resonance or restore brightness lost during separation. Sweep to locate the problem, then make a small cut instead of removing a broad part of the mix. Residual vocal tone changes with the singer and arrangement, so fixed frequency recipes are less dependable than careful listening supported by a spectrum analyzer.
A dull music-only track may benefit from a slight high-frequency lift, but that can also emphasize separation fizz. Match loudness when comparing processed and original versions, and bypass the EQ regularly. If the track works only under heavy filtering, return to the separation model or quality setting.
Critical check: Judge the backing track on headphones, speakers, and a mono fold-down. Each playback method exposes different problems.
Use an objective benchmark carefully
Signal-to-distortion ratio, or SDR, helps compare separation models. In the MUSDB18-HQ evaluation, htdemucs_ft reached 9.19 dB median vocal SDR, htdemucs reached 8.53 dB, and mdx_net_inst_hq3 reached 5.81 dB, using BSS Eval v4 through museval as reported in the open-source evaluation.
Those figures provide context, not a final production decision. Vocal SDR around 7 to 9 dB is generally strong for consumer separation, while output below 6 dB often leaves audible vocal leakage or musical residue. SDR cannot show whether the damage lands in the chorus you need, so listen to that passage directly.
If hiss or granular residue remains, apply noise reduction lightly and only where it occurs. For a short gap, layering a clean music-only passage from another legitimate source may sound better than aggressive restoration. When one model damages the drums, test another model or quality setting before rebuilding the mix.
Final Thoughts Beyond Vocal Removal
The useful mindset is to stop treating stem separation as an eraser. The same process can produce music-only tracks, isolated vocals, drum material, bass references, dialogue, or other routed outputs depending on the project. Research and production tools now support 2-stem, 4-stem, and 5-stem workflows, alongside cloud processing and API integration, as shown in Deezer's Spleeter project overview.
For a karaoke track, a browser tool is usually enough. For a remix, move the output into a DAW and repair the moments that matter. For a video, isolate or preserve dialogue and music according to the edit rather than applying one blanket mute. Even a lyrics-focused project, such as using a Snowman guide from House of Lyrics, benefits from treating the music and vocal as separate creative assets.
The final vocal-free track doesn't need to be mathematically perfect to be useful. It needs to survive the context where someone will hear it. Check the chorus, protect the drums, control phase, compare multiple outputs, and make the final decision with your ears.
ClearAudio lets you upload a song and choose to keep the music or isolate vocals, with quality modes that support quick previews through more detailed processing. Visit ClearAudio to create a cleaner backing track for your next video, rehearsal, or production session.