You've probably watched it happen: the camera records sharp, attractive footage, the edit has clean cuts and polished graphics, and then the first spoken sentence arrives sounding hollow, distant, or buried under room noise. Viewers may forgive an imperfect frame. They rarely forgive audio that makes them strain to understand every word.
YouTube video audio quality doesn't come from one magic loudness number or an expensive microphone. It comes from a chain with four separate points of failure: record, edit, upload, and playback. A problem introduced while recording needs a different fix from a muddy mix created during editing, a clipped export altered by YouTube's processing, or a perfectly good file played through a problematic television setting.
AI cleanup has a useful place in that chain. It can reduce noise, tame room echo, isolate dialogue, and separate competing elements from a difficult recording. It can't turn a badly placed microphone into a well-recorded performance, and it won't remove the need for sensible gain, a quieter room, and careful monitoring. The practical workflow below focuses on where each decision earns its keep.
Table of Contents
- Why Most YouTube Videos Sound Worse Than They Look
- Choosing and Placing Your Microphone
- Treating Your Room Without Building a Studio
- Editing and Cleaning the Audio You Already Have
- Export Settings That Survive YouTube's Processing
- Troubleshooting When Your Video Sounds Different for Viewers
- A Pre-Upload Checklist for Your Next Video
Why Most YouTube Videos Sound Worse Than They Look
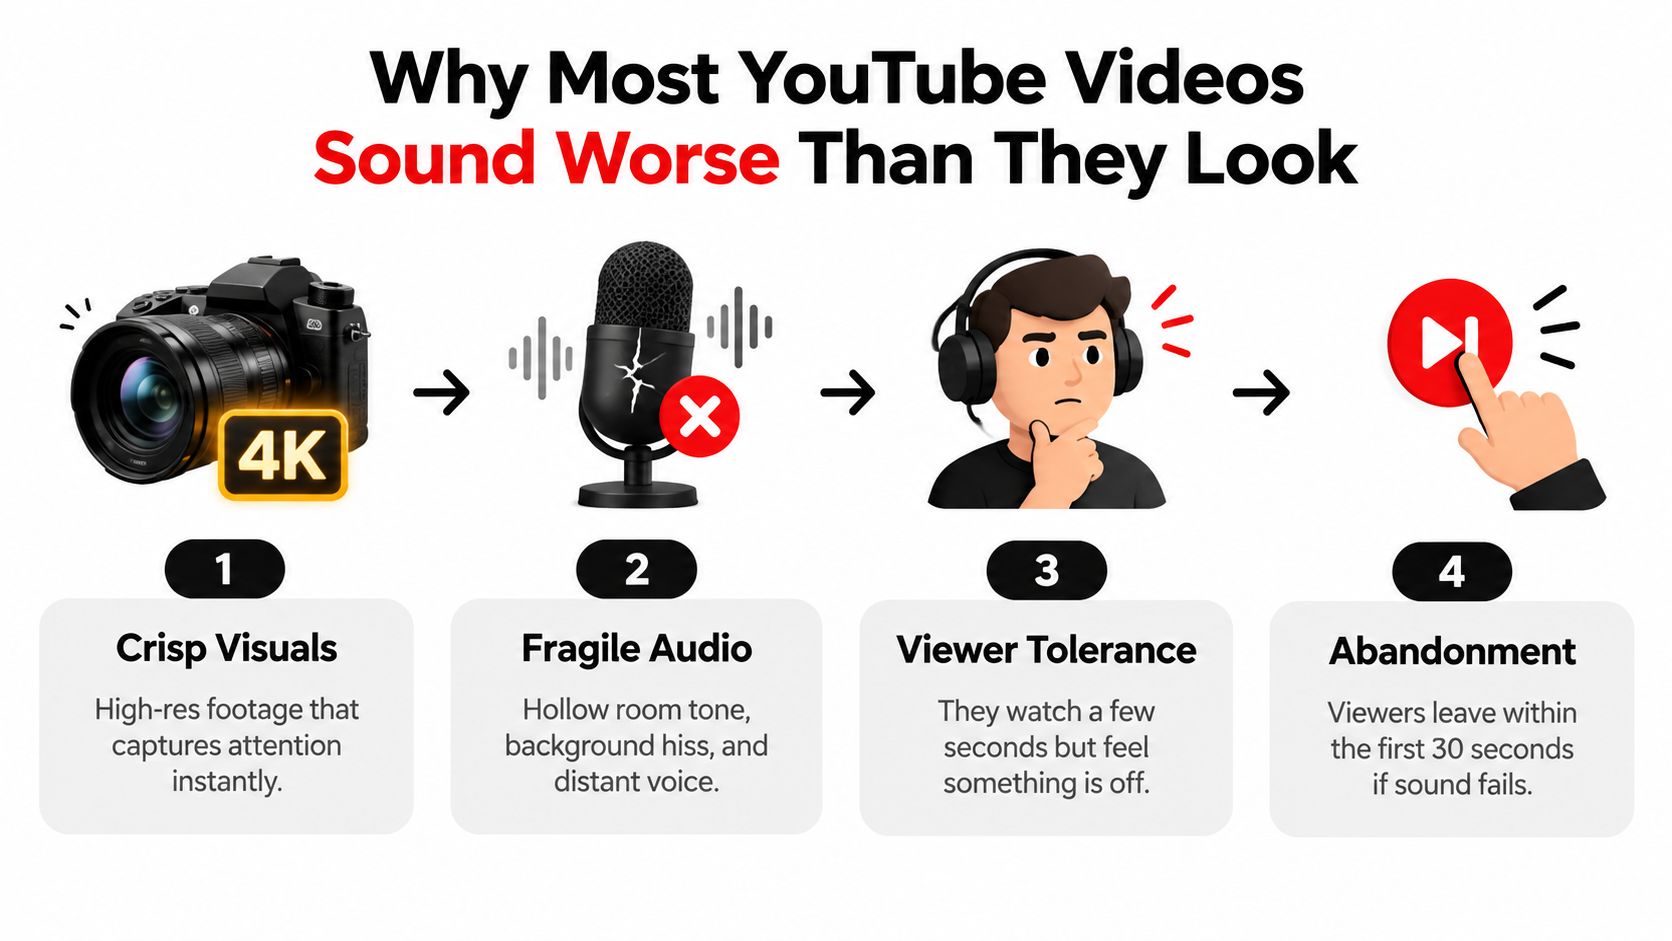
A creator records a talking-head video in a bright room. The camera is sharp, the exposure is consistent, and the background has just enough decoration to feel intentional. On playback, however, the voice seems to come from the far side of the room. Every pause exposes the computer fan, consonants carry a faint hiss, and the music bed competes with the explanation.
The creator's first instinct is often to blame the export. They raise the volume, add a limiter, switch codecs, or search for a new microphone. Those changes may miss the actual problem. If the microphone was too far from the speaker, the recording already contains too much reflected sound and too little direct voice. If the room was noisy, the editor is trying to separate speech from material that was captured alongside it.
Practical rule: Find the broken stage before choosing the fix. A recording problem, a mix problem, an upload problem, and a playback problem can sound deceptively similar.
The four links in the chain
Record determines the raw signal. Mic distance, angle, gain, room reflections, HVAC noise, keyboard vibrations, and background activity all become part of the file.
Edit determines whether that signal remains intelligible. Noise reduction, dialogue balance, EQ, compression, de-essing, music ducking, and automation can reveal speech or damage it through overprocessing.
Upload adds platform processing. YouTube has reduced the level of louder uploads since late 2014 to make playback more consistent across videos, a historical shift described in the documented YouTube loudness-normalization rollout. Loudness is therefore no longer determined entirely by the uploader.
Playback belongs to the viewer. A phone speaker, laptop, headphones, earbuds, and television can present the same mix very differently. Stable-volume settings, automatic quality selection, Bluetooth delay, mono compatibility, and surround processing can all change the experience, as YouTube's troubleshooting guidance makes clear.
The best-looking camera can't compensate for a weak first link. Capture the cleanest signal you can, then use editing tools, including AI when the source is difficult, to protect intelligibility rather than manufacture a studio recording after the fact.
Choosing and Placing Your Microphone
Microphone choice matters, but placement usually matters sooner. A modest microphone positioned close to the speaker can produce a more usable recording than a costly model left across a desk in a reflective room.
Match the microphone to the room
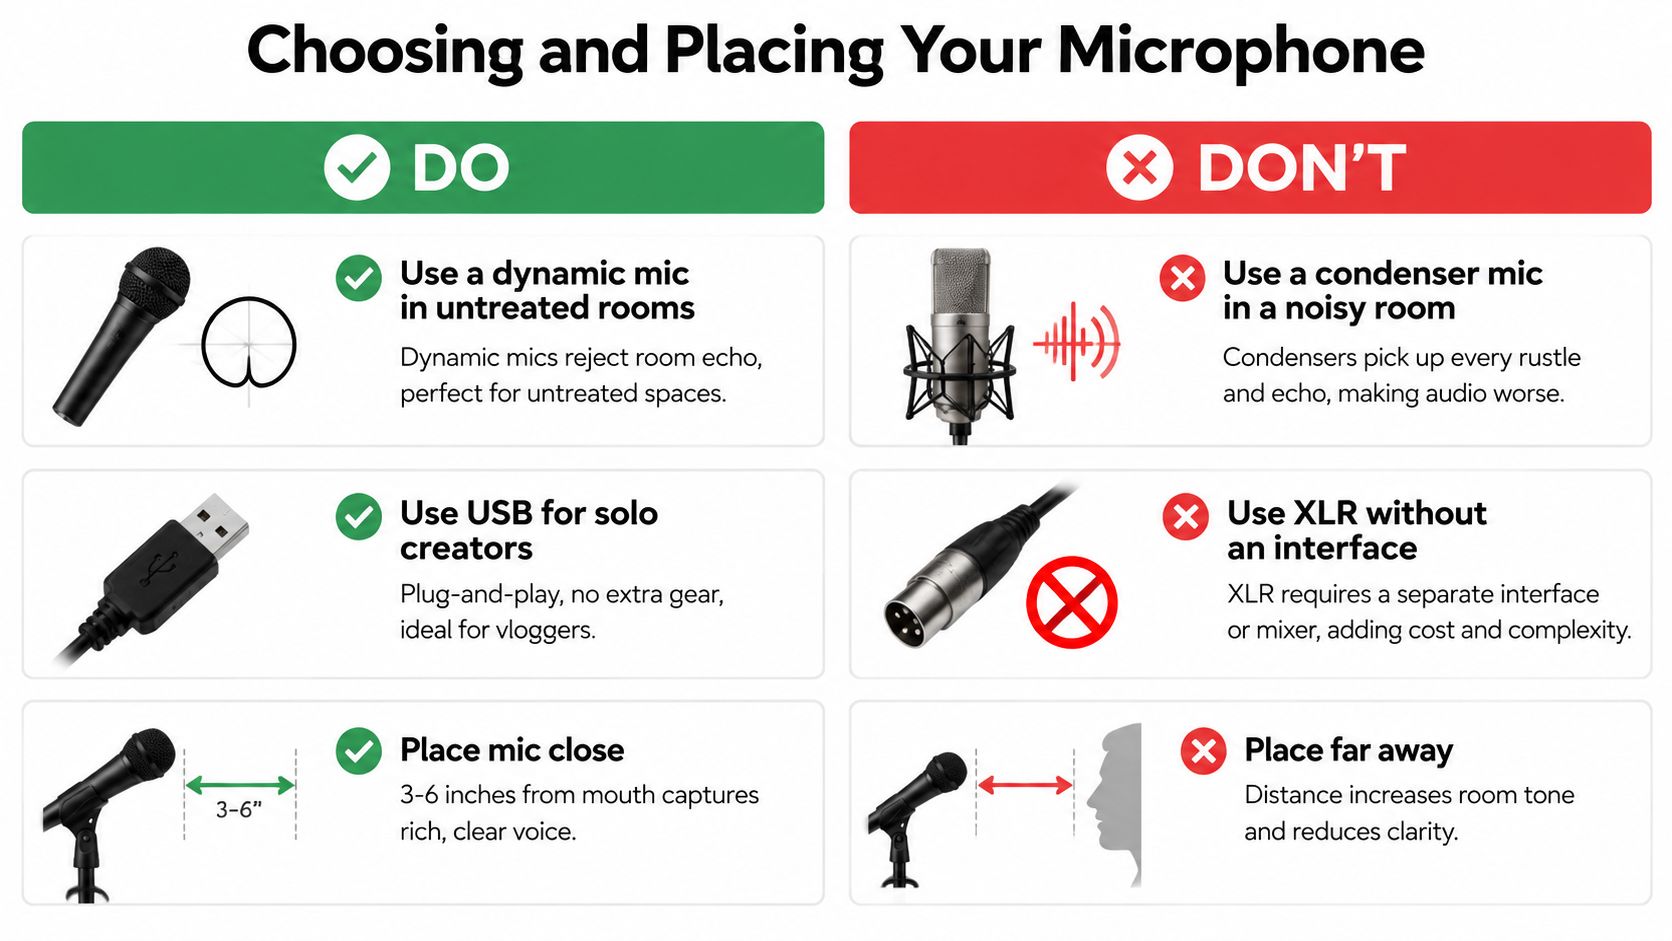
For an untreated room, a dynamic microphone is often a practical choice because it generally captures less surrounding room sound than a sensitive condenser used at the same distance. That doesn't make every dynamic microphone automatically better. It means the room and the speaking position should guide the decision.
A condenser can work well in a controlled space, especially when the speaker needs a particular tonal response or is recording music. In a noisy office, though, it may capture keyboard taps, reflections, fans, and distant traffic with unwelcome enthusiasm.
USB is sensible for a solo creator who wants a direct computer connection and a simple setup. XLR offers a path into an interface or mixer, but it adds equipment and gain-staging decisions. Don't buy an XLR microphone before accounting for the interface it needs.
For a broader walkthrough of compact recording setups, how to get studio audio is a useful companion resource, especially when a phone is part of the production chain.
Place it for the voice, not the frame
Start with the microphone close to the speaker, slightly off-axis if plosives or sharp consonants are a problem. Aim toward the mouth or upper chest according to the model's pickup pattern, use a pop filter, and keep the distance consistent when the speaker turns.
Don't point a directional microphone at the back or side without checking its pattern. Off-axis rejection can reduce unwanted sound, but it doesn't replace a quiet room. A boom arm or stable stand also prevents desk vibrations from becoming low-frequency thumps.
Before recording, run this checklist:
- Set gain conservatively: Speak at the loudest expected level and leave room for natural emphasis.
- Monitor on headphones: Listen for hum, clothing noise, plosives, computer fans, and clipping before shooting.
- Record a slate or clap: This gives the edit a clear sync reference when separate audio is involved.
- Capture room tone: Record a short stretch of the empty room so edits can use a matching ambience bed.
- Check the actual position: Confirm that the microphone hasn't drifted away from the speaker between takes.
Mic technique beats gear talk because the microphone can only work with the sound that reaches its capsule. Give it a strong, direct voice and a manageable acoustic environment first.
Treating Your Room Without Building a Studio
Room reflections create the familiar “bathroom” character in many home recordings. The microphone hears the direct voice, then catches reflections from walls, ceilings, floors, desks, and hard furniture. Noise from HVAC systems and computer fans adds a separate problem because cleanup software may interpret constant noise as material to remove.
You don't need to build a commercial booth. Start by changing the recording position. A clothes-filled closet can absorb reflections more effectively than a bare office. Blankets draped over chairs can soften nearby surfaces, while a moving blanket hung from a simple frame can reduce the energy returning from a wall behind or beside the speaker.
Foam is often overused. It can help at reflection points, but small decorative panels won't solve a noisy air conditioner or a microphone placed too far away. First identify the dominant reflection and noise sources, then treat those surfaces rather than covering a room at random.
Low-cost changes that usually matter
- Move away from bare walls, windows, and corners.
- Place soft material behind the microphone or speaker according to the microphone's pickup pattern.
- Silence computer fans where practical, or move the computer farther from the microphone.
- Record HVAC-off takes only when safe and practical, then restore a consistent ambience in the edit.
- Use rugs, curtains, bookshelves, and upholstered furniture to break up hard reflections.
- Keep the microphone close enough that the direct voice dominates the room.
Record a short passage before the change and another after it. Listen at the same monitoring level, not with the treated take made artificially louder. You're listening for shorter reflections, clearer consonants, and less room tone between phrases.
| Treatment | Typical Cost | Impact on Clarity |
|---|---|---|
| Record near clothing and soft furnishings | None | Often high when the original room is reflective |
| Blankets over nearby hard surfaces | Low or none | Moderate to high, depending on placement |
| Moving blankets on a simple frame | Low to moderate | High for controlling nearby reflections |
| Rug or curtains | Low to moderate | Moderate, especially in bright rooms |
| Foam at first reflection points | Low to moderate | Useful when placed correctly |
| HVAC and computer-noise control | None to moderate | High when constant noise masks speech |
Basic recording and editing apps can help you compare waveforms and noise floors, but your ears remain essential. Measure changes consistently, then verify them on headphones and a small speaker. Treatment works before the microphone captures the reflection. Software works after the reflection is already embedded.
Editing and Cleaning the Audio You Already Have
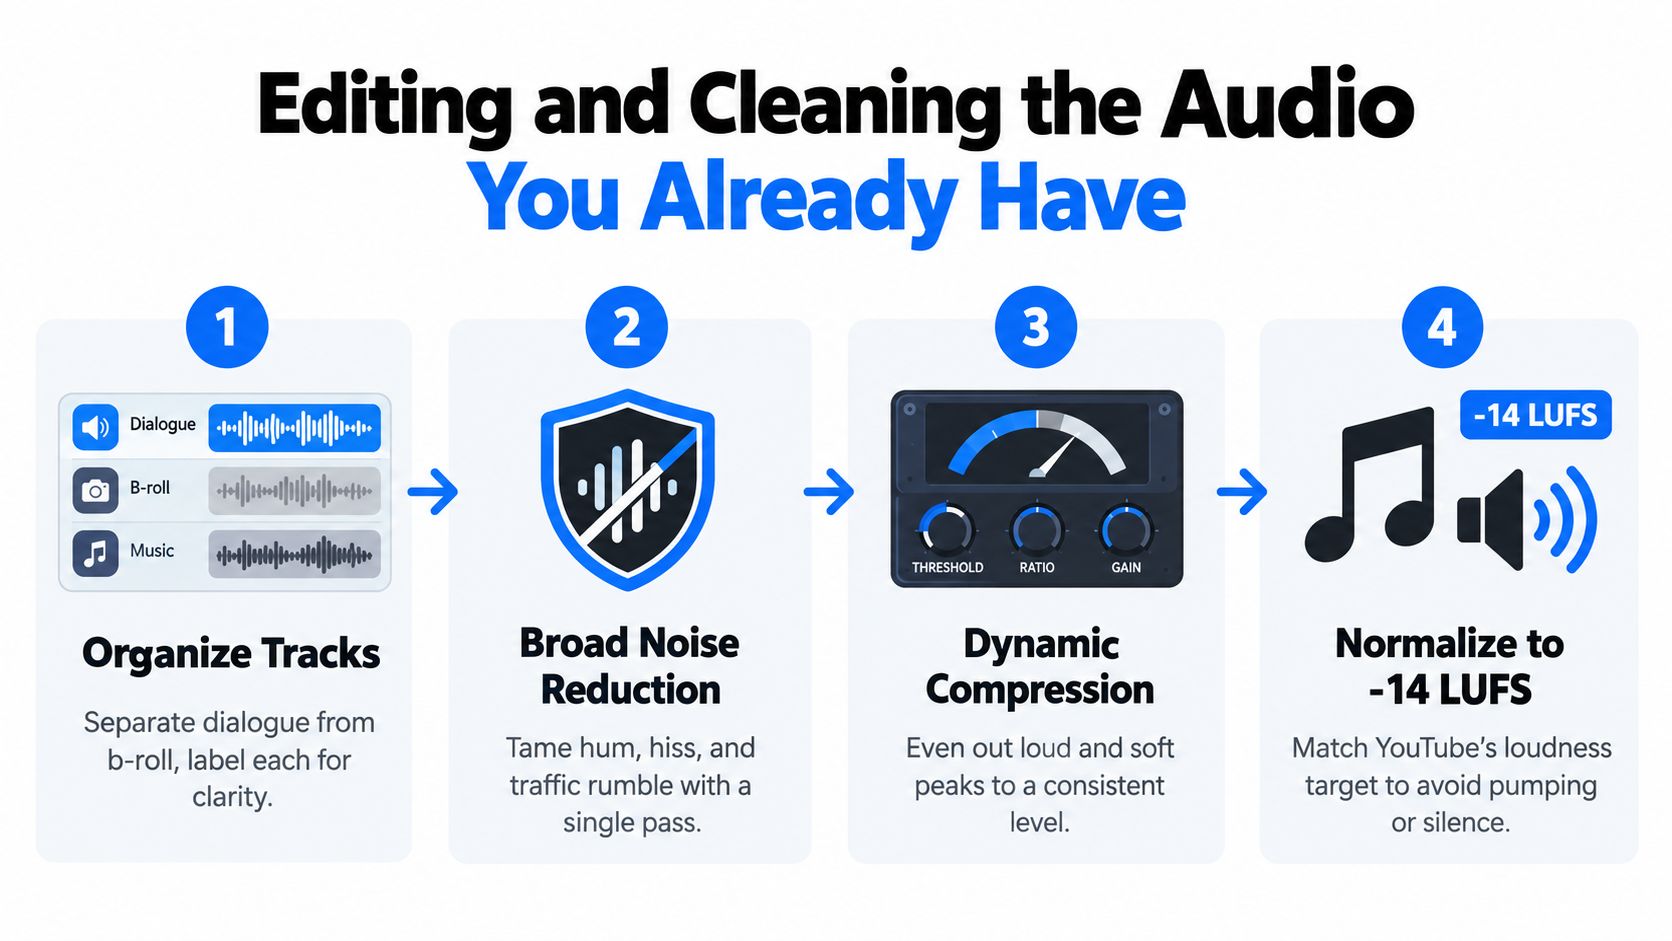
A good edit doesn't begin with a plugin chain. It begins with organization. Put dialogue, room tone, music, effects, and b-roll audio on identifiable tracks, then listen to the unprocessed dialogue from start to finish. Mark the sections where noise, echo, wind, music, or overlapping voices become obstacle.
Four checkpoints for a usable dialogue track
First, organize and label. Separate the main speaker from b-roll sound, interview tracks, music, and effects. A clean session makes it possible to repair one source without damaging another.
Second, reduce broad noise carefully. Use a noise profile or a short section of room tone to target steady hiss, hum, traffic rumble, or fan noise. Apply the lightest setting that solves the problem. Strong reduction can leave watery artifacts, metallic edges, or unnatural gaps around speech.
Third, isolate dialogue when the voice is buried. Dialogue isolation is useful when reverb, wind, or background activity masks the words. An AI tool such as ClearAudio can process an audio or video file to reduce room echo, hum, and hiss while focusing on speech or dialogue. It can also separate vocals, music, or other requested elements, which makes it relevant when a creator has only a combined recording to work with.
Fourth, separate shared sources when necessary. If speech and music were recorded or exported together, stem separation may give you independent control. Treat that result as a starting point, not an unquestionable replacement. Artifacts can appear around sibilants, sustained notes, ambience, or overlapping sounds.
For editors working in Premiere, a practical guide to sound cleanup for editors can sit alongside the built-in tools and third-party processing already in the timeline.
Traditional processing versus AI cleanup
A conventional digital audio workstation chain gives precise control. A high-pass filter can remove unnecessary low rumble, EQ can correct tonal imbalance, a de-esser can restrain sharp sibilants, compression can manage level changes, and a limiter can prevent peaks from escaping. The trade-off is time and judgment. Poor settings can make the voice thin, lispy, pumped, or unnaturally flat.
AI cleanup is faster when the problem is source separation or complex background interference. It earns its place when dialogue is difficult to isolate manually, especially under reverb or competing music. It doesn't replace a properly placed microphone, and it shouldn't be used to erase every trace of room character. Naturalness is part of quality.
A reliable sanity check is simple:
- Solo the processed track and compare it with the original.
- Lower the monitoring level and check whether consonants remain clear.
- Listen on headphones, earbuds, and a phone speaker.
- Restore a little original ambience if the processed version sounds detached.
- Automate music under speech instead of relying only on a heavy compressor.
AES guidance emphasizes controlling noise, dynamics, and masking across the whole chain, rather than merely raising level. Its technical discussion also identifies HASPI for intelligibility and HASQI for quality as objective perceptual measures, while warning that aggressive cleanup can reduce natural speech cues. Human listening still decides whether the result sounds believable.
Export Settings That Survive YouTube's Processing
Loudness targets are useful delivery controls, not a substitute for a balanced mix. A practical YouTube benchmark is approximately −14 LUFS integrated with true peak at or below −1 dBTP, as outlined in this YouTube loudness workflow. The target helps avoid unnecessary playback reduction and leaves protection against post-upload clipping, but it can't repair weak dialogue, excessive dynamics, or a noisy source.
Use a high-quality master rather than sending YouTube an already degraded file. A common production choice is 48 kHz for video work and 24-bit for the local master, with a high-bitrate AAC upload when an uncompressed upload isn't practical. The exact export menu varies by editor, so confirm the project sample rate and avoid unnecessary sample-rate conversion.
| Setting | Master File (local) | YouTube Upload |
|---|---|---|
| Sample rate | 48 kHz | Match the video project at 48 kHz |
| Bit depth | 24-bit | Preserve the highest practical source quality |
| Codec | Uncompressed PCM or equivalent | High-bitrate AAC or uncompressed audio |
| Loudness | Balanced mix before delivery | Approximately −14 LUFS integrated |
| True peak | Keep headroom for later work | At or below −1 dBTP |
| Channel layout | Stereo or mono according to the source | Confirm mono compatibility before upload |
Dialogue often works well in mono when it comes from a single centered source. Music and environmental sound may need stereo width, but check that the bed remains coherent when summed or played through a phone. Phase problems can make a stereo element lose weight or disappear on some playback systems.
What loudness-only workflows miss
YouTube's historical normalization behavior means an overly loud master may be turned down rather than rewarded. A quiet upload shouldn't be expected to gain the same way, and two files at a similar integrated reading can still differ in punch, density, and speech clarity because their dynamics and frequency balance differ.
YouTube's encoded audio is lossy. Independent analysis has found an error signal typically around 20 dB below the input musical level, with differences becoming more noticeable at higher frequencies and above about 16 kHz in this technical analysis of YouTube audio. An academic analysis has also treated playback as lossy AAC at roughly 126–128 kb/s, while observing that listener preference and raw fidelity aren't identical measures.
Avoid four common export mistakes:
- Clipping into the limiter: A limiter can't restore distorted transients.
- Double loudness correction: Don't normalize in the editor, then apply another corrective process without checking the integrated result.
- Using a lossy source as the master: Export from the clean project, not an old MP3.
- Skipping phase checks: A wide music bed can sound acceptable in headphones and weak on a compatible mono playback path.
For creators publishing music-led videos, this practical guide to the best AI video generator for YouTube music may help with the wider production workflow, but audio delivery still depends on the quality of the source mix.
Troubleshooting When Your Video Sounds Different for Viewers
YouTube doesn't deserve blame for every unpleasant playback result. The platform transcodes uploaded media and applies loudness behavior, but the original recording, the final mix, and the viewer's device can each create a different failure.
Start with the file you delivered. Download or otherwise compare the published version with your local master, using the same excerpt and similar monitoring level. If the downloaded result already sounds distorted, thin, or phasey, inspect the upload and transcode path. If it matches the master, the difference may be happening on the viewer's device.
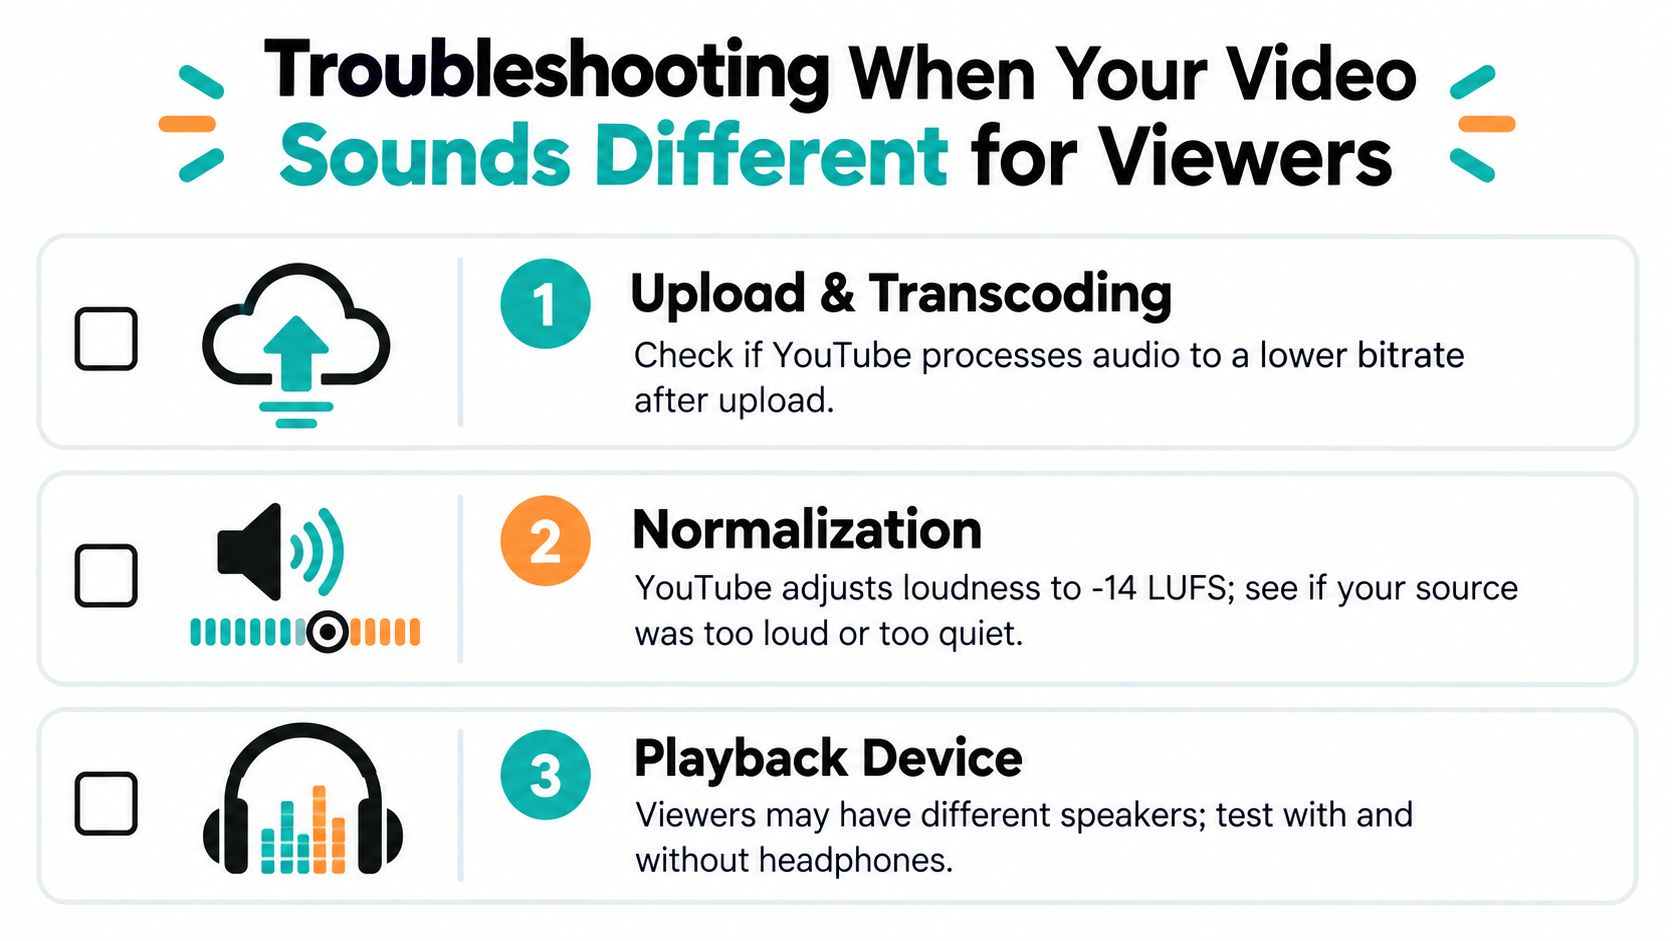
Separate the three likely failure points
Upload and transcoding: Check the delivered codec and bitrate through YouTube's Stats for nerds panel during playback. A low-quality source can remain poor after processing, and transcoding can't create detail that wasn't present.
Normalization: Check whether the original master was excessively loud or unusually quiet. Normalization changes playback gain. It doesn't fix a muddy midrange, a distant microphone, or background hiss.
Playback device: Compare a computer, phone, headphones, earbuds, and television. Stable volume, automatic quality selection, Bluetooth delay, and surround-sound output can alter what the viewer hears. A phone may expose missing midrange clarity, while a television may reveal phase or bass-management problems.
If the published file matches your master, stop rebuilding the mix first. Reproduce the viewer's playback conditions before changing the audio.
Common misdiagnoses waste time. Room noise is a recording problem, not a codec problem. A muddy voice is usually a capture or mix problem, not proof that normalization destroyed the track. Missing low end may indicate that the recording never contained usable low frequencies, or that the playback system is filtering them.
Use this quick triage sequence:
- Re-export from the clean project master.
- Confirm the integrated loudness and true peak.
- Upload an unlisted test.
- Check the published stream and Stats for nerds.
- Compare playback on a phone, computer, and headphones.
- Only then investigate television processing, Bluetooth behavior, or account-specific settings.
That process turns a vague complaint, “YouTube ruined my audio,” into a location in the chain that you can fix.
A Pre-Upload Checklist for Your Next Video
A checklist is damage prevention. Run it before publishing, when changes are cheap, rather than after viewers have already heard the flawed version.
Record
- Place the microphone close and consistently: Direct voice reduces the amount of room sound the editor must fight.
- Set conservative gain: Confirm loud speech doesn't clip, and keep the recording clean enough for natural dynamics.
- Monitor before the take: Use headphones to catch hum, clothing movement, plosives, desk vibration, and fan noise.
- Capture room tone: Keep a matching ambience recording for clean edits between phrases.
- Slate separate sources: A clap or spoken marker simplifies sync when camera and external audio are separate.
Edit
- Label every track: Keep dialogue, b-roll, room tone, music, and effects independently controllable.
- Print a noise profile carefully: Reduce steady hiss, hum, or rumble without creating watery artifacts.
- Check dialogue isolation: Use manual tools or AI processing when reverb and background elements obscure speech.
- Automate music: Lower the bed under words instead of forcing the dialogue compressor to do all the work.
- Compare processed and original audio: If the cleaned version sounds metallic or detached, back off the processing.
Export
- Measure integrated loudness: Aim for approximately −14 LUFS integrated and verify the reading with a full-program meter, using the practical YouTube loudness benchmark.
- Protect true peaks: Keep them at or below −1 dBTP to reduce the risk of clipping after platform processing.
- Use a clean video master: Work at 48 kHz when that matches the project and export from the highest-quality source available.
- Check channel compatibility: Confirm that centered speech stays centered and stereo music doesn't collapse unpredictably.
- Avoid repeated processing: Don't stack loudness correction, limiting, and codec conversion without measuring the final result.
Playback verification
- Upload privately or unlisted: Listen to the actual YouTube version, not only the local export.
- Use the Stats for nerds panel: Confirm the delivered stream information when investigating a suspected transcode issue.
- Test three listening paths: Use headphones, a phone speaker, and a computer or television.
- Check quiet sections: Room tone, edits, and noise often become more obvious between sentences.
- Check the first spoken line: The opening must be intelligible before viewers decide whether to keep watching.
Quick wins: Set gain at the microphone, treat the first strong reflection point in the room, and isolate dialogue before the final limiting pass. Those habits usually move the result further than shopping for another microphone.
Make the next upload a controlled test, not a guess. Compare the source, mix, published stream, and playback devices in that order, then fix the stage that failed.
ClearAudio lets you upload an audio or video file, specify whether you want speech, dialogue, music, vocals, or another element preserved, and process noise, hum, hiss, room echo, or competing sounds in the browser. Try ClearAudio on your next difficult dialogue track, then run the cleaned result through the same export and multi-device checks before publishing.